
Transplanting
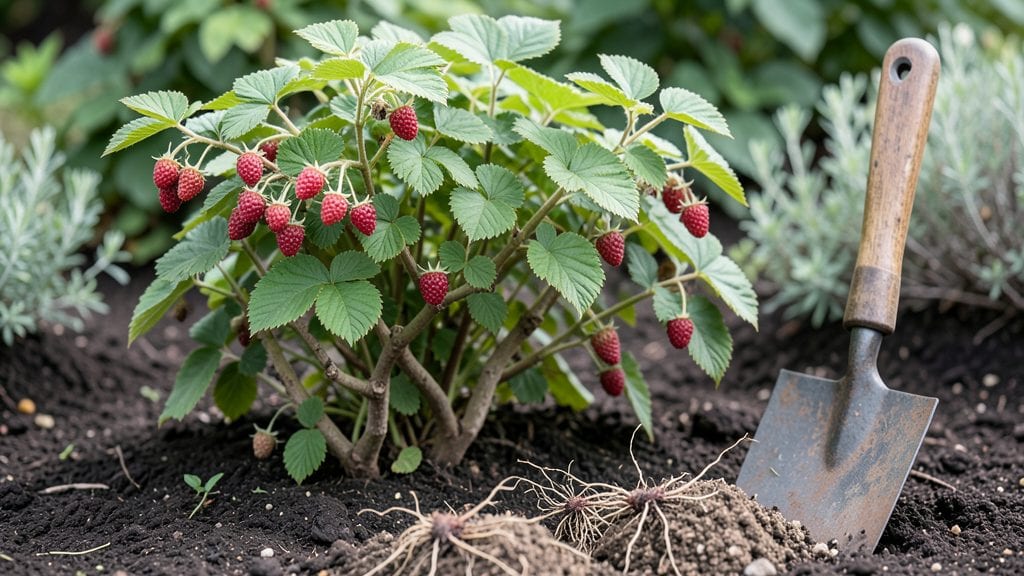
Planting Willamette raspberries in your Pacific Northwest garden means reliable harvests even when summer heat arrives. 🌱 I’ve grown them for years, and they handle our damp springs and cool summers better than any other variety I’ve tried.
The key is getting them in the ground at the right time and giving them the space they need to spread.
These berries thrive in full sun to partial shade, so a spot with at least 6 hours of sunlight works best. The soil should be well-draining but moist—think rich, crumbly loam with a pH between 5.5 and 6.5.
Space plants 4 to 6 feet apart in rows 6 feet apart, and plant crowns just above soil level to prevent rot. Early spring or fall are ideal planting times, avoiding extreme heat or frost.
In the first few weeks, keep the soil consistently moist but not soggy—mulch helps retain water and suppress weeds. You’ll see new canes emerge within 4 to 6 weeks, and by next summer, you’ll have a productive patch.
Watch for spider mites or aphids, but a strong start means fewer early pests. The payoff? Juicy, flavorful berries that outlast most varieties through the season.
Works equally well in home gardens, community plots, or even large containers with proper drainage. Once established, these raspberries need minimal fuss—just prune old canes in winter and keep feeding with compost. Here’s how to set yours up for success from day one.
📚 In This Guide
- What you need
- Instructions
- Tips and common mistakes
- Wrapping up and next steps
What you need
- ● Willamette raspberry plants: 3–5 bare-root or potted plants (ensure they’re disease-free and from a reputable nursery).
- ● Well-draining soil: Mix of 60% topsoil, 30% compost, and 10% perlite or coarse sand (pH 5.5–6.5).
- ● Fertilizer: Balanced organic fertilizer (10-10-10) or composted manure (apply at planting and mid-season).
- ● Mulch: 2–3 inches of straw or wood chips (to retain moisture and suppress weeds).
- ● Trellis system: 6–8 ft tall posts (4x4 or T-posts) with horizontal wires (3–4 lines, spaced 12–18 inches apart).
- ● Pruners: Sharp, clean bypass pruners (sterilize with rubbing alcohol between cuts).
- ● Garden gloves: Heavy-duty for protection while handling thorny canes.
- ● Watering system: Drip irrigation or soaker hose (raspberries need 1–1.5 inches of water weekly).
- ● Soil test kit: To check nutrient levels before planting.
- ● Epsom salt: For magnesium boost (1 tbsp per plant every 4–6 weeks).
- ● Row cover: Frost cloth for early-season protection (if temps dip below 20°F).
- ● Bird netting: To safeguard ripe berries from hungry critters.
- ● Compost tea: For a foliar spray to enhance plant health.
Step-by-step instructions for planting Willamette raspberries
This cold-hardy variety thrives in Pacific Northwest climates with minimal fuss.
🌱 Step 1: Choose the Perfect Planting Spot
Willamette raspberries need 6-8 hours of sunlight daily, but they tolerate partial shade better than most varieties. I always pick a site with morning sun and afternoon shade to prevent fruit scorching. The soil should drain well—these plants hate soggy roots—but they’re flexible enough to handle our region’s damp winters.
Test your soil by digging a 12-inch deep hole. If water pools after 30 minutes, amend with 2-3 inches of compost to improve drainage. Willamette raspberries also appreciate a slightly acidic to neutral pH (6.0-7.0)—you can adjust with sulfur or lime if needed. Mark the spot with a stake so you don’t forget where you’re planting.
🪴 Step 2: Dig and Prepare the Planting Hole
Dig a hole twice as wide as the root ball but only as deep as the container’s base. Loosen the sides of the hole with a shovel to encourage root spread. I always mix 1 cup of all-purpose fertilizer (like 10-10-10) into the bottom 6 inches of soil—this gives the roots an immediate nutrient boost without burning them.
Gently remove the raspberry plant from its container, tease apart any circling roots, and place it in the hole so the top of the root ball sits level with the ground. Press the surrounding soil firmly to eliminate air pockets. Water deeply right away—this helps settle the soil and removes any gaps around the roots. You’ll know it’s right when water drains evenly without pooling.
☀️ Step 3: Mulch and Water for Establishment
Spread 3-4 inches of mulch (like wood chips or straw) around the base, keeping it 6 inches away from the stem to prevent rot. This conserves moisture and keeps roots cool in summer. Willamette raspberries need 1-1.5 inches of water per week, but they’re drought-tolerant once established—just don’t let the soil dry out completely in their first year.
Water 2-3 times per week for the first month, then taper to once a week once new growth appears. You’ll see bright green leaves within 2-3 weeks—that’s your sign the plant is settling in. Avoid overhead watering after planting; instead, water at the base to prevent fungal diseases common in our rainy climate.
✂️ Step 4: Prune for Strong Growth in Early Spring
Willamette raspberries produce primocanes (first-year canes) that won’t bear fruit until next year. In early spring, cut back any dead or weak canes to the ground. Leave the healthiest 6-8 canes—these will grow into your fruiting canes. I always prune on a dry, sunny day to reduce disease risk.
Remove any suckers growing from the base in the first year—they’ll drain energy from your main canes. Once fruit appears (usually late summer), harvest berries by twisting gently to avoid damaging the canes. Willamette raspberries are self-pollinating, so you won’t need to worry about cross-pollination. Just keep the area weed-free to reduce competition for nutrients.
Tips & tricks for perfect Willamette raspberry planting
These practical insights will help you get the most out of your cold-hardy raspberries with minimal effort.
Sunlight Strategy: While Willamette raspberries tolerate partial shade, I've found that morning sun and afternoon shade works best in our region. If your site only gets 4-5 hours of direct sun, consider planting them near a south-facing wall or fence that reflects additional light. The key is to avoid hot afternoon sun that can scorch the leaves and fruit.
Soil Test Shortcut: Instead of digging a full 12-inch hole to test drainage, I recommend doing a quick "percolation test" first. Dig a 6-inch hole, fill it with water, and time how long it takes to drain. If it takes less than 30 minutes, your soil drains well. If it pools longer, you'll definitely need to amend with compost as instructed in Step 1.
Root Ball Handling: When removing your raspberry plant from its container, don't be afraid to get rough with circling roots. Gently pull them apart with your fingers—this encourages outward root growth rather than keeping them tightly bound. I also like to make a few small vertical cuts around the root ball with a clean knife to help roots spread more quickly into the surrounding soil.
Watering Wisdom: The 2-3 times per week watering schedule in the first month might seem frequent, but it's crucial for establishment. I've seen plants fail when gardeners assume they're drought-tolerant right away. Use your finger to check soil moisture—if the top inch feels dry, it's time to water. The goal is to keep the root zone consistently moist but not soggy during this critical period.
Pro Tips for Willamette Raspberry Planting
- These practical insights will help you get the most out of your cold-hardy raspberries with minimal effort.
- Sunlight Strategy: While Willamette raspberries tolerate partial shade, I've found that morning sun and afternoon shade works best in our region.
- Soil Test Shortcut: Instead of digging a full 12-inch hole to test drainage, I recommend doing a quick "percolation test" first.
Frequently asked questions
Got questions about planting Willamette raspberries in your Pacific Northwest garden? You’re not alone! Here are answers to the most common queries to help you grow thriving, cold-hardy berries with ease.
When is the best time to plant Willamette raspberries?
Plant your Willamette raspberries in early spring (March–April) or early fall (September–October) for optimal root establishment. Avoid planting in summer heat or winter frost—roots need stable soil temps (around 50–60°F) to thrive. Pro tip: Bare-root plants can go in anytime as long as soil isn’t frozen!
How cold-hardy are Willamette raspberries, really?
Willamettes are Zone 5–8 hardy, surviving winters down to –20°F without issue. Their secret? Dormant canes protect buds from extreme cold. Just mulch heavily (3–4 inches of straw or wood chips) after the first frost to shield roots. Bonus: They rebound faster after winter dieback than many varieties!
Can I grow Willamette raspberries in containers?
Yes! Use a 5-gallon+ container with drainage holes and rich, well-draining soil. Opt for black or dark-colored pots (they absorb heat) and place in full sun (6+ hours/day). Watch for: Overwatering (containers dry faster) and root-bound plants (repot every 2–3 years). Dwarf varieties like ‘Boyne’ work well in pots too!
What pests or diseases should I watch for with Willamette raspberries?
Common issues include:
- Spider mites (tiny webs on leaves) – Spray with water or neem oil.
- Cane borers (hollow stems) – Prune infested canes and treat with Bt (bacillus thuringiensis).
- Gray mold (Botrytis) (fuzzy gray spots) – Space plants for airflow and remove infected fruit.
Prevention tip: Rotate planting sites every 3–4 years to avoid soil-borne diseases.
How long does it take for Willamette raspberries to bear fruit?
Patience pays off! Primocanes (first-year canes) produce small berries in Year 1, but full harvests start in Year 2. With proper care, you’ll get 1–2 lbs of berries per plant annually. Pro move: Thin canes to 6–8 per plant in spring to boost fruit size and yield.
Wrapping up and next steps
Planting Willamette raspberries in your Pacific Northwest garden is a rewarding way to grow a cold-hardy, delicious variety that thrives with minimal fuss. With the right soil, spacing, and care, you’ll soon enjoy bountiful harvests of sweet, flavorful berries—perfect for fresh eating, jams, or sharing with neighbors. 🌱
Now that you’re ready to dig in, take the next step: mark your planting spots, gather your tools, and schedule your transplanting for early spring or fall. Before you know it, your garden will be bursting with vibrant raspberry canes—and the taste of homegrown success! 🍓