Transplanting
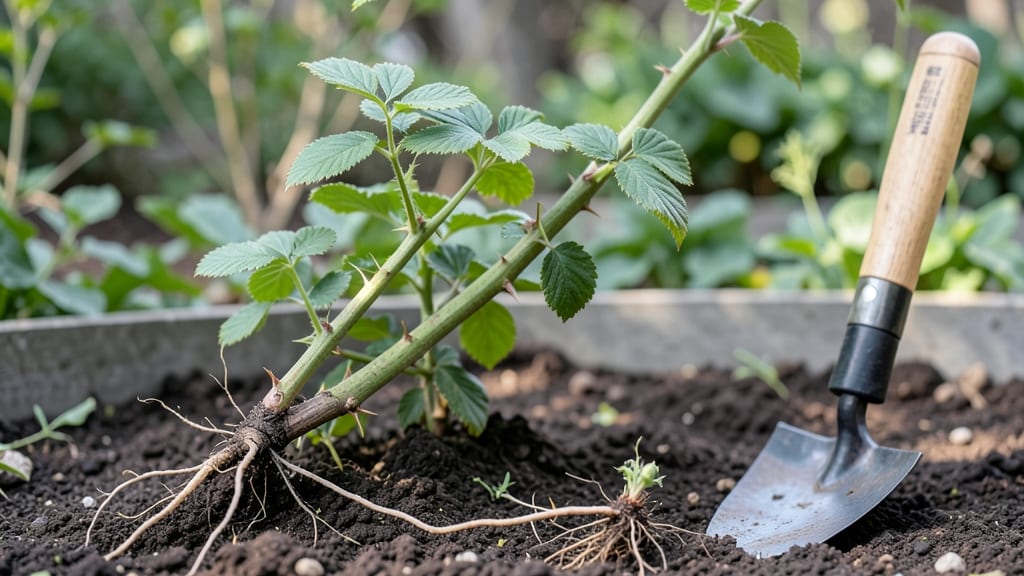
Planting raspberry canes the right way means summer berries that last until frost—something I learned after my first two attempts produced half the harvest. The secret isn’t just digging holes; it’s about soil, spacing, and knowing whether you’ve got summer-bearing or fall-bearing varieties.
My best crop came from treating them like the delicate perennials they are, not just tossing them into the ground.
You’ll need well-draining soil, a sunny spot with at least 6 hours of light, and either bare-root canes or potted plants from a nursery. Summer-bearing types need 3-4 feet between rows, while fall-bearing varieties can handle 5-6 feet for better airflow.
The biggest mistake? Planting them too deep—roots should sit just below soil level, with the crown exposed. I buried mine too far the first year, and it took them two seasons to recover.
Once planted, keep the soil consistently moist but not soggy for the first 4-6 weeks, and mulch heavily to protect roots in winter. By next summer, you’ll be picking berries straight from the plant—no need to wait years for a harvest.
The first crop might be small, but with proper care, your raspberries will produce for 5-10 years without replanting. Here’s how to get it right from day one.
This works for zones 3-9, though fall-bearing types thrive best in warmer climates. If your winters are harsh, choose hardier varieties like ‘Boyne’ or ‘Nova’—they’ll bounce back year after year.
The key is patience: raspberries don’t rush, but once established, they’ll reward you with pounds of berries with almost no effort after the initial setup.
📚 In This Guide
- What you need
- Instructions
- Tips and common mistakes
- Wrapping up and next steps
What you need
- ● Raspberry canes: 2–5 plants per 10 feet of row (bare-root or potted). Choose everbearing (two crops/year) or summer-bearing (one crop/year) varieties.
- ● Well-draining soil: Mix in 2–3 inches of compost or aged manure for nutrient-rich soil (pH 5.5–6.5).
- ● Organic mulch: 4–6 inches of straw, wood chips, or pine needles to retain moisture and suppress weeds.
- ● Fertilizer: Balanced 10-10-10 or organic fertilizer (e.g., fish emulsion) for planting.
- ● Garden trowel or shovel for digging holes (6–8 inches deep).
- ● Pruners or sharp shears (sterilized with rubbing alcohol) to trim canes.
- ● Garden hose or watering can for thorough watering.
- ● Measuring tape or ruler to space canes 18–24 inches apart in rows 5–6 feet apart.
- ○ Garden stakes or trellis system (optional but highly recommended for support).
- ● Sunlight: 6–10 hours of full sun daily (raspberries thrive in bright light!).
- ● Location: Choose a spot with good air circulation to prevent disease.
- ● Water access: Ensure a drip irrigation system or hose reach for consistent moisture.
- ● Frost-free dates: Plant 2–3 weeks before the last frost (spring) or late summer/early fall for fall planting.
Step-by-step instructions for planting raspberry canes
Here’s how to establish a thriving raspberry patch that rewards you with fruit for years.
Prepare the Planting Site for Optimal Growth
Raspberries thrive in well-draining soil with 6-8 hours of sunlight daily. Choose a location that receives morning sun and afternoon shade if your climate is hot—this prevents fruit scorching. Test your soil’s pH; raspberries prefer slightly acidic conditions (5.5-6.5). If your soil is heavy clay, amend it with 2-3 inches of compost mixed into the top 12 inches of soil to improve drainage and fertility.
Dig individual planting holes 18-24 inches apart for summer-bearing varieties or 24-36 inches apart for fall-bearing types. The hole should be twice as wide as the root ball but only as deep as the root system. Avoid working soil when it’s wet—this compacts it and stresses the roots. Instead, prepare the site 1-2 weeks before planting to allow the soil to settle naturally.
Plant Canes Correctly for Strong Establishment
Remove raspberry canes from their containers and loosen the roots if they’re tightly bound. Soak the roots in lukewarm water for 20-30 minutes before planting to revive them. Place each cane in its hole so the crown (where roots meet stems) sits just above soil level—burying it too deep invites rot, while leaving it exposed risks drying.
Backfill the hole with soil, pressing gently around the roots to eliminate air pockets. Water deeply until the soil is evenly moist to a depth of 6 inches. Mulch the area with 2-3 inches of organic mulch (like wood chips or straw) to retain moisture and suppress weeds. Avoid piling mulch directly against the stems—keep it 2-3 inches away to prevent rot. Plant 4 canes per row for cross-pollination, spacing rows 6-8 feet apart for airflow.
Maintain Canes for Year-Round Productivity
Water newly planted canes deeply every 2-3 days until they establish roots (4-6 weeks). After that, water 1-2 times per week, ensuring the soil stays consistently moist but not soggy. Raspberry canes need 1-2 inches of water weekly, especially during fruiting. Use a soaker hose or drip irrigation to deliver water at the base—avoid overhead watering, which spreads disease.
Prune in early spring by removing dead, diseased, or weak canes, cutting them back to the ground. For summer-bearing varieties, leave 6-8 of the strongest canes per plant, while fall-bearing types produce fruit on second-year canes—prune to 4-6 canes and thin fruiting laterals to 6-8 inches apart. Harvest when berries are fully colored and plump, picking every 2-3 days to encourage continuous production. Renew mulch annually in late winter to protect roots from temperature swings.
Tips & tricks for perfect raspberry planting
Establishing a thriving raspberry patch requires attention to detail—here's what I've learned to ensure your canes thrive from day one.
Soil Preparation is Non-Negotiable: The 1-2 week window before planting is crucial for soil settling. If your soil is heavy clay, don't just add compost—mix it thoroughly into the top 12 inches to prevent waterlogging. I've seen canes fail when planted in unamended clay because roots can't breathe properly. For best results, test your soil pH before planting; raspberries prefer slightly acidic conditions (5.5-6.5) and won't perform well outside this range.
Root Revival Technique: That 20-30 minute lukewarm water soak for the roots isn't just optional—it's essential for stressed nursery plants. I've planted canes without this step and noticed slower establishment. Use water that's warm to the touch but not hot, and make sure all roots are submerged. This simple step can make the difference between canes that struggle and ones that establish quickly.
Crown Placement Matters: Positioning the crown just above soil level is more precise than it sounds. The crown is that critical junction where roots meet stems, and burying it too deep invites rot while leaving it exposed risks drying. I use a small marker on my trowel to verify depth before backfilling—this consistency pays off during the first growing season when roots need to establish properly.
Watering Strategy: The 6-inch deep watering after planting isn't about quantity—it's about saturation. Press your finger into the soil after watering; it should feel evenly moist to your first knuckle. For the first 4-6 weeks, I set a reminder to water deeply every 2-3 days rather than relying on memory. Overwatering is just as damaging as underwatering, especially when roots are still developing.
Pro Tips for Planting Raspberry Canes
- Establishing a thriving raspberry patch requires attention to detail—here's what I've learned to ensure your canes thrive from day one.
- Soil Preparation is Non-Negotiable: The 1-2 week window before planting is crucial for soil settling.
- Root Revival Technique: That 20-30 minute lukewarm water soak for the roots isn't just optional—it's essential for stressed nursery plants.
Frequently asked questions
Got questions about planting raspberry canes? You’re not alone! Here are answers to the most common concerns—from timing to troubleshooting—to help you grow a thriving patch with confidence.
When is the best time to plant raspberry canes?
Plant raspberry canes in early spring (as soon as the soil is workable) or early fall (4-6 weeks before frost). Avoid planting in extreme heat or winter—canes need time to establish roots before temperature swings. Bare-root canes can even be planted in late winter if kept cool and moist until planting.
Can I plant raspberry canes in containers?
Containers work well for potted raspberries, especially in small spaces or colder climates. Use a 5-gallon pot minimum (bigger is better) with drainage holes, and fill with well-draining soil. Choose floricane varieties (like ‘Boyne’ or ‘Heritage’) over primocanes—they adapt better to container life. Just remember to winter-protect pots in freezing zones!
Why are my raspberry canes turning yellow or dying after planting?
Yellowing or wilting canes often signal root rot (from overwatering) or transplant shock. Check soil moisture—it should stay consistently damp but not soggy. If canes are mushy at the base, improve drainage or repot. Stress factors like sudden heat or pests (like spider mites) can also cause issues—inspect leaves for damage and treat accordingly.
Do raspberry canes need support, or can they grow freely?
While some trailing varieties (like ‘Heritage’) can sprawl, most raspberries benefit from trellises or stakes. Supports prevent canes from flopping, improve airflow (reducing disease), and make harvesting easier. Install a 3–4 foot tall trellis or use T-posts with twine—just tie canes loosely to avoid damaging stems.
How long does it take for raspberry canes to produce fruit?
Patience pays off! Primocane varieties (like ‘Autumn Bliss’) may fruit in the first year if planted early. Floricane types (traditional red/black raspberries) take 1–2 years to bear fruit—focus on establishing strong canes first. Prune old canes annually to encourage new growth and heavier yields.
Wrapping up and next steps
Planting raspberry canes is a rewarding journey that unlocks a year-round harvest of sweet, juicy berries with minimal effort! By choosing the right variety, preparing your soil, and following proper spacing and care techniques, you’ll set the stage for a thriving bramble patch.
Remember, patience and consistency are key—your raspberries will thank you with bountiful yields for years to come. 🌱
Now that you’re armed with the know-how, roll up your sleeves and get planting! Start small if you’re new, or expand your patch for bigger harvests.
Before you know it, you’ll be savoring fresh raspberries straight from your garden—what’s next? Share your progress with fellow gardeners or dive into pruning tips to keep your canes healthy and productive. Happy growing! 🍓✨