Pruning
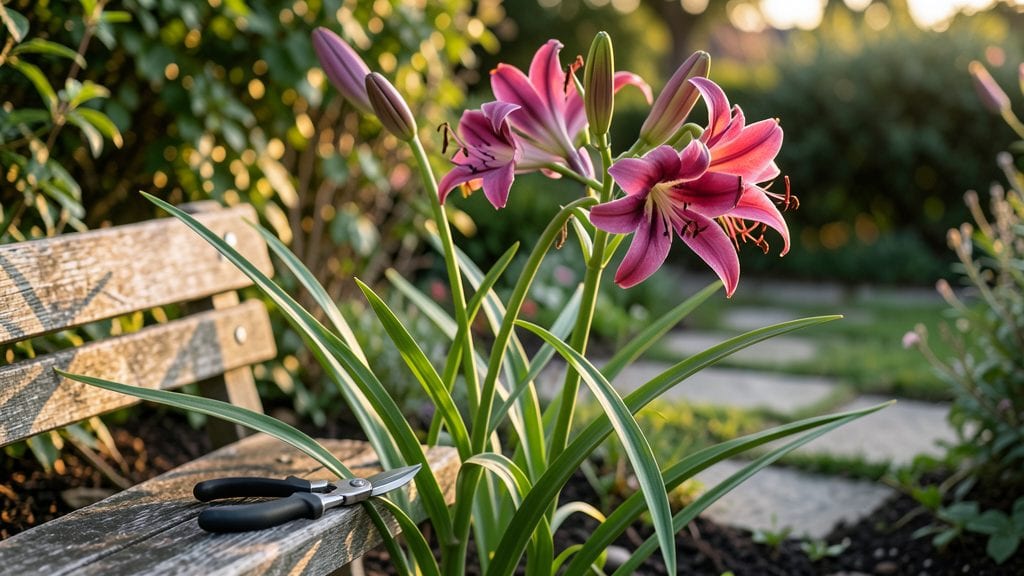
The right cuts now mean a second wave of blooms next summer. 🌸 Trimming lily plants isn't just about cleanup—it's how you coax those dramatic, trumpet-shaped flowers to keep coming back year after year.
I've learned the hard way that skipping this step means fewer blooms, weaker stems, and plants that peter out by August instead of thriving through fall.
Timing matters more than technique here. You'll want to trim spent blooms right after they fade, cut back foliage in late fall, and divide congested clumps in early spring. The tools are simple—a sharp pair of pruners, some clean gloves, and a bucket for clippings.
Most gardeners overlook the foliage cleanup, but leaving dead stems invites pests and disease, so we'll tackle that too.
What you'll end up with is lily plants that bounce back stronger every season. The second flush of blooms arrives a month earlier, the stems stay sturdy, and your plants resist those pesky aphid infestations that plague neglected lilies.
Even better, dividing clumps every few years prevents overcrowding and keeps your garden looking fresh and vibrant.
This works for both Asiatic lilies and Oriental varieties, though the timing shifts slightly between early and late bloomers. Here's how to make those cuts without killing your plants—and how to tell when you've done it right.
📚 In This Guide
- What you need
- Instructions
- Tips and common mistakes
- Wrapping up and next steps
What you need
- ● Pruning shears or sharp bypass pruners – Choose sterilized, sharp tools (4-6 inch blades) to avoid damaging plant tissue.
- ● Garden gloves – A pair of cut-resistant, breathable gloves (size medium/large) to protect your hands from thorns and dirt.
- ● Disinfectant (70% isopropyl alcohol or bleach solution) – 1 part bleach to 9 parts water to sterilize tools between cuts.
- ● Compost bin or bag – For disposing of trimmings (1-2 gallon size recommended).
- ● Watering can or hose with a gentle spray nozzle – To hydrate plants post-trimming.
- ● Hand pruners (for smaller stems) – For precision trimming in tight spaces.
- ● Plant fertilizer (balanced 10-10-10 or bulb-specific) – A small bag (5-10 lbs) to nourish lilies after pruning.
- ● Mulch (straw or shredded bark) – 2-3 inches thick to retain moisture and protect roots.
- ● Plant marker or labels – If you’re trimming multiple varieties, label them to avoid confusion!
Step-by-Step instructions for trimming lily plants
Here's how I refresh tired lilies for a second burst of blooms—no pruning experience needed.
✂️ Step 1: Wait for the Right Time
Never trim lilies in fall or winter—they need their foliage to store energy for next year. Instead, wait until late spring or early summer when blooms have faded but leaves remain green and healthy. You'll know it's time when the flower stalks turn brown and crispy while the leaves stay vibrant.
This timing ensures you're not removing the plant's food source prematurely. If you trim too early, you'll weaken the bulb's ability to regenerate for next season. I always check for at least 6 weeks of warm weather ahead—this gives the plant time to recover before cooler temperatures arrive.
✂️ Step 2: Remove Spent Blooms and Seed Pods
Start by cutting back the brown, dried flower stalks at the base using clean, sharp pruners. Cut at a 45-degree angle about ½ inch above the first set of leaves to prevent water from pooling. This encourages the plant to redirect energy toward leaf growth instead of seed production.
Next, look for any seed pods forming at the base of the flower stalks. These little green bulbs drain energy from the plant. Pinch or snip them off immediately—they won't produce new plants anyway, and they'll only slow down your lily's recovery. I always run my fingers along the stem to feel for any hidden pods I might miss visually.
🌿 Step 3: Thin Overcrowded Foliage
Lilies often grow multiple shoots from a single bulb. If you have more than 3-4 strong stems emerging from one clump, thin them down to the strongest 2-3 stems. Use your pruners to cut at the base, leaving the largest, healthiest-looking shoots. This prevents competition for nutrients and helps each remaining stem grow stronger.
Watch for any yellowing or mushy leaves—these are signs of disease or rot. Remove them immediately by cutting back to healthy green tissue. Never leave dead leaves attached; they'll only spread problems to the rest of the plant. I like to dispose of these in the trash rather than the compost to avoid spreading potential pathogens.
☀️ Step 4: Encourage New Growth with Proper Care
After trimming, give your lilies a light feeding with a balanced fertilizer (10-10-10 works well) to support new growth. Water deeply but avoid soggy soil—lilies hate wet feet. You'll see new growth emerge within 2-3 weeks if conditions are right. Look for fresh, upright leaves that feel firm to the touch.
Place your trimmed lilies in a spot with full sun (6+ hours daily) and well-draining soil. If your climate gets hot, provide afternoon shade to prevent leaf scorch. Mulch around the base with 2-3 inches of organic mulch to retain moisture and regulate soil temperature. This step is crucial for preventing stress after the trim.
⏰ Step 5: Monitor for Second Blooms
With proper care, many lily varieties will produce a second flush of blooms 6-8 weeks after your initial trimming. Watch for new flower buds forming at the top of the stems. These will be smaller than the first blooms but just as beautiful—and they'll extend your display well into summer.
If no second blooms appear, don't worry. Some varieties focus all their energy on leaf growth to strengthen the bulb for next year. The key is maintaining healthy foliage until it naturally yellows in fall. At that point, you can cut back the leaves to 2-3 inches above the ground and leave them for winter protection.
Tips & tricks for perfect lily plant trimming
These simple tricks will help you revive your lilies for a stunning second bloom—without the guesswork.
Timing is Everything: The late spring/early summer window is critical for success. I've learned the hard way that trimming too early—even just a few weeks off—can weaken the bulb's energy reserves. Check your local frost dates and plan to trim when you have at least 6 weeks of warm weather ahead. This gives your plants time to recover before fall arrives.
The 45-Degree Angle Secret: When cutting back those dried flower stalks in Step 2, that 45-degree angle isn't just decoration—it's a water management trick. The angled cut prevents water from pooling at the base, which could lead to rot. I always use sharp pruners and make the cut just above the first set of leaves to maintain the plant's natural structure.
Thinning Strategy: In Step 3, when you're thinning overcrowded foliage, focus on keeping the strongest 2-3 stems. I've found that lilies respond best when they're not competing for nutrients. Look for stems that are upright, vibrant green, and free of spots. If you're unsure which to keep, choose the ones closest to the center of the clump—they'll have the most energy.
Post-Trim Care: That 2-3 inch mulch layer in Step 4 isn't just for looks—it's a game-changer. Organic mulch regulates soil temperature, retains moisture, and prevents weeds from competing with your lilies. I like to use shredded bark or straw, and always keep it 2-3 inches away from the stems to prevent rot. This simple step makes all the difference in recovery time.
Pro Tips for Trimming Lily Plants
- These simple tricks will help you revive your lilies for a stunning second bloom—without the guesswork.
- Timing is Everything: The late spring/early summer window is critical for success.
- The 45-Degree Angle Secret: When cutting back those dried flower stalks in Step 2, that 45-degree angle isn't just decoration—it's a water management trick.
Frequently asked questions
Got questions about trimming your lilies? You’re not alone!
Here are some of the most common concerns—and straightforward answers—to help you keep your lilies thriving after a fresh trim.
When is the best time to trim lily plants?
Trim lilies after they’ve finished blooming in late summer or early fall. This prevents stressing the plant before it stores energy for next year. Avoid pruning in spring—let the foliage feed the bulbs until it naturally yellows. Pro tip: Wait until leaves turn brown before cutting back completely!
How much can I cut back my lilies without harming them?
Cut back only the spent flower stalks (scape) after blooming, leaving the leaves intact. Once foliage yellows in fall, trim it to 2–3 inches above ground. Never remove more than ⅔ of the leaves—this disrupts the bulb’s energy storage for next season’s blooms.
What if my lilies aren’t blooming after trimming?
Lack of blooms often means the plant isn’t getting enough sunlight or nutrients. Ensure lilies get 6+ hours of sun daily and feed with a balanced fertilizer (like 10-10-10) in early spring. Over-trimming foliage or bulbs planted too shallowly can also stunt flowers—double-check your pruning technique!
Can I use lily leaves or stems for anything after trimming?
Dry the leaves for compost or use them as mulch in garden beds. The stems can be chopped for potting soil amendments, though avoid using them if pests (like aphids) were present. Bonus: Some gardeners even repurpose lily stems as natural plant ties!
Should I trim lilies before the first frost?
No—wait until after the first frost when foliage turns brown. Trimming too early can expose bulbs to cold damage. If your area has harsh winters, mulch around the base (2–3 inches deep) to protect the roots. Remember: Lilies are hardy, but a little patience goes a long way!
Wrapping up and next steps
Trimming your lily plants in spring isn’t just about tidying up—it’s your secret weapon for longer, healthier blooms and a showstopping garden! 🌸 By following these simple steps, you’ll encourage stronger growth, prevent disease, and give your lilies the fresh start they deserve.
Now that you’re armed with the right tools and techniques, there’s no better time to roll up your sleeves and transform your garden into a lush paradise.
Ready to see the magic happen? Grab your pruners and start trimming today—your lilies (and your future blooms) will thank you! For extra inspiration, check out lily care guides or join gardening communities to share your progress. Happy gardening! 🌱