Pruning
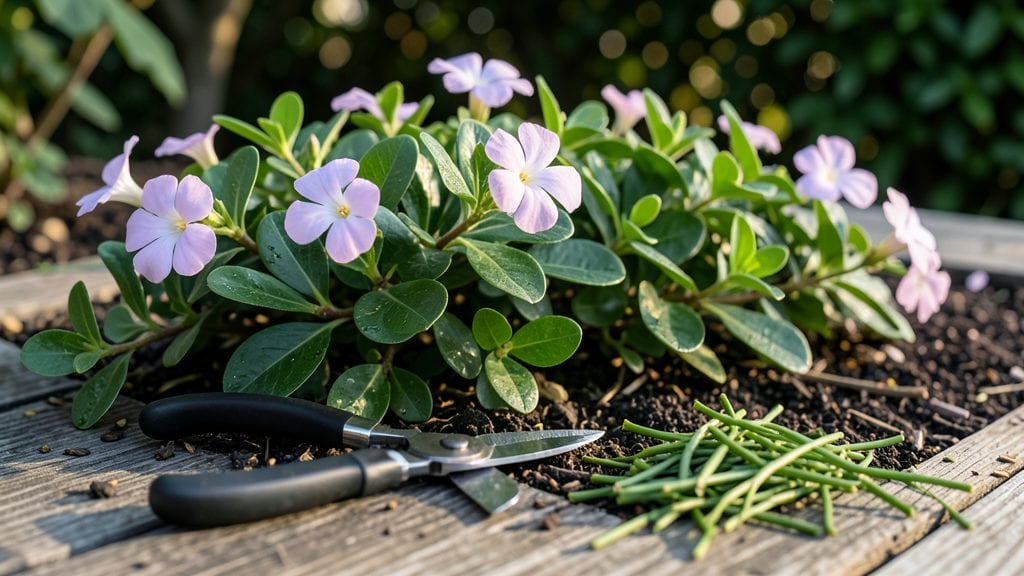
My vinca plants stay covered in blooms all summer because I prune them three times a year—not just when they look messy. 🌿 The secret isn’t cutting back hard like you’d prune roses; it’s strategic little snips that keep them compact and flowering.
After my first overzealous pruning session (which left me with bare stems), I learned the right technique makes all the difference.
The tools you’ll need are simple: sharp bypass pruners, clean gloves, and a spray bottle for post-pruning care. You’ll work in three phases—spring cleanup, mid-season shaping, and late-summer rejuvenation—to encourage new growth and prevent legginess.
Each trim takes less than 15 minutes, but the payoff is months of vibrant pink, white, or purple flowers.
What you’ll end up with is a vinca plant that looks fuller, blooms longer, and stays healthier through heat waves. The key is always cutting just above a leaf node or set of leaves, never into bare stems.
This keeps the plant guessing—it thinks it’s being attacked and responds by growing bushier and more flowers.
Works for both in-ground vincas and container plants, and the same principles apply whether you have one pot or a full garden bed. Once you master these three trims, your vincas will be the talk of the neighborhood—and you’ll never buy bedding plants again.
📚 In This Guide
- What you need
- Instructions
- Tips and common mistakes
- Wrapping up and next steps
What you need
- ○ Pruning shears: Bypass pruners (sharp, clean, and disease-free) for clean cuts. Optional: Small hand pruners for delicate trims.
- ● Garden gloves: A pair of cut-resistant, breathable gloves (e.g., nitrile-coated or leather) to protect hands from thorns and sap.
- ● Disinfectant: 70% isopropyl alcohol or rubbing alcohol + paper towels to sterilize tools between cuts (prevents bacterial/fungal spread).
- ● Garden twine or plant ties: Soft, stretchy twine (e.g., jute or plastic-coated) to secure branches if staking is needed post-prune.
- ○ Garden waste bag: A durable, lined bag (10–20 gallon) for trimmings. Optional: Compost bin if you plan to recycle clippings.
- ● Watering can or hose: For post-pruning hydration (1–2 gallons of water per plant, depending on size).
- ● Staking supplies (if needed): Bamboo stakes (6–12 inches tall, ¼-inch diameter) or metal plant supports.
- ● Soft plant ties (e.g., Velcro strips or rubber-coated wire).
- ● Loppers: For thicker branches (if your vinca has woody stems). Choose bypass loppers (18–24 inches) with a sharp blade.
- ● Hedge shears: If pruning a formal hedge or multiple plants in a row (look for ergonomic, adjustable handles).
- ● Plant food: Balanced fertilizer (10-10-10 or 20-20-20) to apply 2–4 weeks post-prune for a growth boost.
- ● Pruning sealant: Wound dressing (e.g., tree paint) for large cuts (though vinca often self-seals well).
- ● Knee pad or stool: For comfort if working with ground-cover vinca or large containers.
- ● Notebook & pen: To jot down pruning notes (e.g., "trimmed ⅓ of plant in May") for tracking growth.
How to prune vinca plants for continuous color
Keep those vibrant blooms coming with this simple, seasonal approach—no fancy tools needed.
✂️ Step 1: Early Spring Cleanup Cut
Start in late February or early March when new growth begins but before buds swell. This first trim removes dead stems and encourages fresh, vigorous shoots. Grab your bypass pruners and make 45-degree cuts just above leaf nodes—where leaves or buds attach—to promote branching.
Don't worry about being perfect here. Vinca is forgiving—focus on removing any brown, woody stems and thinning crowded areas. You'll see new green shoots within 2-3 weeks, signaling the plant is waking up. This is the moment that matters: a clean start prevents disease and sets up summer blooms.
✂️ Step 2: Mid-Summer Deadheading Trim
When 50% of blooms have faded (usually June or July), it's time for the second cut. Snip spent flowers back to the nearest leaf node—this redirects energy from seed production to more blooms. I like to do this on a dry, sunny morning when the stems are firm and easy to cut.
Here's the thing—vinca blooms continuously, but you'll notice fewer flowers if you skip this step. After trimming, watch for new flower buds forming at the tips of branches within 10-14 days. If you see leggy growth, it's a sign the plant needs more light—not more water.
✂️ Step 3: Late Summer Rejuvenation Cut
In August or early September, give vinca a hard prune back by one-third to one-half of its height. This isn't about shaping—it's about re-energizing the plant before cooler weather. Cut just above a leaf node, and don't worry if it looks sparse afterward. You'll see compact, bushy growth by fall.
Real talk: this step is where most people hesitate, but vinca rebounds beautifully. After trimming, water deeply to help roots recover. You'll notice new leaves within 2 weeks, and by late fall, the plant will be fuller than ever—ready for winter.
⏰ Step 4: Light Winter Maintenance Trim (Optional)
If your vinca stays green through winter (in USDA Zones 8-11), do a light cleanup in January to remove any frost-damaged stems. Just snip back to healthy growth—no aggressive cuts needed. This keeps the plant tidy without shocking it.
If you're in colder zones and vinca dies back completely, wait until late winter when new shoots emerge before pruning. The goal here is minimal—just tidying up. You'll see first signs of life as tiny green tips push through the soil, and that's your cue to hold off.
Tips & tricks for pruning vinca plants
Between us, vinca plants are the unsung heroes of summer color—but they need a little guidance to keep blooming nonstop. Here's what I've learned after years of trial (and a few too many sad, leggy vinca disasters).
Timing is Everything: The 2-3 week window after your early spring cleanup cut is critical for watching those new green shoots emerge. If you see no new growth after 3 weeks, your vinca might need more sunlight or a deeper watering. I always check soil moisture first—vinca prefers it to dry out slightly between waterings, but new growth needs consistent moisture.
The 45-Degree Cut Secret: Those angled cuts in Step 1 aren't just for looks—they create larger surface areas for water absorption and prevent water from pooling on the cut. Use your bypass pruners to make clean cuts just above a leaf node, and avoid tearing the stems. I've found that making these cuts on a dry morning prevents the plant from absorbing too much water through the fresh cuts.
Deadheading Done Right: When you're doing your mid-summer trim (Step 2), don't just cut off the faded flowers—snip back to the nearest leaf node where you see new flower buds forming. This redirecting of energy is what keeps vinca blooming continuously. I've seen vinca plants go from sparse blooms to full again in just 10-14 days after proper deadheading.
Late Summer Rejuvenation: Don't be afraid of that aggressive cut in Step 3—it's what gives vinca its compact, bushy fall growth. After cutting back by one-third to one-half, I always water deeply to help the roots recover. The key is to cut just above a leaf node, not at a random point. You'll be amazed at how quickly vinca rebounds from this hard prune—it's like hitting the reset button for fall blooms.
Pro Tips for Pruning Vinca Plants
- Between us, vinca plants are the unsung heroes of summer color—but they need a little guidance to keep blooming nonstop.
- Timing is Everything: The 2-3 week window after your early spring cleanup cut is critical for watching those new green shoots emerge.
- The 45-Degree Cut Secret: Those angled cuts in Step 1 aren't just for looks—they create larger surface areas for water absorption and prevent water from pooling on the cut.
Frequently asked questions
Got questions about keeping your vinca plants thriving with the perfect prune? You’re not alone! Here are answers to the most common concerns—so you can prune with confidence and enjoy those vibrant blooms all year.
When is the best time to prune vinca plants for maximum blooms?
The ideal window is early spring (just as new growth starts) and after each major bloom cycle (spring, summer, and fall). Light trims can happen anytime, but avoid heavy pruning in late fall—it may stunt winter hardiness. Think of it like a three-act play: trim, grow, repeat!
Can I prune vinca plants too much, and how will I know?
Yes, over-pruning can stress vincas, leading to sparse foliage or fewer blooms. If you see bare stems or leggy growth, you’ve gone too far. Aim to remove no more than 1/3 of the plant at once. Pro tip: Step back and squint—if it looks like a "haircut gone wrong," dial it back!
What should I do if my vinca plant looks dead after pruning?
Don’t panic! Vincas are tough. If it’s just looking sad (wilted or dormant), give it time and water. If stems are brown and mushy (not just dry), it might be root rot—trim away the bad, repot in fresh soil, and reduce watering. Yellow leaves? That’s normal post-prune; they’ll regrow!
Do I need to prune vinca plants if they’re not flowering well?
Poor blooms often mean overgrowth or leggy stems. Prune to encourage bushier growth and redirect energy to flowers. Cut back woody or bare stems to the base and trim back others by 1/3. Bonus: Deadheading spent blooms (snipping flowers after they fade) keeps vincas blooming longer!
Can I prune vinca plants in winter, or should I wait?
Light maintenance (like removing dead leaves) is fine in mild winters, but avoid heavy pruning until spring. Cold snaps can stress freshly trimmed plants. If you’re in a frost-prone zone, wait until temps stay above 40°F (4°C) for a few days. Think of winter as pruning’s nap time!
Wrapping up and next steps
Pruning your vinca plants doesn’t have to be intimidating—it’s all about timing, technique, and a little TLC! 🌿 With just three targeted trims a year, you’ll keep those vibrant blooms coming strong, promote healthier growth, and give your garden a polished look.
Whether you’re a seasoned gardener or just starting out, these steps will help you master the art of pruning vinca with confidence.
Ready to see the results? Grab your pruners and give your vinca the care it deserves—your garden (and future blooms) will thank you! For extra inspiration, check out before-and-after photos or share your progress with fellow plant lovers online. Happy pruning! 🌸