Container Gardens
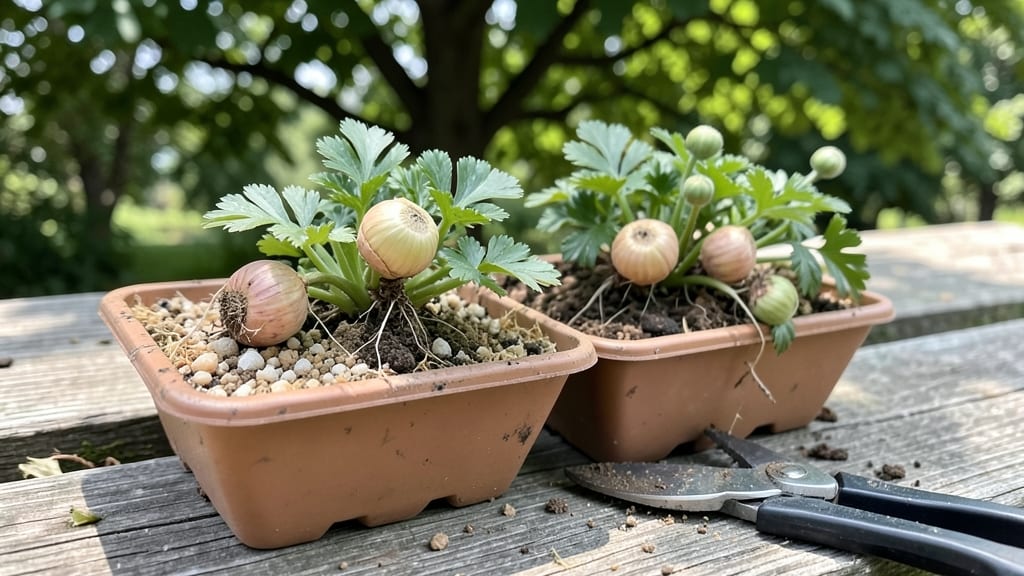
Planting ranunculus tubers unlocks those shockingly lush blooms that look like they came from a florist shop. ✨ I’ve grown them for years, and the secret isn’t complicated—just timing, a little prep, and knowing exactly where to tuck those tubers.
The first time I saw them pop through the soil in early spring, I knew I’d never buy cut flowers again.
You’ll need a sunny spot, well-draining soil, and about 30 minutes to get them in the ground. Ranunculus tubers hate soggy roots, so if your soil drains poorly, mix in some sand or perlite.
Plant them shallow—just 1 inch deep—with the flat side down, and space them 2-3 inches apart. The key? Start them indoors in late winter if you live in a cold zone, or wait until the ground thaws in early spring.
By late spring, you’ll be rewarded with clusters of velvety petals in every color imaginable. The blooms last weeks in vases, and the plants multiply every year. Just keep an eye out for rot—if tubers stay too wet, they’ll turn mushy.
A quick fix is to adjust your watering or move them to a sunnier spot.
Works in containers, garden beds, or even hanging baskets—just make sure they get at least 6 hours of sunlight daily. Once you’ve mastered this, you’ll be the one everyone asks for cuttings. Let’s get those tubers in the soil!
📚 In This Guide
- What you need
- Instructions
- Tips and common mistakes
- Wrapping up and next steps
What you need
- ● Ranunculus tubers: 10–20 tubers per plant (adjust based on desired fullness; larger tubers yield bigger blooms). Choose certified disease-free tubers for best results.
- ● Well-draining potting mix: 1–2 gallons per container (or 1 cubic foot per square foot in garden beds). Use a blend of 50% potting soil and 50% perlite or coarse sand to prevent rot.
- ● Containers or garden bed: Containers: 6–12 inches deep with drainage holes (e.g., ceramic pots, fabric grow bags). Size: 12–18 inches in diameter for 10–15 tubers.
- ● Garden beds: Full sun (6+ hours daily) with loose, well-amended soil.
- ● Slow-release fertilizer: 1 tbsp per container or 1 lb per 10 sq ft of garden bed (look for a balanced 10-10-10 or high-phosphorus 5-10-5 formula).
- ● Watering can or hose with gentle spray nozzle: For even moisture without disturbing tubers.
- ○ Gloves (optional but recommended): To protect hands from sharp tuber edges.
- ● Mulch: Straw or shredded bark to retain moisture and regulate soil temperature.
- ● Epsom salt: 1 tsp dissolved in water (every 2–3 weeks) for vibrant blooms.
- ● Plant labels: To track varieties (e.g., ‘Buttercup,’ ‘Persian Pink’).
- ● Grow lights (indoor starters): If pre-sprouting tubers indoors in low-light areas.
Instructions for planting ranunculus tubers
Here’s the straightforward method I’ve used to get vibrant ranunculus blooms every spring—no fuss, just bold color.
🌱 Step 1: Soak and Prepare the Tubers
Start by soaking the ranunculus tubers in lukewarm water for 12-24 hours before planting. This hydrates them and helps break any dormancy. Place them in a shallow dish or bowl, ensuring they’re fully submerged but not crowded—leave enough room for them to spread slightly. You’ll see them plump up and soften, which is your signal they’re ready.
After soaking, gently pat them dry with a paper towel. This prevents rot later when you plant them in soil. I like to inspect them for any soft or mushy spots—those should be discarded, as they won’t grow. Healthy tubers feel firm and slightly spongy to the touch.
🪴 Step 2: Choose Containers and Planting Medium
Use the 6-inch deep containers you’ve prepared, filling them about halfway with the well-draining potting mix. Ranunculus tubers need excellent drainage, so avoid heavy garden soil—it’ll cause rot. Press the mix down lightly to create a firm base, but don’t compact it too tightly. This ensures roots can easily push through as they grow.
Place the soaked tubers on top of the soil, spacing them about 2 inches apart. They don’t need to be buried—just nestle them gently into the surface. The key here is keeping them exposed to light while allowing roots to grow downward. If you’re planting multiple tubers, arrange them in a loose cluster rather than a tight row.
☀️ Step 3: Add Soil and Provide Light
Lightly cover the tubers with an additional 1-2 inches of the potting mix, just enough to hold them in place without burying them deeply. Press down very gently—you’re not creating a mound, just securing the tubers. Water the soil lightly until it’s evenly moist, but not soggy. You’ll know it’s right when water runs through the drainage holes without pooling.
Place the containers in a spot with bright, indirect light—think 6-8 hours of sunlight daily, but avoid harsh midday sun at first. A south-facing window or a grow light setup works perfectly. Keep the soil consistently moist (but never waterlogged) for the next 4-6 weeks. You’ll see green shoots emerge in about 2-3 weeks, signaling that the tubers are actively growing.
💧 Step 4: Encourage Growth and Bloom
Once the shoots reach about 3-4 inches tall, you can gradually introduce them to more direct sunlight—this helps strengthen the stems and encourages robust blooms. Water from the bottom of the containers to avoid wetting the leaves, which can lead to fungal issues. Let the top inch of soil dry out slightly between waterings to prevent overwatering.
In about 8-10 weeks, you’ll start seeing buds form at the top of the stems. This is the moment you’ve been waiting for! To keep the blooms coming, deadhead spent flowers by snipping them off just above the next set of leaves. This redirects the plant’s energy into producing more flowers rather than seeds.
Tips & tricks for planting ranunculus tubers
Here's what I've learned from years of growing these stunning blooms—simple tricks that make all the difference between pretty sprouts and showstopping flowers.
Soaking Secret: The 12-24 hour soak is your first critical step. Use lukewarm water—not cold, not hot—because extreme temperatures can shock the tubers. I like to add a few drops of hydrogen peroxide (1 tsp per gallon) to the water to prevent bacterial growth during soaking. This extra step keeps your tubers healthier right from the start.
Container Depth Matters: Those 6-inch deep containers aren't just arbitrary—they give roots room to grow downward while keeping the tubers shallow enough for light exposure. If you're using deeper pots, don't fill them completely at first. Ranunculus roots prefer vertical space over depth, so leave about 2 inches of air space between the soil and container rim.
Light Transition Strategy: When you're ready to move from bright indirect light to more direct sunlight (around the 3-4 inch shoot stage), do it gradually over 3-4 days. I start by moving containers to a spot with morning sun only, then gradually increase exposure. Sudden full sun can scorch delicate new leaves and shock the plants.
Deadheading Timing: Those 8-10 weeks until buds form will fly by, but don't rush the deadheading. Wait until flowers are completely spent and starting to wilt before snipping. This ensures you're not removing buds that could still develop. I use clean, sharp scissors to make clean cuts just above the next set of leaves—this prevents disease from entering the stems.
Pro Tips for Planting Ranunculus Tubers
- Here's what I've learned from years of growing these stunning blooms—simple tricks that make all the difference betwe...
- Soaking Secret: The 12-24 hour soak is your first critical step. Use lukewarm water—not cold, not hot—because extreme...
- Container Depth Matters: Those 6-inch deep containers aren't just arbitrary—they give roots room to grow downward whi...
Frequently asked questions
Got questions about planting ranunculus tubers? You’re not alone! Here are answers to the most common ones to help you grow stunning blooms with confidence.
When is the best time to plant ranunculus tubers?
Plant them 8–10 weeks before your last frost date—typically late winter to early spring in most climates. For fall blooms, try planting in late summer. Ranunculus thrive in cool weather, so avoid planting when soil temps exceed 70°F (21°C).
Do I need to soak ranunculus tubers before planting?
Yes! Soak them in lukewarm water for 1–2 hours to rehydrate and encourage faster growth. This helps break dormancy and ensures a stronger start. Just don’t let them dry out afterward—plant them within 24 hours.
Can I plant ranunculus tubers in winter?
Not directly—they won’t survive freezing soil. Instead, start them indoors under grow lights 10–12 weeks before your last frost, then transplant outdoors once temperatures rise. Alternatively, plant in early spring as soon as the ground is workable.
What if my ranunculus tubers rot after planting?
Overwatering or poor drainage are the usual culprits. Ensure tubers are planted in well-draining soil (mix in perlite or sand if needed) and water only when the top inch of soil is dry. Avoid soggy soil—ranunculus hate wet feet!
Are there alternatives to ranunculus for similar blooms?
If ranunculus seem tricky, try anemones, tulips, or snapdragons for bold, layered blooms. Anemones, like ranunculus, love cool weather and thrive in containers. Tulips are another low-maintenance option with striking colors!
Wrapping up and next steps
Planting ranunculus tubers is your ticket to vibrant, velvety blooms that’ll steal the show in your container garden! 🌸 With the right timing, soil, and care, these tuberous beauties reward you with months of color—from early spring to late summer.
Whether you’re a seasoned gardener or a beginner, the key is patience and a little attention to detail.
Now that you’re armed with the know-how, grab those tubers and get planting! Once your ranunculus are thriving, why not explore companion plants to extend their season or create a stunning container display? Happy gardening—your future blooms are waiting! 🌱✨