Pruning
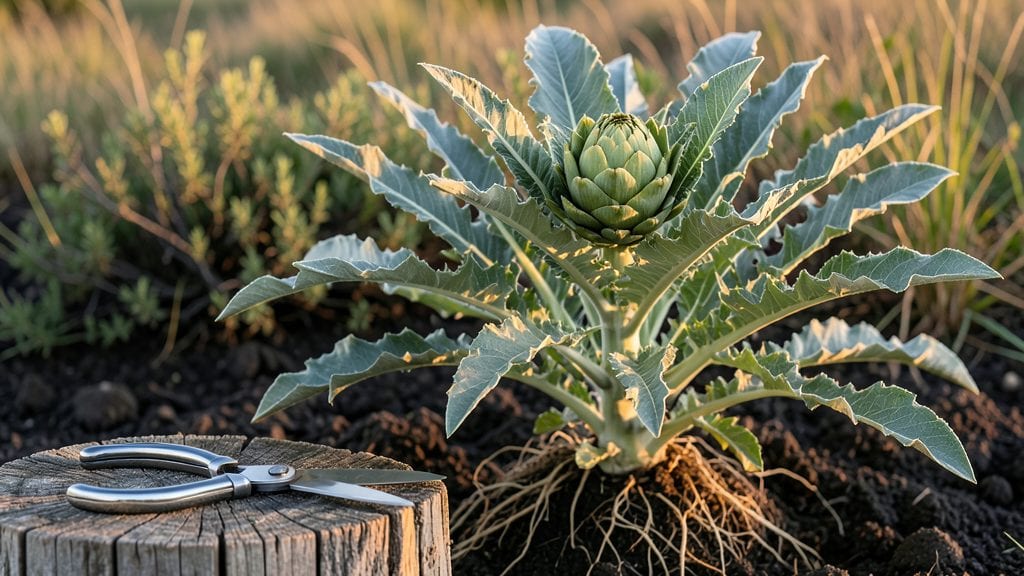
Mastering the art of trimming artichoke plants at the right time transformed my first season from a handful of artichokes to a garden full of them—though I learned it the hard way.
Trimming artichoke plants isn’t just about keeping them neat; it’s about directing their energy where it matters most: toward those plump, edible buds.
Timing is everything, and most gardeners trim twice: once in early spring to shape the plant and again in summer to encourage new growth. You’ll need sharp pruners, a clean cutting surface, and about 30 minutes of focused work.
The goal is to remove old or damaged stems while leaving enough leaves to feed the plant. Think of it like giving your artichokes a haircut—they’ll thank you with bigger, healthier buds.
When done right, your plants will reward you with a harvest that’s 2-3 times larger than if you’d left them untouched. The buds stay tight and tender, and the plant puts all its effort into producing what you want to eat.
Even better, the process keeps your artichokes looking tidy and prevents disease from setting in. It’s the kind of simple task that makes a huge difference.
This method works for both globe and French artichokes, whether you’re growing them in the ground or in containers. The key is consistency—don’t skip a season, and you’ll see the payoff in bigger, better harvests year after year. Ready to get started?
📚 In This Guide
- What you need
- Instructions
- Tips and common mistakes
- Wrapping up and next steps
What you need
- ● Pruning shears: Sharp, bypass-style shears (4–6 inches) for clean cuts—sterilize with rubbing alcohol before and after use! 🔪
- ● Gloves: Heavy-duty, gardening gloves (waterproof, long-cuffed) to protect from thorns and sap.
- ● Disinfectant: 70% isopropyl alcohol or a 10% bleach solution (1 part bleach to 9 parts water) for tools.
- ● Bucket or bin: Large enough to collect trimmings (5+ gallon capacity recommended).
- ○ Watering can or hose: For post-trimming hydration (optional but helpful).
- ● Marker or tags: Waterproof plant markers to label trimmed sections (if managing multiple plants).
- ● Pruning saw: For thick, woody stems (rare in artichokes but useful for established plants).
- ● Compost bin: To recycle trimmings into nutrient-rich soil.
- ● Plant food: Balanced fertilizer (10-10-10 or similar) to replenish nutrients after trimming.
- ● Knee pads: For comfort during extended trimming sessions.
- ● Sun hat & sunscreen: Because even gardeners need SPF! ☀️
Step-by-Step guide for trimming artichoke plants
Here’s how to keep your artichoke plants healthy and productive with simple, effective cuts.
Identify and Remove Dead or Damaged Growth
Start by inspecting your artichoke plants for any brown, wilted, or yellowing stems and leaves. These are signs of disease, pests, or environmental stress. Use clean, sharp pruning shears to cut these away at the base—never leave stubs, as they can trap moisture and invite rot. Focus on the outer edges of the plant first, working your way inward. You’ll notice a difference in the plant’s overall appearance almost immediately after removing the dead growth.
If you spot any leaves with holes or chewed edges, those are likely pest-damaged and should be trimmed off too. Healthy leaves should be deep green and firm to the touch. Cutting these out prevents pests from spreading further and helps the plant redirect its energy to producing artichokes instead of repairing damaged foliage.
Prune Side Shoots for Stronger Main Stems
Artichoke plants produce side shoots that can compete with the main stem for nutrients. To encourage larger, healthier artichokes, remove these side shoots as soon as they appear. Use your pruning shears to snip them off just above a leaf node or where they branch from the main stem. This redirecting of energy ensures the main stem grows stronger and produces more robust buds.
I like to do this every 2-3 weeks during the growing season, especially when the plant is actively producing new growth. You’ll see the main stem thicken and the leaves darken slightly—a sign the plant is focusing its resources on the primary structure. Avoid over-pruning, though; if you remove too many side shoots, the plant may struggle to support its own weight or produce enough foliage for photosynthesis.
Thin Out Crowded Buds for Larger Harvests
Once your artichoke plant starts forming buds, you’ll need to thin them out to ensure the remaining ones grow larger and healthier. Leave only 1-2 buds per stem, spaced about 6-8 inches apart. Use your fingers or pruning shears to gently twist off smaller or weaker buds at the base. This step is crucial because overcrowded buds compete for nutrients, resulting in smaller, less flavorful artichokes.
Watch for buds that are uneven in size or shape—these are often weaker and should be removed. After thinning, water the plant deeply to help it recover and support the remaining buds. You’ll notice the remaining buds swell more quickly and develop a deeper purple or green hue, indicating they’re thriving.
Cut Back Flower Stems After Harvest
After harvesting an artichoke, don’t just leave the stem behind—cut it back to encourage more production. Use your pruning shears to trim the stem about 1 inch below the harvested bud. This prevents the plant from wasting energy on seed development and redirects it toward producing new buds. I always do this within 24 hours of harvesting to keep the plant in peak condition.
If you notice any flower stems that haven’t produced artichokes, trim those off too. These are essentially wasted energy for the plant. After cutting, give the plant a light application of balanced fertilizer to support its recovery and continued growth. You’ll see new buds forming within 1-2 weeks, signaling that the plant is ready to produce again.
Prepare for Dormancy with Late-Season Trimming
As the growing season winds down and temperatures drop, it’s time to prepare your artichoke plant for dormancy. Cut back any remaining foliage or stems to about 6 inches above the ground. This reduces the plant’s energy demands over winter and helps prevent disease or pest issues from lingering in dead growth. Use your pruning shears to make clean cuts, avoiding any jagged edges that could invite problems.
After trimming, mulch the base of the plant with 2-3 inches of organic mulch to insulate the roots and protect them from freezing temperatures. You’ll notice the plant looks much tidier and is less susceptible to winter damage. In spring, you can trim back any remaining dead growth and fertilize lightly to encourage new growth.
Tips & tricks for perfect artichoke plant trimming
A few precise techniques will transform your artichoke plants from struggling survivors to thriving producers. These small adjustments make a big difference in both yield and plant health.
Timing Secret: In Step 2, when pruning side shoots every 2-3 weeks, I recommend doing this on a bright, sunny morning. The plant’s natural energy from photosynthesis will help it recover faster from the pruning. Avoid trimming after rain or in the evening, as the cuts won’t heal as quickly and may invite fungal issues. The plant’s natural sap flow is strongest in the morning, which helps seal cuts more effectively.
The Technique That Changed Everything: For Step 3 when thinning buds, I've found that using your fingers to gently twist off weaker buds works better than cutting with shears. This method prevents accidental damage to nearby healthy buds. When you twist, you can feel the bud's resistance—weaker buds will come off with minimal force, while stronger ones will require more pressure. This tactile feedback helps you make better decisions about which buds to keep.
Critical Timing: The 24-hour window after harvesting in Step 4 is truly critical. I've seen plants that went 48 hours without trimming the stems show significantly reduced bud formation in the next growth cycle. The plant's energy redirection mechanism works best when you act promptly. If you must delay, do the trimming within 36 hours at most, but don't push it further than that.
Equipment Recommendation: While pruning shears are essential, I've found that having a small magnifying glass on hand helps tremendously when inspecting buds in Step 3. The subtle differences in bud health become much clearer when you can see the fine details of the leaf structure and coloration. This simple tool helps you make more precise decisions about which buds to keep and which to remove for optimal harvest size.
Pro Tips for Trimming Artichoke Plants
- A few precise techniques will transform your artichoke plants from struggling survivors to thriving producers. These ...
- Timing Secret: In Step 2, when pruning side shoots every 2-3 weeks, I recommend doing this on a bright, sunny morning...
- The Technique That Changed Everything: For Step 3 when thinning buds, I've found that using your fingers to gently tw...
Frequently asked questions
Got questions about trimming your artichoke plants? You’re not alone—proper pruning can feel tricky! Below, we’ve rounded up the most common queries to help you grow like a pro.
When is the best time to trim artichoke plants?
Trim your artichoke plants early in the season (spring) to encourage bushier growth and more buds. Focus on removing the first few flower buds (the "chokes") to redirect energy to later, larger harvests. Avoid heavy pruning after mid-summer—this can stress the plant before winter.
How do I know which buds to trim off?
Look for the smallest, youngest buds (about the size of a marble) near the base of the plant. These are the "chokes"—trim them first to promote bigger, later harvests. Leave larger buds (golf-ball size or bigger) to mature into edible artichokes. Pro tip: Use clean, sharp shears to avoid damaging stems!
What should I do if my artichoke plant has no buds?
If your plant is budless, it might be underwatered, over-fertilized, or stressed. Check soil moisture (keep it consistently damp but not soggy) and reduce nitrogen-heavy fertilizers. Trim any dead or yellowing leaves to redirect energy. If the plant is young, give it time—buds often appear 6–8 weeks after transplanting.
Can I still harvest artichokes if I skip trimming?
Yes, but yields will likely be smaller and later. Skipping trimming means the plant focuses energy on the first few buds, leaving fewer (and often smaller) artichokes later in the season. Trimming encourages a second flush of buds for a more abundant harvest. Think of it like pruning tomatoes—more fruit, better quality!
Are there any alternatives to traditional trimming?
If you’re short on time, try the "selective pinching" method: Gently squeeze off the smallest buds with your fingers (no tools needed!). For large plants, focus on removing only the lowest 2–3 buds to simplify the process. Just avoid cutting into woody stems—stick to soft, green growth.
Why are my trimmed artichokes turning fuzzy or opening too soon?
Fuzzy or prematurely opening artichokes often signal heat stress or over-maturity. Harvest them immediately if they start opening—this means they’re past their prime. To prevent it, trim aggressively in early spring and avoid pruning in hot, dry weather. Mulch plants to retain moisture and shade them slightly if temps exceed 90°F.
Wrapping up and next steps
Trimming your artichoke plants isn’t just about keeping them tidy—it’s the secret to healthier growth, bigger buds, and a more abundant harvest! 🌱 Whether you’re a seasoned gardener or just starting out, mastering the art of precision cuts ensures your plants thrive year after year.
With the right tools, timing, and technique, you’ll be rewarded with plump, flavorful artichokes that’ll make your garden the talk of the neighborhood.
Ready to take your artichoke game to the next level? Grab your pruners, roll up your sleeves, and give your plants the care they deserve—your future harvest will thank you!
For even more tips, check out our full guide or dive into seasonal pruning schedules to keep your garden in peak condition.