Blooming
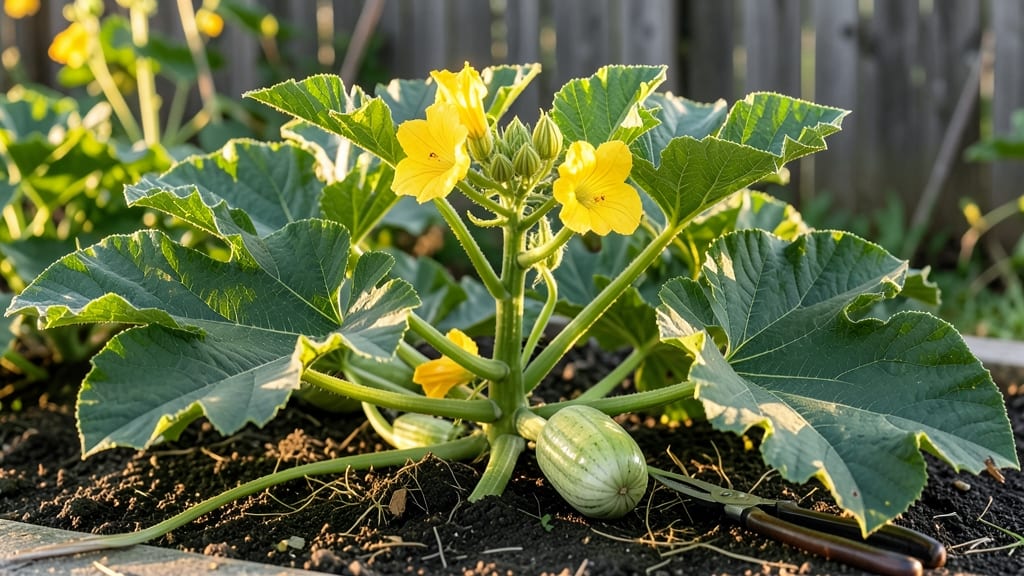
Growing squash blossoms year-round means never missing those delicate, edible flowers again. 🌿 I’ve learned that the key isn’t just sunlight or soil—it’s how you prune and encourage the plant to keep blooming like clockwork.
That first flush of flowers in spring? It’s just the beginning if you use these secrets.
The real magic happens when you focus on three pruning moves: pinching back vines to encourage bushier growth, removing spent blossoms to redirect energy, and thinning crowded stems for better airflow.
My plants now produce blossoms from early spring through fall, even in partial shade. You’ll need sharp shears, a sunny spot, and a little patience—but the payoff is worth it.
By mid-summer, you’ll have a steady stream of blossoms ready for salads, frying, or garnishes, plus the promise of squash later in the season. The flowers themselves are stunning—bright yellow, delicate petals that attract bees and hummingbirds.
This isn’t just about food; it’s about turning your garden into a living, blooming masterpiece.
Works for both edible varieties like zucchini and ornamental types, and adapts to containers or ground beds. Once you master these pruning secrets, your squash plants will keep blooming like they’re on a never-ending show. Let’s get those shears ready!
📚 In This Guide
- What you need
- Instructions
- Tips and common mistakes
- Wrapping up and next steps
What you need
- ● Squash blossom seeds or seedlings: Choose varieties like Cucurbita pepo (zucchini) or Cucurbita moschata (butternut squash) for vibrant blooms. 3-5 plants per garden bed is ideal.
- ● Well-draining potting mix: 10-15 lbs of high-quality, organic soil (or a mix of 60% garden soil, 30% compost, 10% perlite for DIY blends).
- ● Containers or garden bed: For containers: 5-gallon pots (minimum) with drainage holes.
- ● For garden beds: Full sun (6+ hours/day) and 6+ feet of space per plant for sprawling vines.
- ● Fertilizer: Balanced organic fertilizer (10-10-10) or compost tea for nutrient-rich soil. Apply every 4-6 weeks.
- ● Watering can or hose with a gentle spray nozzle: Squash blossoms need 1-2 inches of water weekly (more in heatwaves).
- ● Pruning shears: Bypass pruners (sharp and clean) for precise cuts.
- ● Gloves: Heavy-duty gardening gloves to protect against thorns and sap.
- ○ Support structures (optional): Trellis or stakes for vining varieties (6-8 feet tall).
- ● Cage or tomato supports for bush types.
- ● Mulch: Straw or shredded leaves to retain moisture and suppress weeds.
- ● Warm climate or greenhouse: Squash blossoms thrive in USDA Zones 3-11 but need warm soil (60°F+) to germinate.
- ● Patience: Germination takes 7-14 days—keep soil consistently moist!
- ● Sunlight commitment: Full sun is non-negotiable for blooms and fruit.
How to prune your squash blossom plant for nonstop blooms
These three simple pruning tricks keep your squash blossoms flowering all season long.
🌿 Step 1: Identify and Remove Suckers Early
Squash plants grow vigorous side shoots called suckers that steal energy from your main plant. Look for them in the leaf axils—the spots where leaves meet the stem—about 2-3 weeks after your main vine starts flowering. These little shoots start as tiny buds, so check your plants weekly once blooms appear.
Pinch off suckers when they're still under 1 inch long. The smaller you catch them, the less stress you put on the plant. I always use my thumb and forefinger to snap them cleanly at the base—no need for pruners here. Real talk: If you wait until they're 4 inches or taller, you'll be fighting a losing battle for plant energy.
✂️ Step 2: Prune Overly Crowded Vines
Once your main vine gets 6-8 feet long, it starts competing with itself for sunlight and air circulation. Focus on removing any vines that grow directly upward instead of spreading outward. These vertical growths create dense clusters where air can't circulate, inviting powdery mildew and other fungal diseases.
Use clean, sharp pruners to cut back these upward vines to a leaf node where a side vine branches off. This redirects the plant's energy into horizontal growth, which produces more blossoms. I like to do this in the early morning when the plants are still turgid with water—it makes for cleaner cuts and less stress on the plant.
☀️ Step 3: Thin Fruit Clusters to Encourage More Blooms
Here's where it gets counterintuitive: when your plant sets fruit, you need to remove some of it. Once you see 3-4 small squash growing in a cluster, leave just one—the healthiest looking one—and snip the others off at the stem with clean pruners. This might seem cruel, but it forces the plant to produce more blossoms instead of focusing all its energy on a few fruits.
Watch for new blossoms appearing within 7-10 days of thinning. The key is consistency—keep checking your plants every 3-4 days during peak growing season. I've found that plants with 3-5 blossoms at any given time produce the most consistent harvests. Don't worry about the size of the blossoms either; even small ones will develop into healthy fruit if given proper care.
🌱 Step 4: Deadhead Spent Blooms (The Secret Weapon)
After a blossom wilts and dies, it's still drawing energy from your plant—even if it didn't set fruit. Snip off these spent blossoms at the base of the stem using clean pruners. This might seem like busywork, but it keeps your plant focused on producing new blooms instead of maintaining old ones.
I do this twice weekly during peak bloom season. You'll notice a difference within 5-7 days—new blossoms appear more frequently, and the ones that do form are often larger and healthier. The best time to deadhead is in the late afternoon, when the plant has had time to recover from morning watering but hasn't yet started its evening growth spurt.
Tips & tricks for perfect squash blossom plant care
These pruning secrets will transform your squash plant into a blooming machine—no matter the season.
Timing Tip: In Step 1, when you're checking for suckers weekly, use a small hand mirror to peer into leaf axils. Suckers often hide in tight spots, and catching them early (under 1 inch) makes all the difference. Confession: I skipped this for years and wondered why my plants never produced as many blossoms as my neighbors!
Tool Tip: For Step 2, keep a pair of pruners dedicated solely to your squash plants. Clean them with rubbing alcohol between uses to prevent spreading fungal spores between plants. I learned this the hard way after my entire patch developed powdery mildew from using the same pruners on infected tomatoes.
Visual Cue: In Step 3, when thinning fruit clusters, look for squash that are uniformly shaped and free of blemishes. The healthiest one will have smooth skin and vibrant color. Between us, I've kept some misshapen squash "just in case" and ended up with fewer blossoms for it—don't make my mistake!
Seasonal Strategy: During cooler months, reduce your deadheading in Step 4 to once weekly instead of twice. Your plant needs to conserve energy when nights get chilly. I've found that maintaining this routine keeps blossoms coming even through fall, when many gardeners give up expecting winter dormancy.
Pro Tips for Squash Blossom Plant
- These pruning secrets will transform your squash plant into a blooming machine—no matter the season.
- Timing Tip: In Step 1, when you're checking for suckers weekly, use a small hand mirror to peer into leaf axils. Suck...
- Tool Tip: For Step 2, keep a pair of pruners dedicated solely to your squash plants. Clean them with rubbing alcohol ...
Frequently asked questions
Got questions about growing and caring for your squash blossom plant? You're not alone! Here are some of the most common queries—plus quick, practical answers to keep those gorgeous blooms coming year-round.
When is the best time to plant squash blossom vines?
For warm climates, plant seeds or seedlings after the last frost when soil temperatures reach at least 60°F (15°C). In cooler zones, start indoors 2–3 weeks before the last frost, then transplant. Squash blossoms thrive in full sun (6+ hours daily), so choose a warm, sheltered spot.
How often should I water squash blossom plants?
Keep soil consistently moist but not soggy—aim for 1–2 inches of water per week. Water at the base (not leaves) to prevent fungal issues like powdery mildew. Drip irrigation or soaker hoses work best to avoid wetting foliage. Pro tip: Mulch around plants to retain moisture and reduce evaporation.
Can I prune squash blossom vines, and how?
Yes! Prune to encourage more blooms and prevent overcrowding. Cut back:
- Leggy vines—trim excess growth after the first 3–4 leaves to redirect energy to flowering.
- Dead or yellowing leaves—remove them to improve air circulation.
- Overly dense foliage—thin out stems to let sunlight reach all blossoms.
What pests or diseases should I watch for?
Squash blossom plants are prone to:
- Squash vine borers—look for wilting vines or sawdust-like frass. Handpick eggs or use row covers early.
- Powdery mildew—white powder on leaves? Improve airflow and spray with neem oil.
- Aphids/spider mites—blast off with water or use insecticidal soap.
What can I do if my squash blossoms aren’t opening?
Blossoms may fail to open due to stress, heat, or lack of pollinators. Try these fixes:
- Hand-pollinate by gently brushing stamens onto pistils with a paintbrush.
- Provide shade cloth if temps exceed 90°F (32°C).
- Check for underwatering or over-fertilizing—too much nitrogen = fewer blooms.
Wrapping up and next steps
Growing a squash blossom plant is a rewarding journey that brings beauty and abundance to your garden—especially when you master the three pruning secrets to keep those blooms coming year-round! 🌸 With the right tools, timing, and care, you’ll enjoy a flourishing vine packed with edible flowers and delicious fruits.
Ready to level up your gardening game? Start by implementing these pruning techniques today, and don’t forget to share your progress with fellow plant enthusiasts. Happy gardening—your future harvest (and Instagram-worthy blooms!) are waiting! 🌱✨