
Pruning
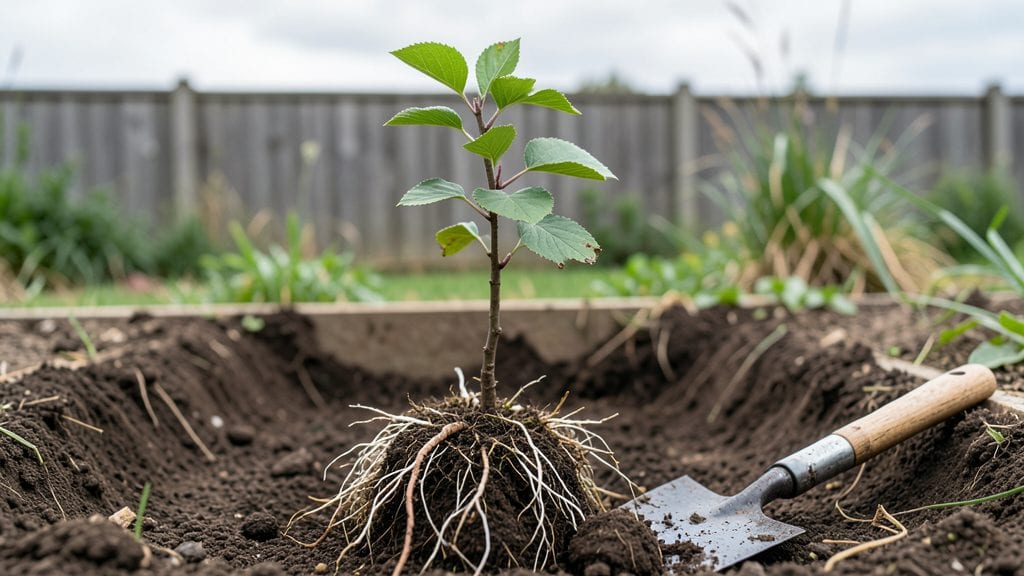
Planting trees in raised beds lets you grow full-sized specimens where soil might otherwise fail—if you nail the layered soil mix and root space. 🌱 I’ve watched my own raised-bed apple tree go from a spindly sapling to a fruit-bearing bush in just three years, and the secret isn’t the tree itself, but the way the soil holds moisture and drains like a champ.
The key starts with three layers: coarse gravel at the bottom for drainage, a mix of compost and native soil in the middle for nutrients, and a top layer of 50% compost to keep roots happy.
You’ll need dwarf or semi-dwarf varieties—they thrive in containers and raised beds, while full-size trees struggle with root competition. Spacing matters too: aim for 12–18 inches between small trees, or 3–4 feet for larger ones.
What you’ll end up with is a tree that grows strong, resists drought, and produces better than in-ground plants. The roots stay aerated, the soil stays loose, and you avoid the compaction that stunts growth in regular beds.
Plus, no digging, no weeds, and no waiting for the ground to thaw in spring.
This method works for fruit trees, ornamentals like Japanese maples, and even small citrus in warm climates. The only catch? Start small—bigger trees need deeper beds, and deeper beds mean heavier structures. But once it’s set up right, you’re basically cheating the system.
📚 In This Guide
- What you need
- Instructions
- Tips and common mistakes
- Wrapping up and next steps
What you need
- ● Raised bed kit or frame: Pre-cut cedar, redwood, or composite wood (4' x 8' x 12"–18" deep). Pro tip: Opt for untreated wood to avoid chemical leaching! 🌡️
- ● Soil layers (per 4' x 8' bed): 2–3 inches of coarse gravel or landscape fabric (drainage)
- ● 6–8 inches of carbon-rich material (composted leaves, straw, or wood chips)
- ● 6–8 inches of nitrogen-rich material (aged manure, compost)
- ● Top 4–6 inches of high-quality potting mix or garden soil
- ● Tree sapling(s): Choose dwarf or semi-dwarf varieties (e.g., apple, pear, or fruit trees) with bare roots or potted roots. Quantity: 1–3 per bed, depending on spacing needs.
- ● Tools: Garden shovel or spade
- ● Wheelbarrow (for soil transport)
- ● Measuring tape
- ● Gloves & knee pads
- ● Mulch: Wood chips or straw (2–3 inches) to retain moisture and suppress weeds.
- ● Tree supports: Stakes or cages for young, top-heavy trees.
- ● Drip irrigation kit: For consistent watering (especially in dry climates).
- ● Soil tester kit: To check pH and nutrient levels before planting.
- ● Erosion control fabric: If your bed is on a slope.
Step-by-Step instructions for raised bed tree planting
Here's how to create the perfect layered soil environment for strong, healthy trees.
🌱 Step 1: Choose and Prepare Your Raised Bed
Select a raised bed that's at least 2 feet wide and 12 inches deep—this gives roots room to spread without circling. I like beds with removable sides for easy soil layering. Place it in a spot with 6+ hours of sunlight and good air circulation to prevent fungal issues.
Line the bottom with cardboard or landscape fabric to block weeds and grass. This prevents competition for nutrients and moisture. If your bed has drainage holes, add a 2-inch layer of gravel first to improve water flow—trees hate soggy roots.
🪴 Step 2: Build the Perfect Soil Layers
Start with a 4-inch base layer of coarse sand or perlite to improve drainage. This prevents waterlogging, which can suffocate roots. Next, add a 6-inch layer of composted wood chips or leaf mold—this breaks down slowly and feeds roots over time.
Top with 6 inches of high-quality garden soil mixed with compost. I like to blend in a handful of mycorrhizal fungi here to boost root health. Keep the layers loose—compacted soil restricts growth. Test the moisture by squeezing a handful; it should hold together but not drip.
☀️ Step 3: Plant Trees at the Right Depth and Spacing
Dig a hole just wide enough to fit the root ball, but no deeper than the container's depth. Trees planted too deep suffocate because roots can't breathe. Gently remove the tree from its container and loosen any circling roots with your fingers—this encourages outward growth.
Place the tree in the hole so the top of the root ball sits 1 inch above soil level. Fill around the roots with your layered soil mix, pressing lightly to remove air pockets. Space trees 10-15 feet apart for mature size—crowding leads to weak, disease-prone growth.
💧 Step 4: Water Deeply and Mulch Properly
Water immediately after planting, soaking the soil until it drains from the bottom. A 5-gallon bucket per tree is a good starting point. Deep watering encourages roots to grow downward instead of staying shallow.
Spread 3-4 inches of wood chips or straw mulch around the base, keeping it 6 inches away from the trunk. Mulch retains moisture and regulates soil temperature. Check moisture weekly—trees in raised beds dry out faster than in-ground plants. Adjust watering so the top 2 inches of soil stay slightly moist.
✂️ Step 5: Monitor and Maintain for Long-Term Health
After planting, avoid fertilizing for 6-8 weeks—the disturbed roots need time to establish. Instead, focus on keeping the soil consistently moist. You'll know your trees are thriving when new leaves emerge within 4-6 weeks and stems stay firm to the touch.
Prune only to remove dead or crossing branches in the first year. Over-pruning stresses young trees. In spring, add a 1-inch layer of compost around the base to replenish nutrients. Raised beds dry out quickly in summer—water deeply twice weekly during heatwaves to prevent stress.
Tips & tricks for perfect raised bed tree planting
Between us, the devil is in the details when it comes to raised bed tree planting. These small but critical tricks will help you avoid common mistakes and give your trees the best possible start.
Soil Layering Strategy: The 4-inch sand layer in Step 2 isn't just about drainage—it's about creating an oxygen-rich environment for roots to thrive. I like to sift the coarse sand or perlite to remove any fine particles that could compact over time. For the 6-inch compost layer, use well-aged wood chips that have broken down but still retain structure—think of it as creating a sponge that holds moisture while allowing excess water to drain away. This layered approach mimics natural forest floors where roots grow vigorously.
Planting Depth Visual Cue: In Step 3, when positioning your tree so the root ball sits 1 inch above soil level, imagine the top of the root ball as the tree's "waistline." You want it to be just slightly above ground level—like someone wearing a belt that sits comfortably above their hips. This prevents the trunk from rotting while allowing roots to access moisture without being buried too deep. If you're unsure, mark the container's original soil line with a pencil before removing the tree.
Mulch Application Technique: The 3-4 inches of mulch in Step 4 serves two critical purposes: moisture retention and temperature regulation. I've learned the hard way that piling mulch against the trunk creates a perfect environment for rot. Instead, create a donut shape with mulch—start 6 inches away from the trunk and spread outward. This allows air to circulate around the base while still protecting the soil. For extra insurance, use straw mulch rather than wood chips near the trunk, as it breaks down more slowly and won't compact as easily.
Watering Consistency Hack: That 5-gallon bucket recommendation in Step 4 is a great starting point, but don't rely on it as your only guide. Instead, use the "squeeze test" mentioned in Step 2 as your watering benchmark. After your initial watering, check soil moisture weekly by squeezing a handful of soil from the top 2 inches. If it holds together but doesn't drip, you're golden. If it crumbles easily, it's time to water again. Remember, raised beds dry out faster than in-ground planting areas—consistency is more important than any specific schedule.
Pro Tips for Raised Bed Tree Planting
- Between us, the devil is in the details when it comes to raised bed tree planting.
- Soil Layering Strategy: The 4-inch sand layer in Step 2 isn't just about drainage—it's about creating an oxygen-rich environment for roots to thrive.
- Planting Depth Visual Cue: In Step 3, when positioning your tree so the root ball sits 1 inch above soil level, imagine the top of the root ball as the tree's "waistline."
Frequently asked questions
Got questions about raised bed tree planting?
You’re not alone! Here are answers to the most common concerns—so you can plant with confidence and watch your trees thrive.
Can I plant any tree in a raised bed, or are there size/root restrictions?
Not all trees suit raised beds! Opt for dwarf or columnar varieties (like Dwarf Fruit Trees or Japanese Maple) or smaller ornamental trees (e.g., Crape Myrtle). Avoid large-rooted species like oaks or willows—their roots will outgrow the space. Always check the mature height/width before planting!
What’s the best time of year to plant trees in a raised bed?
Spring (after last frost) or early fall (4–6 weeks before first frost) are ideal. Avoid summer heat or winter cold, which stress young roots. If planting in containers, you can extend the window slightly, but soil temps matter most—aim for 50–70°F for optimal root growth.
How often should I water a tree in a raised bed, and does it dry out faster?
Yes, raised beds dry out faster! Water deeply 2–3 times per week (more in extreme heat) to encourage deep root growth. Use a soaker hose or drip irrigation to avoid surface evaporation. Mulch heavily (3–4 inches) to retain moisture and regulate soil temp.
What if my tree isn’t growing well in a raised bed? Troubleshooting tips?
Check these first:
- Soil mix: Is it well-draining? Amend with compost or perlite if compacted.
- Sunlight: Are leaves yellowing? It may need more (or less) light.
- Watering: Wilting or crispy edges? Adjust frequency or mulch.
- Pests: Inspect for gnawed leaves or sawdust-like frass (sign of borers).
Can I use a raised bed for fruit trees, or is it better for ornamentals?
Raised beds are great for fruit trees like dwarf apple, peach, or citrus (in warm climates). The controlled soil prevents rot, improves drainage, and makes harvesting easier. Just ensure the bed is at least 2–3 feet deep for root expansion and add organic matter annually for fertility.
Wrapping up and next steps
Planting trees in raised beds unlocks a world of possibilities for healthier roots, better drainage, and stunning vertical gardens! 🌱 By layering soil thoughtfully—balancing nutrients, aeration, and moisture—you’re giving your trees the ideal foundation to thrive.
Whether you’re a seasoned gardener or a curious beginner, this method makes tree care accessible and rewarding.
Now that you’re armed with soil secrets, roll up your sleeves and start digging! Ready to transform your space? Grab your tools, pick your perfect tree, and let the roots run wild—your future canopy starts with just one shovel’s depth. 🌳✨