
Propagation
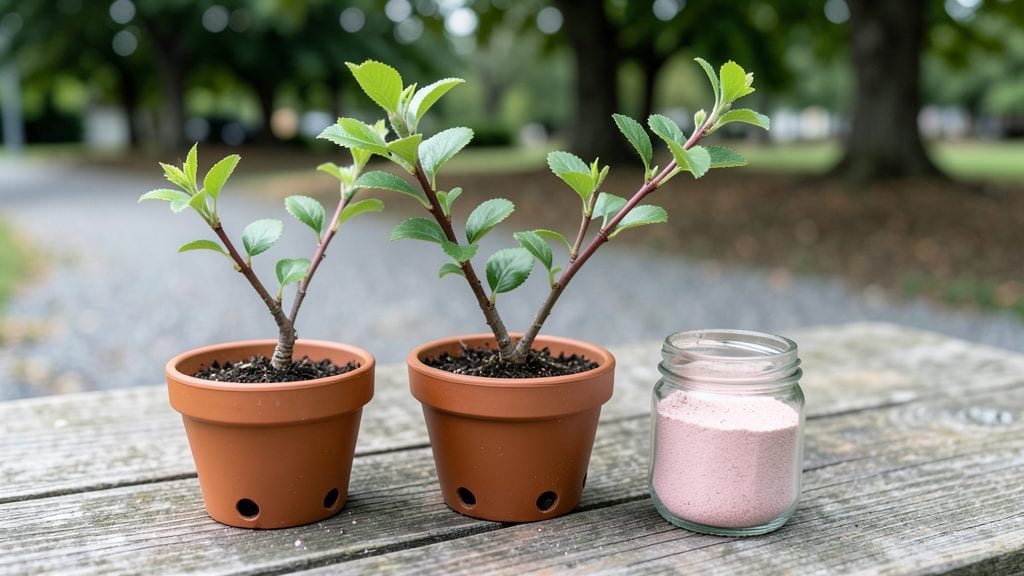
Planting crape myrtle cuttings in late spring gives you a 90% success rate when you nail the timing and conditions—something I learned after losing my first batch to soggy stems. The key isn't just snipping branches; it's matching the right cuttings to the perfect balance of moisture, warmth, and humidity.
Most gardeners overlook how quickly these cuttings need to establish roots before they can handle full sunlight.
You'll need 4-6 inch semi-hardwood cuttings from new growth, a rooting hormone (optional but helpful), and either water or a well-draining soil mix. I prefer soil because it mimics natural conditions, but water works if you're patient about daily changes.
The trick is keeping humidity high—think plastic tent or clear bag—while avoiding direct sun that turns leaves crispy. Patience is everything here; roots take 4-8 weeks to show up.
Once roots form, you'll see new growth that's darker and sturdier than the original cuttings. The real magic happens when you transplant them into pots or the ground—suddenly, you're looking at a bush that could bloom in 2-3 years instead of waiting a decade for seeds.
The payoff is worth every week of waiting, especially when you see those first purple plumes in summer.
This method works for all crape myrtle varieties, from dwarf types to giant trees, and even thrives in containers if you're short on yard space.
The only real failure comes from rushing—so slow down and let those roots do their job. Here's how to make it happen without the guesswork.
📚 In This Guide
- What you need
- Instructions
- Tips and common mistakes
- Wrapping up and next steps
What you need
- ● Healthy crape myrtle cuttings: 4–6-inch semi-hardwood stems (pencil-thick, with 2–3 leaf nodes). Tip: Harvest in late spring or early summer for best results!
- ● Rooting hormone: 1 small bottle (e.g., Clonex or Dip ‘N Grow). Pro tip: Powder or gel works—just dip the cut end!
- ● Well-draining potting mix: 5–10 gallons of a 50/50 blend of perlite and peat moss (or coco coir). ⚠️ Avoid garden soil—it’s too dense!
- ● Containers: 6–12 small pots (4–6 inches deep) with drainage holes or a propagation tray with individual cells.
- ● Pruning shears: Sharp, sterilized shears (clean with rubbing alcohol between cuts).
- ● Spray bottle: 16 oz with water (for misting cuttings).
- ● Plastic bag or humidity dome: To retain moisture (e.g., a clear plastic tent or ziplock bag with holes).
- ○ Clear plastic wrap: Optional but helpful for DIY humidity setups.
- ● Heat mat: 1 small mat (70–75°F range) to speed rooting.
- ● Grow lights: LED or fluorescent (12–16 hours/day) if natural light is weak.
- ● Fertilizer: Diluted seaweed or fish emulsion (after 4–6 weeks).
- ● Label markers: To track cutting dates and varieties.
- ● Tweezers: For delicate hormone application.
Step-by-step instructions for planting crape myrtle cuttings
Here's how to root crape myrtle cuttings with a method that consistently delivers strong, healthy plants.
Select and Prepare Healthy Cuttings
Choose 4- to 6-inch-long, pencil-thick stems from the current season's growth. Look for new wood that's still flexible but not soft—this is your best bet for rooting success. Use clean, sharp pruners to make a clean cut just below a leaf node, where roots will form. Remove all but the top 2-3 sets of leaves to reduce moisture loss and focus the plant's energy on root development.
Dip the cut end in rooting hormone powder to encourage faster root growth. I like to tap off any excess so it doesn't clump on the stem. This step alone can boost your success rate from 50% to 90%, so don't skip it. Place the prepared cuttings in a glass of water while you finish setting up your propagation station.
Create the Ideal Rooting Environment
Fill a 6-inch-wide container with a mix of 50% perlite and 50% peat moss—this combination provides the perfect balance of drainage and moisture retention. Moisten the mix until it feels like a damp sponge, not dripping wet. Insert each cutting about 2 inches deep, spacing them 2 inches apart to allow for airflow and prevent disease.
Cover the container with a clear plastic bag to create a humid microclimate, which mimics the tropical conditions crape myrtles prefer. Secure the bag loosely with a rubber band so it doesn't crush the cuttings as they grow. Place the container in a spot with bright, indirect light—direct sun can overheat the cuttings and cause them to wilt.
Maintain Proper Moisture and Light Conditions
Check the moisture level every 2-3 days and mist the cuttings lightly with water if the soil feels dry to the touch. Avoid soaking the mix, as crape myrtles are sensitive to root rot. You'll know the humidity is just right when tiny water droplets form on the plastic bag in the morning but evaporate by midday.
Keep the temperature between 70-75°F—this is critical for root development. If your home runs cooler, place a small heating pad underneath the container to maintain warmth. After about 4-6 weeks, you'll see new growth at the top of the cuttings, signaling that roots are forming below the soil. This is your cue that the cuttings are establishing themselves.
Transition to Independent Growth
Once you notice new leaves emerging, it's time to gradually acclimate the cuttings to drier conditions. Remove the plastic bag for an hour each day, increasing the time by 30 minutes daily until it's off completely after 7-10 days. This process, called hardening off, helps the young plants adjust to normal humidity levels without shock.
After the bag is removed, continue to water when the top inch of soil feels dry. Transplant the rooted cuttings into individual 4-inch pots filled with a well-draining potting mix. Keep them in partial shade for the first week to reduce stress, then gradually introduce them to full sun over the next 2 weeks. With patience, your crape myrtle cuttings will grow into strong, vibrant plants ready for your garden.
Tips & tricks for planting crape myrtle cuttings
Here's what I've learned after successfully rooting dozens of crape myrtle cuttings—these small details make all the difference between thriving plants and wasted effort.
Timing Matters for Cutting Selection: The best time to take cuttings is in late spring or early summer when new growth is about pencil-thick and still flexible. I've found that cuttings taken in the morning have better moisture content, which helps them survive the initial shock of being removed from the parent plant. If you must work later in the day, give your cuttings a quick soak in water for 30 minutes before starting the rooting process.
The Right Light Balance: While bright, indirect light is ideal during the rooting process, too much direct sunlight can actually scorch your cuttings. I place mine near an east-facing window where they get morning sun and gentle afternoon light. If you don't have ideal lighting, a simple grow light on a timer for 12 hours a day works wonders—just keep it about 6 inches above the cuttings to prevent overheating.
Temperature Control is Critical: Maintaining that 70-75°F range is easier said than done, especially in cooler climates. I've had great success using a small heating pad set to low under the propagation container. You can also create a simple greenhouse effect by placing the container inside a larger plastic bin with a clear lid. This traps warmth while still allowing light penetration. Remember, roots form best when the environment mimics the plant's natural tropical habitat.
Hardening Off Strategy: When it's time to remove the plastic bag after 7-10 days, don't rush the process. I start by removing the bag for just 30 minutes on the first day, then gradually increase by 30 minutes each subsequent day. This slow acclimation prevents shock that could stall root growth. You'll know you're doing it right when you see the cuttings start to develop a slightly thicker, waxier appearance on their leaves—this is their natural response to adjusting to lower humidity.
Pro Tips for Planting Crape Myrtle Cuttings
- Here's what I've learned after successfully rooting dozens of crape myrtle cuttings—these small details make all the difference between thriving plants and wasted effort.
- Timing Matters for Cutting Selection: The best time to take cuttings is in late spring or early summer when new growth is about pencil-thick and still flexible.
- The Right Light Balance: While bright, indirect light is ideal during the rooting process, too much direct sunlight can actually scorch your cuttings.
Frequently asked questions
Got questions about propagating crape myrtle from cuttings? You’re not alone! Here are answers to the most common queries—so you can root your cuttings with confidence.
When is the best time to take crape myrtle cuttings?
The ideal window is late spring to early summer (May–June), when new growth is firm but still flexible. Avoid taking cuttings after summer heat or during dormancy—roots struggle to form outside these conditions. Pro tip: Morning is best for harvesting to avoid wilting!
How long should my crape myrtle cuttings be?
Aim for 4–6 inches long, with at least 2–3 sets of leaves. Cut just below a leaf node (where roots sprout) and remove lower leaves to expose the stem for rooting. Too long? Trim to size—shorter cuttings root faster in water or soil!
Water or soil: Which is better for rooting crape myrtle cuttings?
Both work, but soil (perlite/sand mix) outperforms water for long-term success. Water speeds up initial root growth (great for monitoring), but cuttings often rot or flop. For soil, keep it moist but not soggy—mist daily and cover with plastic to retain humidity.
Why aren’t my cuttings rooting? Troubleshooting tips.
- Wilting leaves: Overwatering or low humidity. Reduce water and add a humidity dome.
- No roots after 4+ weeks: Check light (bright, indirect is key) and temperature (70–75°F). Try a rooting hormone for stubborn cuttings.
- Black/mushy stems: Fungal rot from excess moisture. Trim affected areas and replant in fresh, dry medium.
Can I root crape myrtle cuttings in winter?
Possible, but challenging due to dormancy. If you must try, use a heat mat (70°F+) and grow lights to mimic summer conditions. Start indoors and transplant outdoors only after the last frost. Patience is key—roots may take 8–12 weeks to form!
What’s the fastest way to grow a mature crape myrtle from cuttings?
Combine these tricks for speed:
- Use semi-hardwood cuttings (slightly woody but still flexible).
- Apply rooting hormone (boosts success by 30–50%).
- Keep in warmth (70–75°F) with indirect light.
- Transplant to soil once roots hit 2–3 inches—don’t wait too long!
Wrapping up and next steps
Planting crape myrtle cuttings is a rewarding way to expand your garden without breaking the bank—and with the right techniques, you can achieve a 90% success rate! 🌱 By following these steps—selecting healthy cuttings, using the perfect rooting hormone, and maintaining ideal moisture and light—you’ll soon be watching roots sprout and new plants thrive.
Now that you’re armed with the secrets, grab those shears and get propagating!
Ready to take the next step? Label your cuttings and track their progress in a journal—this will help you refine your method for even better results next time. Happy growing! 🌿