
Companion Plants
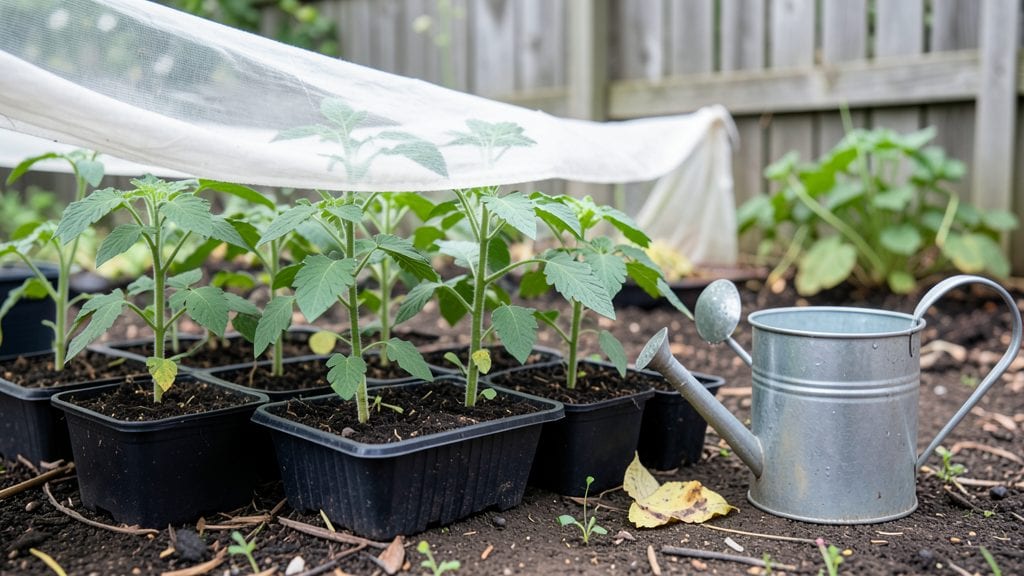
Hardening off plants is the secret weapon that turns delicate seedlings into tough outdoor survivors. 🌱 I learned this the hard way when my first batch of tomato plants wilted within hours of transplanting—until I discovered this gradual acclimation process.
The goal isn't to rush plants into the cold but to let them adjust over 7-14 days so they can handle wind, sun, and temperature swings without shock.
You only need a few things: your seedlings, a sheltered outdoor spot, and patience. Start by moving plants outside for just 1-2 hours on a mild day, then gradually increase their time outdoors while protecting them from harsh afternoon sun.
Herbs like basil and parsley handle this process faster than heat-loving tomatoes, but the principle stays the same—slow and steady wins every time.
By the end of the hardening process, your plants will look stronger, greener, and ready to thrive in their permanent spot. You'll see them stretching toward the light, developing thicker stems, and even flowering earlier than plants that went straight into the ground.
The payoff? A 90%+ transplant success rate instead of the usual gamble.
Works for vegetables, flowers, and even tender perennials—just adjust the timeline based on your climate. Here's exactly how to do it without stressing your plants (or yourself).
📚 In This Guide
- What you need
- Instructions
- Tips and common mistakes
- Wrapping up and next steps
What you need
- ● Healthy seedlings or young plants – Choose varieties suited for your climate zone (e.g., kale, spinach, or cold-hardy flowers like pansies). Quantity: As many as you plan to transplant.
- ● Grow lights or a shaded outdoor space – A partial-sun area (4–6 hours of sunlight) or a grow light on a timer (12–16 hours/day) for indoor hardening.
- ● Hardening-off tray or container – A shallow, well-draining tray (e.g., 6"–12" deep) with drainage holes. Size: Large enough to hold plants 2–3 inches apart.
- ● Potting mix or seed-starting soil – Lightweight, sterile mix (avoid garden soil—it’s too dense!). Quantity: Enough to fill your tray 2–3 inches deep.
- ● Watering can or spray bottle – A gentle spray nozzle (to avoid disturbing plants) or a watering can with a fine rose.
- ● Frost cloth or shade cloth (30–50% shade) – Breathable fabric to protect plants from harsh winds or sudden cold snaps. Size: Large enough to cover your hardening-off tray.
- ● Plant labels & markers – Waterproof tags to track plant names and hardening dates.
- ○ Gloves (optional) – Nitrile or gardening gloves to protect hands from soil or prickly stems.
- ● Sturdy, disease-free plants – Ensure seedlings have 2–4 sets of true leaves and no signs of pests or wilting.
- ● Consistent outdoor temperatures – Aim for 50–60°F (10–15°C) daytime temps and no frost in the forecast for at least 5–7 days.
- ● Gradual exposure plan – Commit to 7–14 days of daily hardening (weather-dependent!).
- ● Sun protection (if needed) – If your climate has intense sun, use shade cloth during the first few days to prevent shock.
Instructions for hardening off plants in 3 simple steps
Here's how to prepare seedlings for outdoor life without shock or setbacks.
🌱 Step 1: Begin with Gradual Exposure
Start by placing hardened-off plants in a sheltered spot—like under a patio awning or against a north-facing wall—where they receive 3-4 hours of indirect sunlight on the first day. This mimics natural conditions and prevents sudden stress from full sun exposure. I like to use a small shade cloth (if available) to filter light intensity during the initial phase.
Watch for leaves that perk up rather than wilt—this is your signal the plant is adjusting. If you notice leaves curling or yellowing, move the plant back indoors for another day. The goal is to let the plant acclimate to outdoor temperatures while building resilience. Avoid windy spots; even gentle breezes can stress tender seedlings.
☀️ Step 2: Increase Sun and Wind Daily
Each subsequent day, extend the outdoor time by 1-2 hours, gradually moving the plants toward full sun exposure over 7-10 days. By day 3, they should tolerate 6-8 hours of sunlight, and by day 5, they can handle full sun if your climate allows. I often place them in a spot where they get morning sun and afternoon shade to ease the transition.
Introduce wind exposure slowly—start with a protected corner and progress to slightly windier areas. You'll know they're ready for full outdoor conditions when their stems stiffen and leaves develop a deeper green hue. If a plant wilts dramatically, it’s not hardened enough; bring it back inside and slow the process.
⏰ Step 3: Finish with Overnight Testing
By the final 2-3 days, leave the plants outside overnight in a sheltered spot where temperatures won’t drop below 40°F. This final test ensures they can handle the full range of outdoor conditions, including cooler nights. Check for wilting or blackened leaves—these are signs the plant isn’t fully hardened and needs more time.
Once they survive the overnight test without issues, they’re ready for permanent outdoor planting. Water them deeply the day before transplanting to reduce shock. I always transplant in the late afternoon when temperatures are cooler, giving plants a head start on recovery. Avoid moving them during heatwaves or after heavy rain, as both conditions stress plants significantly.
Tips & tricks for perfectly hardened off plants
These simple yet critical adjustments will help your seedlings thrive during the hardening process.
Sunlight Gradation: The 3-4 hours of indirect sunlight on day one is non-negotiable—it's the plant's first taste of outdoor life. I've found that using a lightweight shade cloth (even if just a piece of cheesecloth) during this initial phase prevents sunburn while still allowing light penetration. This gradual introduction mimics natural shade conditions and prevents the shock of full sun exposure.
Environmental Monitoring: Pay close attention to temperature fluctuations during your 7-10 day process. While you're building up to full sun, watch for sudden temperature drops—especially when moving plants from indoor warmth to outdoor conditions. I keep a small thermometer nearby to ensure we're not dropping below 40°F during overnight testing, as this can cause irreversible damage to tender seedlings.
Wind Resistance Training: The slow introduction of wind exposure in Step 2 is where many gardeners make mistakes. Start with completely sheltered spots and only progress to slightly windier areas when you notice stems beginning to stiffen. I've seen beginners rush this process and end up with plants that look like they've been through a hurricane—don't let that be you!
Transplant Timing: That late afternoon transplanting tip in Step 3 is golden. The cooler evening temperatures give plants a better chance to establish their root systems without immediate stress. I've had the best success transplanting between 4-6 PM, giving plants several hours of recovery before nightfall. This simple timing adjustment can make the difference between thriving plants and those that struggle in their new home.
Pro Tips for Hardened Off Plants
- These simple yet critical adjustments will help your seedlings thrive during the hardening process.
- Sunlight Gradation: The 3-4 hours of indirect sunlight on day one is non-negotiable—it's the plant's first taste of outdoor life.
- Environmental Monitoring: Pay close attention to temperature fluctuations during your 7-10 day process.
Frequently asked questions
Got questions about hardening off plants? You’re not alone! Here are the most common concerns—and straightforward answers—to help you prep your seedlings like a pro.
What does "hardened off" mean, and why is it necessary?
Hardening off is the process of gradually exposing your tender greenhouse or indoor seedlings to outdoor conditions (wind, sun, temperature shifts) over 7–14 days. This toughens them up so they don’t get shocked when planted outside. Think of it like sunbathing after weeks of shade—ease in or risk a painful burn!
How long does the hardening-off process take?
The timeline depends on your climate, but a 7–14 day window is standard. Start with just 1–2 hours of outdoor time on day one, then add 1–2 hours daily. Pro tip: If frost is forecasted, speed up the process or delay planting until after the last frost date!
Can I harden off plants too quickly?
Yes! Rushing the process can stress seedlings, leading to stunted growth or even death. Signs of over-hardening include wilting, yellowing leaves, or growth stops. If you see these, move them back indoors for a day and slow down. Patience pays off—your plants will thank you!
What if my seedlings are already leggy or weak?
Leggy or weak seedlings can still be hardened off, but you’ll need to extend the timeline (up to 2–3 weeks) and provide extra care. Use shade cloth for the first few days, water consistently, and avoid direct midday sun. Bonus: A light fertilizer boost during hardening can help them recover!
What should I do if rain or wind is forecasted during hardening?
Bad weather isn’t a deal-breaker! On windy days, place seedlings in a sheltered spot (like near a fence or under a patio). For rain, ensure they’re in well-draining soil to prevent waterlogging. No need to stress—just adapt and keep them safe!
Can I harden off plants indoors without going outside?
Not ideally. While you can mimic outdoor conditions with fans (for wind) and grow lights (for sun), actual outdoor exposure is critical for temperature and light spectrum changes. If outdoor space is limited, try a balcony, garage with open doors, or even a sunny windowsill with gradual outdoor trips.
Wrapping up and next steps
Mastering the art of hardening off plants ensures your cold-hardy transplants thrive—no matter how chilly the season gets! 🌱 With the right tools, patience, and these three simple steps, you’re well on your way to a flourishing garden.
Remember, consistency is key, and soon your plants will be ready to face the elements like pros.
Now that you’re equipped with the know-how, take the next step—plant them with confidence! Whether you’re prepping for spring or fall, your garden’s future looks bright. Happy gardening! 🌿