Pruning
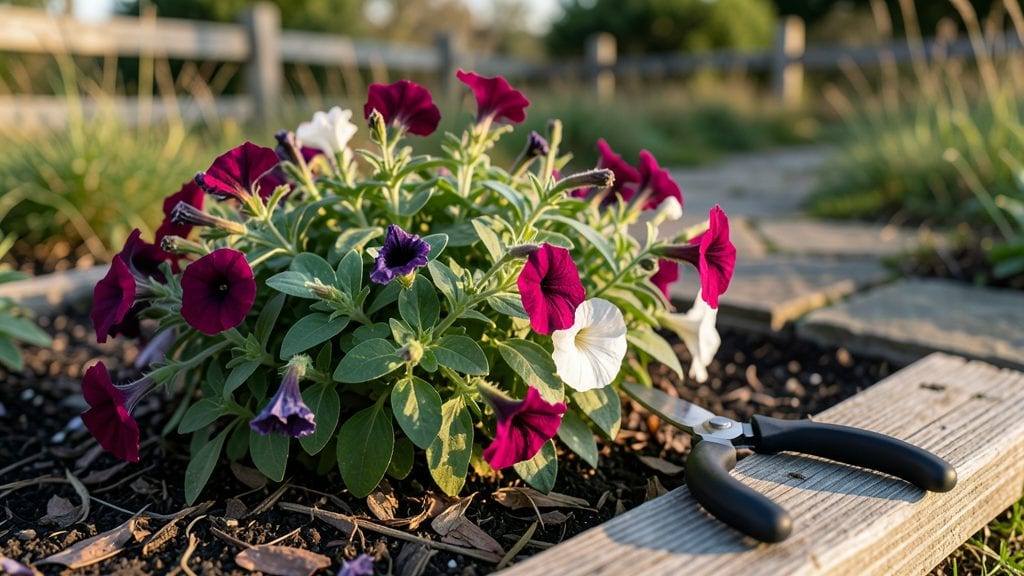
Deadheading plants in October isn’t just about tidying up—it’s the secret to stronger roots and next year’s blooms. 🌿 I learned this the hard way when my fall mums faded early because I waited too long.
The right cuts now mean more energy stored for winter and fewer surprises when spring arrives.
You’ll need sharp pruners, gloves, and a clear day when temps hover above 40°F—cold snaps make plants sluggish. Focus on perennials like coneflowers, daylilies, and ornamental grasses, plus hardy annuals like snapdragons.
Roses? Give them a light trim to clean up but avoid heavy cuts that stress them before dormancy.
What you’ll get is plants that look neater now and bounce back faster in spring. The key is cutting just above a leaf node or bud, never leaving stubs. This simple step turns October’s cleanup into next year’s foundation—no fancy tools, just sharp cuts and timing.
Works for zones 5-9, though in colder areas, wait until first frost for tender perennials. Here’s how to do it right without overcomplicating it.
📚 In This Guide
- What you need
- Instructions
- Tips and common mistakes
- Wrapping up and next steps
What you need
- ● Pruning shears or bypass pruners: Choose a pair with sharp, bypass blades (not anvil) for clean cuts. 1 pair is all you need.
- ○ Hand pruners (for smaller plants): Ideal for delicate stems (e.g., roses, annuals). 1 pair (optional but handy).
- ● Garden gloves: Wear nitrile-coated or leather gloves (size medium/large) to protect against thorns and dirt. 1 pair.
- ● Disposable pruning bags or bucket: Collect spent blooms and debris. A 5-gallon bucket or mesh bag works well.
- ○ Sharpie marker (optional): Label pruning tools if you share them with others.
- ● Hose with nozzle or watering can: Lightly mist plants before pruning to reduce stress.
- ● Compost bin or bin liner: For easy disposal of plant waste (avoid composting diseased material).
- ● Knee pads or stool: For comfort when working close to the ground.
- ● Rake or leaf blower: Clear fallen leaves/debris after deadheading to prevent fungal growth.
- ● Check the weather forecast—deadhead on a dry, overcast day to avoid shocking plants.
- ● Review your plant varieties—some (like perennials) benefit from partial deadheading, while others (e.g., ornamental grasses) should be left alone.
- ● Have a sharpener on hand to maintain tool edges (dull blades crush stems, inviting disease).
Step-by-step guide to deadheading plants in October
Here’s how to keep your garden tidy and healthy as temperatures drop—without cutting back too soon.
🌿 Step 1: Identify Which Plants Need Deadheading
Not every plant benefits from October deadheading. Focus on annuals, tender perennials, and flowering shrubs that have finished blooming for the season. Roses, zinnias, and marigolds are classic candidates, but avoid pruning woody perennials like lavender or salvia—they need their stems for winter protection.
Look for spent blooms with dry, brown centers or fading petals. These signal the plant has redirected energy to seed production, meaning it’s time to trim. I always check the plant tag or my notes first—some varieties bloom sporadically, and cutting too early can stunt next year’s flowers.
✂️ Step 2: Use the Right Tools and Technique
Grab your sharp, clean pruners—dull blades tear stems, inviting disease. For larger stems, use bypass pruners; for delicate flowers, hand-pruners or even clean scissors work. Always disinfect tools with rubbing alcohol between cuts to prevent spreading fungal spores.
Cut just above a leaf node or bud, at a 45-degree angle. This encourages new growth from the right spot. Avoid leaving stubs—those trap moisture and rot. If you’re dealing with leggy stems, trim back to a stronger branch or the plant’s natural shape. Think of it like giving the plant a fresh haircut for winter.
🌱 Step 3: Deadhead Strategically for Winter Prep
For annuals, cut back to the base or the first set of healthy leaves. This removes energy sinks (like seed heads) and keeps plants looking neat. For perennials like coneflowers or black-eyed Susans, trim spent blooms but leave the foliage—it protects the crown from freezing temperatures.
I know it seems counterintuitive, but resist the urge to over-prune. October’s goal isn’t to encourage new growth (that’s a summer task) but to tidy up and reduce winter maintenance. Focus on removing only the most obvious deadheads. You’ll see the difference in spring when your plants bounce back without stress.
💧 Step 4: Clean Up and Protect Remaining Foliage
After deadheading, rake up fallen petals and debris to prevent pests and diseases from overwintering. For tender perennials, add a 2-inch layer of mulch around the base to insulate roots. Avoid piling mulch against stems—this traps moisture and causes rot.
If you’re dealing with woody plants or shrubs, leave their stems intact. The natural structure acts as a windbreak and protects delicate buds. Water deeply one last time before frost if your area hasn’t had recent rain—hydrated plants handle winter better than thirsty ones.
⏰ Step 5: Plan for Next Year’s Blooms
Take a quick inventory of what thrived and what didn’t. Note which plants needed more or less deadheading, and adjust your approach for spring. Some plants, like dahlias, benefit from a full cleanup in fall, while others, like hellebores, should be left alone until spring.
This is also the perfect time to sketch a rough map of your garden layout. Mark where you’ll replant perennials or add new annuals next season. A little planning now means less guesswork in spring—and fewer deadheaded blooms come October!
Tips & tricks for perfect late-season garden maintenance
Here's what nobody tells you about making October garden cleanup actually work for your plants.
Timing is Everything: October deadheading isn't about encouraging new growth—it's about preparing plants for winter dormancy. The key is to work just before the first hard frost, usually 2-4 weeks before your area's average first freeze date. Check your local frost calendar and aim for that window. If you're in a mild climate, you might have a few extra weeks, but don't wait until November—cold weather slows plant recovery.
Tool Prep Matters: Beyond just having sharp pruners, take 5 minutes to properly prep your tools before you start. Soak pruners in a 1:9 ratio of bleach to water for 10 minutes between plants to prevent cross-contamination of diseases. I also keep a small spray bottle of rubbing alcohol handy to quickly disinfect between cuts. This simple step prevents fungal spores from spreading between healthy and already compromised plants—something I learned the hard way after losing several roses to black spot.
Strategic Cutting Technique: When you're making those 45-degree cuts in Step 2, focus on cutting just above a leaf node or outward-facing bud. This creates a natural growth pattern that won't interfere with the plant's winter structure. For woody stems, make your cuts at the branch collar—the swollen area where the branch meets the trunk. This might seem like overkill, but it makes a huge difference in how well plants recover in spring. Think of it as giving your plants a clean, professional haircut rather than a rough trim.
Mulch Depth Wisdom: That 2-inch layer of mulch mentioned in Step 4 is crucial, but don't let it pile up against stems. Instead, create a donut shape around the base, leaving 2-3 inches of space between the mulch and plant stems. This prevents moisture buildup that leads to rot. For extra protection, top your mulch with a light layer of straw—it insulates better than plain mulch and breaks down slowly. This is especially important for tender perennials that might not survive hard freezes without this extra insulation.
Pro Tips for Deadheading Plants October
- Here's what nobody tells you about making October garden cleanup actually work for your plants.
- Timing is Everything: October deadheading isn't about encouraging new growth—it's about preparing plants for winter dormancy.
- Tool Prep Matters: Beyond just having sharp pruners, take 5 minutes to properly prep your tools before you start.
Frequently asked questions
Why is deadheading important in October?
Deadheading in October redirects a plant’s energy from seed production to root and stem growth, helping it store nutrients for winter. This boosts hardiness, reduces disease risk (like fungal spores on spent blooms), and often triggers a second flush of flowers in late-season varieties like astilbe or sedum. Think of it as a “winter prep” for your plants!
Is it too late to deadhead in October?
Not at all! October is a great time for most perennials, shrubs, and even some annuals (like zinnia or cosmos), as long as the ground isn’t frozen. Avoid deadheading evergreens (e.g., boxwood) or late-blooming perennials (e.g., chrysanthemums), which rely on seed heads for winter interest or next year’s growth.
What’s the best way to deadhead woody shrubs like roses?
For roses and other woody plants, trim just above a healthy outward-facing bud (the “5-leaflet” or “leaf scar” method). Use clean, sharp pruners to avoid tearing bark. Skip deadheading hybrid teas or grandifloras in October—they’re semi-hardy and need winter protection. Focus on knock-out roses or climbing roses for late-season blooms.
Can I compost deadheaded flowers?
Freshly deadheaded blooms (disease-free) make excellent compost or mulch. If you notice black spots or powdery mildew on stems, toss them in the trash or burn them (if safe) to prevent spreading pathogens. For heavy infestations, soak cuttings in a 1:10 bleach-water solution for 10 minutes before composting.
What if my plant keeps blooming after deadheading?
Some plants (like impatiens or geraniums) are self-cleaning—they naturally drop spent blooms. Others, such as petunias or begonias, may rebloom if given consistent care (sun, water, fertilizer). For perennials, stop deadheading in late September to let seed heads provide winter interest or food for birds!
Wrapping up and next steps
Deadheading plants in October isn’t just about tidying up—it’s your secret weapon for a healthier, more vibrant garden next spring.
By removing spent blooms and preparing for winter, you’re giving your plants the care they need to thrive when warmer weather returns. Your efforts now will pay off in bold, beautiful growth later!
Ready to take your garden to the next level? Start with just one plant this weekend—grab your pruners, follow the steps, and watch your garden transform! 🌱✨