Vegetables
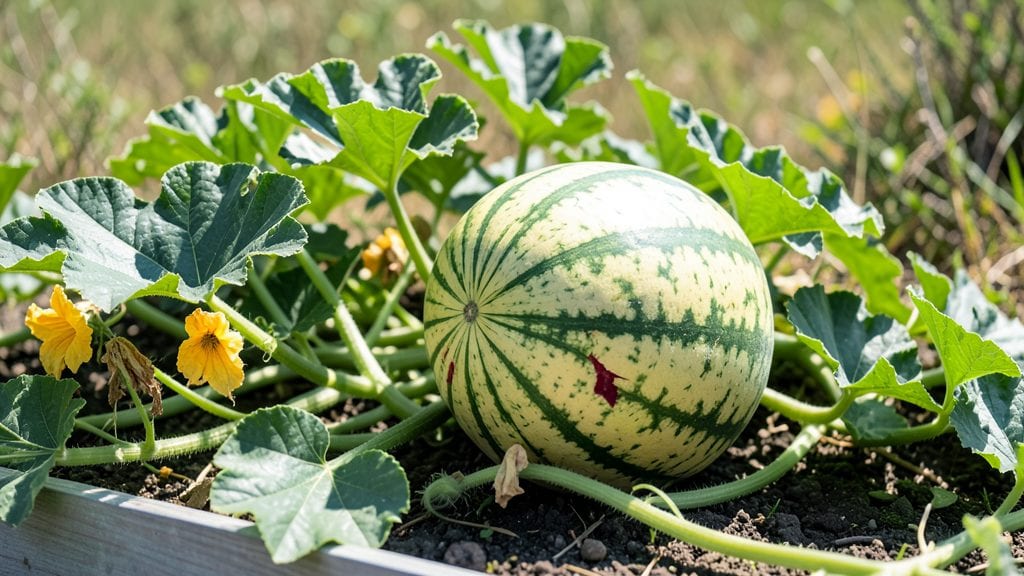
The crimson watermelon plant delivers sweet, deep-red flesh and a tough skin that fights off common diseases—exactly what I needed after my last garden’s melons cracked before ripening. 🌱 This variety isn’t just pretty; it’s a reliable performer that thrives even when conditions aren’t perfect.
The secret lies in its roots (literally)—healthy soil and consistent moisture set the stage for fruit that’s both beautiful and burstingly flavorful.
You’ll need a sunny spot with at least 6-8 hours of light, well-draining soil, and plenty of space—these vines spread like they’re racing for a prize.
I’ve found that mulching around the base keeps moisture steady and weeds at bay, while trellising the vines (if space is tight) saves room and improves airflow. The payoff? Watermelons that stay firm, resist pests, and develop that signature crimson blush when they’re ready.
By mid-summer, you’ll be harvesting watermelons with vibrant red flesh that’s sweeter than most store-bought varieties. The thick rind resists cracking, and the seeds stay plump—perfect for snacking or saving for next year.
Even beginners can nail this; the key is patience and a little extra care during flowering. Trust me, the first bite is worth every effort.
Works in zones 4-10, though warmer climates produce bigger yields. Start seeds indoors 4-6 weeks before last frost, or transplant young plants after soil warms to 70°F. If your summer gets humid, watch for powdery mildew and treat early with neem oil.
The rest? Just let nature do its thing—these plants practically grow themselves once they’re settled in.
📚 In This Guide
- What you need
- Instructions
- Tips and common mistakes
- Wrapping up and next steps
What you need
- ● Seeds: Crimson watermelon seeds (disease-resistant variety, like 'Crimson Sweet' or 'Crimson Tide'). Start with 4-6 seeds per plant or 10-12 seeds if planting multiple.
- ● Growing Containers or Garden Bed: For containers: 5-gallon pots or larger (watermelons need space!)
- ● For in-ground: A sunny, well-draining spot with at least 8-10 hours of sunlight daily.
- ● Potting Soil: High-quality, well-draining potting mix (avoid heavy clay soil). Add compost or aged manure for nutrients.
- ● Fertilizer: Balanced fertilizer (10-10-10) for seedlings.
- ● Low-nitrogen, high-potassium fertilizer (5-10-10) when flowers appear.
- ● Watering Can or Hose: With a gentle spray nozzle to avoid damaging seedlings.
- ● Mulch: Straw or black plastic mulch to retain moisture and suppress weeds.
- ○ Trellis or Support (Optional): For varieties with smaller vines, a lightweight trellis can help manage growth.
- ● Grow Lights: If starting indoors, LED grow lights for 12-16 hours/day.
- ● Seedling Heat Mat: To speed up germination in cooler climates.
- ● Plant Tags: To track varieties and watering schedules.
- ● Pruning Shears: For trimming excess vines or yellow leaves.
- ● Pest Control: Neem oil or insecticidal soap (for aphids or beetles).
Step-by-Step guide to growing crimson watermelon plants
This vibrant variety thrives with the right balance of warmth, space, and patience—here's how to coax those deep-red fruits from seed.
🌱 Step 1: Start Seeds Indoors 4-6 Weeks Before Last Frost
Watermelon seeds need warmth to germinate, so begin indoors using the 4-6 seed packets with the 2-inch deep seed-starting trays. Fill each cell with moistened seed-starting mix, pressing lightly to remove air pockets. Crimson watermelons germinate best at 80-90°F, so place the tray on a seedling heat mat or in a sunny windowsill—south-facing gets the job done.
Sow 2 seeds per cell at a depth of ½ inch, just deep enough to cover them lightly. Mist the surface with a spray bottle to keep moisture even without disturbing the seeds. Cover the tray with plastic wrap to trap humidity, then check daily for condensation. Remove the wrap as soon as sprouts appear—usually within 7-10 days—to prevent damping-off. You’ll know germination worked when the first cotyledons (those tiny round leaves) push through the soil.
☀️ Step 2: Harden Off and Transplant After Warm Soil
Two weeks before your last frost date, move seedlings outside for 1-2 hours daily, gradually increasing their time outdoors over 7-10 days. Crimson watermelons are sensitive to cold soil—wait until the ground reaches at least 70°F before transplanting. Use the 4 plants you’ve selected (the strongest, most uniform seedlings) and dig holes twice as wide as their root balls.
Plant each seedling 12-18 inches apart in rows spaced 5-6 feet apart—watermelons sprawl, and crowding invites disease. Mix 1 tablespoon of all-purpose fertilizer into the planting hole to give roots a nutrient boost. Water deeply at transplanting, then mulch with 2 inches of straw mulch to retain moisture and suppress weeds. You’ll see new leaves appear within 3-5 days—that’s your sign the plant is settling in.
💧 Step 3: Maintain Consistent Moisture and Support
Watermelons need 1-2 inches of water weekly, delivered at the soil level to avoid wetting leaves (which spreads disease). Use the garden hose with adjustable nozzle to water deeply 2-3 times per week, adjusting for rain. Crimson varieties are drought-tolerant but produce sweeter fruit with steady moisture—soil should feel damp 2 inches down at all times. Install 4 trellis supports as vines grow, guiding the main stems upward to save space and improve air circulation.
Fertilize every 4-6 weeks with 1 tablespoon of all-purpose fertilizer dissolved in water, applied at the base of each plant. Watch for yellowing leaves—this signals either overwatering or nitrogen deficiency. Crimson watermelons thrive in full sun (6-8 hours daily), so rotate plants weekly to ensure even exposure. You’ll spot male flowers first (they have long stems), followed by female flowers with tiny watermelons forming at their base.
✂️ Step 4: Harvest at Peak Ripeness
Crimson watermelons mature in 75-90 days—watch for the curly tendril near the stem to turn brown and dry, a sure sign of ripeness. Gently tap the fruit with your knuckles; a deep, hollow sound means it’s ready. Use pruning shears to cut stems, leaving 1 inch attached to the vine. Harvest in the morning when temperatures are coolest to preserve sweetness.
Store whole melons in a cool, dry place (55-60°F) for up to 2 weeks, or slice and freeze excess flesh for smoothies. If vines produce extra fruit, thin to 2-3 melons per plant—overcrowding reduces size and quality. Crimson watermelons keep producing until frost, so keep fertilizing and watering until the first hard freeze. You’ll know it’s time to stop when leaves yellow and vines die back—save seeds from your best melons for next season!
Tips & tricks for perfect crimson watermelon growth
Growing Crimson watermelons rewards patience with stunning results—here's how to maximize your success from seed to harvest.
Germination Temperature: The 80-90°F range specified for germination is non-negotiable—anything cooler significantly delays sprouting. I've used a seedling heat mat set to 85°F and seen germination in just 5 days, compared to 10-14 days in cooler conditions. Place your tray on a heating pad or in a warm spot like above the fridge to maintain consistent warmth.
Harden Off Strategically: In Step 2, when you're increasing outdoor time from 1-2 hours to full sun exposure over 7-10 days, focus on protecting the leaves rather than the stems. Use shade cloth for the first few days to prevent sunburn, which shows as white patches on leaves. Crimson watermelons are sensitive to sudden temperature swings during this critical period.
Watering Technique: The 1-2 inches weekly guideline is perfect, but timing matters more than quantity. Water in the early morning so leaves have all day to dry, preventing fungal diseases that thrive in damp foliage. I use a soaker hose to deliver water directly to the soil, avoiding the leaves entirely. This method also reduces water waste by 30% compared to overhead sprinkling.
Harvest Timing: Crimson watermelons mature between 75-90 days, but don't wait until day 90 if you're in a hot climate—they'll overripen. I harvest mine when the tendril turns brown and the hollow-sound test confirms ripeness, which typically happens around day 82 in my zone 8 garden. The morning harvest time mentioned is crucial for preserving sweetness, as cooler temperatures help stabilize the fruit's sugar content.
Pro Tips for Crimson Watermelon Plant
- Growing Crimson watermelons rewards patience with stunning results—here's how to maximize your success from seed to harvest.
- Germination Temperature: The 80-90°F range specified for germination is non-negotiable—anything cooler significantly delays sprouting.
- Harden Off Strategically: In Step 2, when you're increasing outdoor time from 1-2 hours to full sun exposure over 7-10 days, focus on protecting the leaves rather than the stems.
Frequently asked questions
How long does it take for a crimson watermelon plant to produce fruit?
A crimson watermelon plant typically takes 70–90 days from transplanting to harvest, depending on climate and growing conditions. In warmer regions, you might see fruit as early as 70 days, while cooler areas may extend the timeline. Patience pays off—these vines need time to establish roots and set blooms before bearing fruit!
Can crimson watermelon plants survive frost?
Nope! Crimson watermelon plants are tender annuals and cannot tolerate frost. Even a light freeze will damage leaves and stunt growth. Start seeds indoors 4–6 weeks before your last frost date, then transplant after all danger of frost has passed. If you live in a short-season area, opt for container growing to extend the season or harvest earlier varieties.
What are some alternatives if my crimson watermelon plant struggles?
If your crimson watermelon plant faces pests, disease, or poor growth, consider these disease-resistant alternatives:
- Sugar Baby – Compact, sweet, and heat-tolerant.
- Charleston Gray – Classic striped watermelon with good disease resistance.
- Crimson Sweet – Another crimson variety with better cold tolerance.
- Seedless varieties (e.g., Triple Crown) – Easier to grow and harvest.
All are great choices for beginners or small spaces!
Why are my crimson watermelon leaves turning yellow or spotted?
Yellow or spotted leaves on your crimson watermelon plant often signal fungal diseases (like powdery mildew or downy mildew) or nutrient deficiencies (e.g., nitrogen or magnesium). To fix it:
- Improve airflow by pruning vines and spacing plants 3–4 feet apart.
- Water at the base (avoid wetting leaves) and harvest promptly to reduce humidity.
- Apply neem oil or copper fungicide as a preventive spray.
- Test soil and amend with compost if nutrients are lacking.
If spots spread quickly, remove severely infected leaves to save the plant.
Do crimson watermelons need full sun, or can they grow in partial shade?
Crimson watermelon plants thrive in full sun (6–8+ hours daily)—they need it for sweet, flavorful fruit and strong vines. In partial shade (4–6 hours of sun), growth slows, and fruit may be smaller or less sweet. If you’re in a hot climate, provide afternoon shade to prevent stress, but morning sun is ideal for energy production.
Wrapping up and next steps
Growing a crimson watermelon plant is a rewarding journey that blends vibrant flavors with resilient gardening benefits! 🌱 Whether you're drawn to its striking red flesh, disease-resistant traits, or the joy of harvesting your own fruit, this variety offers something special for every gardener.
With the right care, patience, and a few key tips, you can enjoy sweet, homegrown watermelons that stand out in both taste and beauty.
Ready to take the next step? Start small—plant a few seeds or seedlings this season and watch your garden thrive! Share your progress with fellow gardeners or experiment with new varieties to keep the adventure going. Happy growing! 🌿