
Shrubs
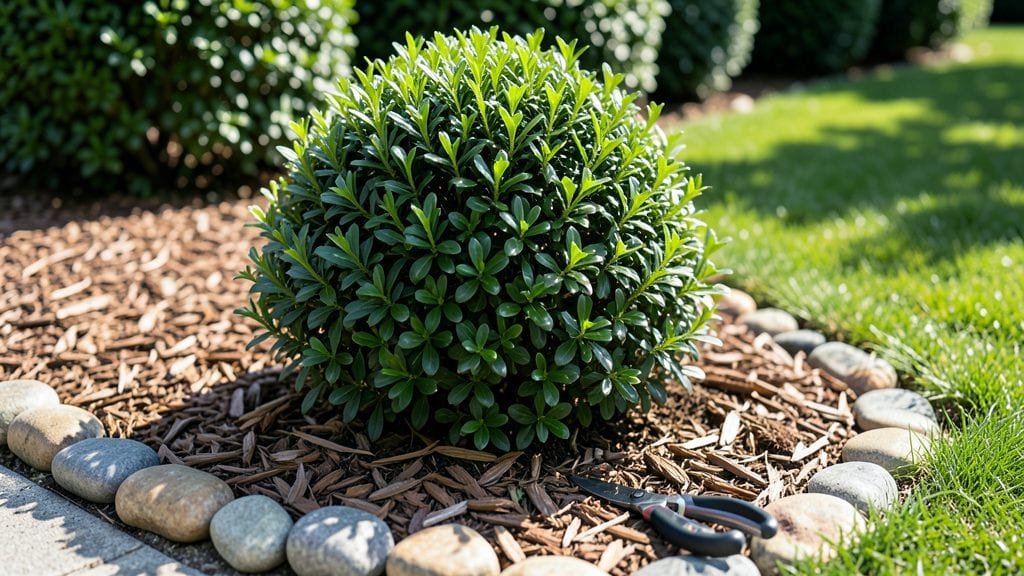
Boxwood foundation planting creates that polished, welcoming look homeowners dream of—where every season feels intentional and the landscape never looks like a last-minute afterthought.
I’ve seen how a well-placed row of boxwoods transforms a plain house into a showstopper, with their glossy green leaves framing windows and doors like a natural frame.
The secret isn’t just planting them; it’s choosing the right varieties for your climate and spacing them so they grow together like a living curtain, not a patchwork of clashing shapes.
Start with ‘Green Velvet’ for dense, compact growth or ‘Winter Gem’ if you want disease resistance and a slightly smaller footprint—both stay lush year-round, even when other plants fade. Most boxwoods thrive in partial shade to full sun, but they’ll tolerate a bit of afternoon shade in hotter climates.
The soil just needs to drain well; amending with compost at planting sets them up for decades of trouble-free growth. Pruning isn’t about heavy shaping—just a light trim in early spring to clean up any messy growth and maintain their natural, tidy form.
Pair them with low-growing perennials like creeping thyme or ornamental grasses for texture, or add spring bulbs like daffodils at their base for seasonal pops of color. The result?
A foundation planting that looks effortless but actually requires minimal upkeep once established. You’ll spend more time admiring the view than fussing over the plants—and that’s the whole point.
Works for both modern and traditional homes, urban and suburban yards, and even narrow spaces where every inch counts. The key is patience: boxwoods grow slowly but reward you with years of structure and elegance—no replanting, no surprises.
Let’s get those borders looking like they belong in a magazine spread.
📚 In This Guide
- What you need
- Instructions
- Tips and common mistakes
- Wrapping up and next steps
What you need
- ● Boxwood shrubs: 3–5 mature plants (depending on foundation length), spaced 3–4 feet apart. Choose Buxus sempervirens (English boxwood) or Buxus microphylla (Korean boxwood) for best results.
- ● Topsoil or garden soil: 1–2 cubic yards (enough to fill planting holes and amend surrounding soil).
- ● Organic compost or peat moss: 1–2 bags (to improve drainage and fertility).
- ● Slow-release fertilizer (10-10-10 or 12-12-12): 1 bag (follow label for dosage).
- ● Mulch (pine bark or shredded hardwood): 2–3 bags (2–3 inches deep).
- ● Landscape fabric: 1 roll (to suppress weeds and retain moisture).
- ● Shovel or spade: 1 (for digging planting holes and amending soil).
- ● Garden trowel: 1 (for fine adjustments and transplanting).
- ● Wheelbarrow: 1 (for mixing soil and transporting materials).
- ● Measuring tape: 1 (to ensure proper spacing between plants).
- ● Gloves and knee pads: 1 pair each (for comfort and protection).
- ● Hose with nozzle or watering can: 1 (for post-planting watering).
- ● Soil pH tester: To check and adjust soil acidity (boxwood prefers pH 6.0–7.0).
- ● Plant supports (stakes or cages): For young or wind-prone boxwoods.
- ● Edging material (brick, stone, or metal): To define the planting bed neatly.
- ● Pruning shears: For shaping plants after establishment.
Step-by-Step instructions for boxwood foundation planting
Here's how to create a polished, evergreen foundation planting that frames your home beautifully.
Plan the Layout and Spacing
Start by sketching your design on paper, using the house as your anchor. Boxwoods thrive in 18-24 inch spacing when mature, so plan for that final size—not their current small stature. For a formal look, maintain equal distances between plants and align them precisely with the foundation corners or windows. I like to use a 10-foot tape measure to mark positions before digging, ensuring symmetry. Real talk: Measure twice, dig once—this is where most uneven plantings begin.
Consider the mature height of your chosen boxwood variety. Standard boxwoods reach 3-4 feet, while dwarf varieties stay under 2 feet. Place taller varieties at the corners to create natural vertical accents that draw the eye upward. For a layered effect, add 1-2 feet of shrubs behind the boxwoods to fill the space between them and the house. This creates depth and prevents a flat, one-dimensional look.
Prepare the Soil and Planting Holes
Boxwoods prefer well-draining, slightly acidic soil with a pH between 6.0 and 7.0. If your soil is heavy clay or sandy, amend it with 2-3 inches of compost mixed into the top 12 inches of soil. I use a garden fork to loosen the soil in a 12-inch radius around each planting spot, breaking up compacted layers to encourage root growth. The planting hole should be twice as wide as the root ball but only as deep—boxwoods dislike being buried too deeply, which can suffocate their roots.
Gently remove the boxwood from its container and inspect the roots. If they’re circling tightly, use your fingers to tease them apart—this prevents girdling as the plant matures. Place the shrub in the hole so the top of the root ball sits level with the surrounding soil. Press the soil lightly around the roots to eliminate air pockets, then water deeply to settle everything. Here’s the thing—if the soil settles too much, you’ll have to add more later, so err on the side of slightly deeper holes.
Plant and Mulch for Long-Term Health
Backfill the hole with the amended soil, tamping it down gently in 2-inch layers to ensure good root-to-soil contact. Avoid compacting too firmly, as this can restrict root growth. Once planted, create a 2-inch-deep basin around the base of the boxwood to direct water straight to the roots. Water the plant thoroughly until it drains freely from the basin—this ensures the roots establish quickly in their new home.
Apply 2-3 inches of mulch (such as shredded bark or pine straw) around the base of the plant, keeping it 3-4 inches away from the stem to prevent rot. Mulch helps retain moisture, regulate soil temperature, and suppress weeds—three critical factors for boxwood health. I like to use dark brown mulch because it blends seamlessly with the evergreen foliage while providing the best weed suppression. Avoid piling mulch against the trunk, as this can trap moisture and invite disease.
Water and Maintain for Establishment
For the first 2-3 weeks, water your boxwoods daily if the weather is hot or dry. After that, shift to deep watering every 5-7 days, ensuring the soil remains evenly moist but not soggy. Boxwoods are drought-tolerant once established, but young plants need consistent moisture to develop strong roots. You’ll know you’re watering correctly when the soil feels damp 2 inches below the surface—stick a finger in to check.
Fertilize lightly in the first spring after planting with a balanced, slow-release fertilizer (10-10-10 or similar) to encourage steady growth. Avoid heavy-handed feeding, which can lead to soft, sappy growth vulnerable to pests. Prune only to shape the plant in late winter or early spring, removing any dead or crossing branches. This keeps the boxwoods looking sharp while encouraging new, healthy growth. Here’s where patience pays off—boxwoods grow slowly but reward you with decades of structure and elegance.
Tips & tricks for perfect boxwood foundation planting
A few strategic moves will ensure your boxwood foundation planting thrives for decades. The details in spacing, soil prep, and ongoing care make all the difference between a mediocre hedge and a showstopping landscape feature.
Precision in Step 1 Pays Off: When marking your 18-24 inch spacing for mature boxwoods, use a garden flag or small stake at each position before digging. This prevents the common mistake of eyeballing measurements, which often leads to uneven spacing as you work. For formal designs, I string a line between corner stakes to create a visual guide—this ensures perfect alignment with your foundation corners. The key is patience: take your time with this step, as it sets the foundation for your entire planting's symmetry and visual impact.
Soil Science in Step 2 Matters More Than You Think: The 2-3 inches of compost you mix into the top 12 inches of soil isn't just about nutrients—it's about creating the perfect air-to-soil ratio that boxwood roots crave. After loosening the soil with your garden fork, I like to add a handful of perlite to the planting hole mix for even better drainage. This becomes especially critical if your soil naturally compacts after watering. Remember, boxwoods hate soggy roots, so never let the planting hole sit with standing water before you plant.
Mulching Technique in Step 3 Requires Attention: That 2-3 inches of mulch you apply should create a donut shape around each plant, maintaining the 3-4 inch clearance from the stem. I've seen too many gardeners pile mulch right against the trunk, which creates the perfect conditions for rot. For the first year, consider using a light-colored mulch like straw instead of dark bark—it reflects sunlight and helps prevent overheating of the roots. And here's a pro tip: refresh your mulch annually in late winter to maintain that 2-3 inch layer, which is crucial for moisture retention and weed suppression.
Watering Strategy in Step 4 Needs Adjustment: While the instructions call for daily watering during the first 2-3 weeks, I've found that morning watering (between 6-9 AM) is far more effective than evening watering. This allows the foliage to dry completely before nightfall, reducing the risk of fungal diseases. For the deep watering every 5-7 days after establishment, use a rain gauge or tuna can to measure exactly 1 inch of water per session. This consistency is what builds those strong root systems boxwoods need to thrive for decades.
Pro Tips for Boxwood Foundation Planting
- A few strategic moves will ensure your boxwood foundation planting thrives for decades.
- Precision in Step 1 Pays Off: When marking your 18-24 inch spacing for mature boxwoods, use a garden flag or small stake at each position before digging.
- Soil Science in Step 2 Matters More Than You Think: The 2-3 inches of compost you mix into the top 12 inches of soil isn't just about nutrients—it's about creating the perfect air-to-soil ratio that boxwood roots crave.
Frequently asked questions
Got questions about creating a stunning boxwood foundation planting? You’re not alone! Here are some of the most common queries—and their practical answers—to help you plan with confidence.
What’s the best time of year to plant boxwoods near my foundation?
For optimal root establishment, plant boxwoods in early spring or fall (4–6 weeks before the first frost). Avoid extreme heat or cold, as these can stress young plants. Spring planting gives roots time to grow before summer, while fall allows them to settle before winter dormancy.
How far from the house should I plant boxwoods to avoid foundation issues?
Keep boxwoods at least 12–18 inches away from siding and 2–3 feet from the foundation wall to prevent moisture buildup or root intrusion. Use gravel or French drains if your soil retains water heavily. Proper spacing also improves airflow, reducing disease risk.
Can I use other shrubs instead of boxwoods for a foundation planting?
Consider holly, juniper, or dwarf yew for similar evergreen structure. For low-maintenance options, try inkberry holly (disease-resistant) or emerald green arborvitae (fast-growing). Just ensure alternatives match your climate zone and mature size to avoid overcrowding.
Why are my boxwood leaves turning yellow or brown after planting?
Yellowing leaves often signal overwatering, poor drainage, or transplant shock. Brown edges may indicate underwatering or sunburn. Water deeply but infrequently (1–1.5 inches per week), and mulch with 2–3 inches of organic mulch to retain moisture. If issues persist, check for pests like boxwood leafminers or fungal diseases.
How often should I prune boxwoods in a foundation planting?
Lightly prune boxwoods once a year in late spring or early summer to shape and encourage dense growth. Avoid heavy pruning—remove no more than 1/3 of the plant annually. Use clean, sharp shears to make angled cuts just above a leaf bud. Pro tip: Prune after flowering for a polished look!
Wrapping up and next steps
Creating a boxwood foundation planting is your ticket to a timeless, low-maintenance landscape that enhances curb appeal and adds structure to your home’s exterior. 🌿 With the right spacing, soil prep, and care, these evergreens will thrive for years, offering year-round greenery and elegance.
Whether you’re a seasoned gardener or just starting, this guide gives you the confidence to plant with precision—and enjoy the results!
Ready to transform your foundation? Grab your tools, pick your boxwood varieties, and start planting! For extra inspiration, sketch a simple layout or consult a local nursery for tailored advice. Happy gardening! 🌱✨