Pruning
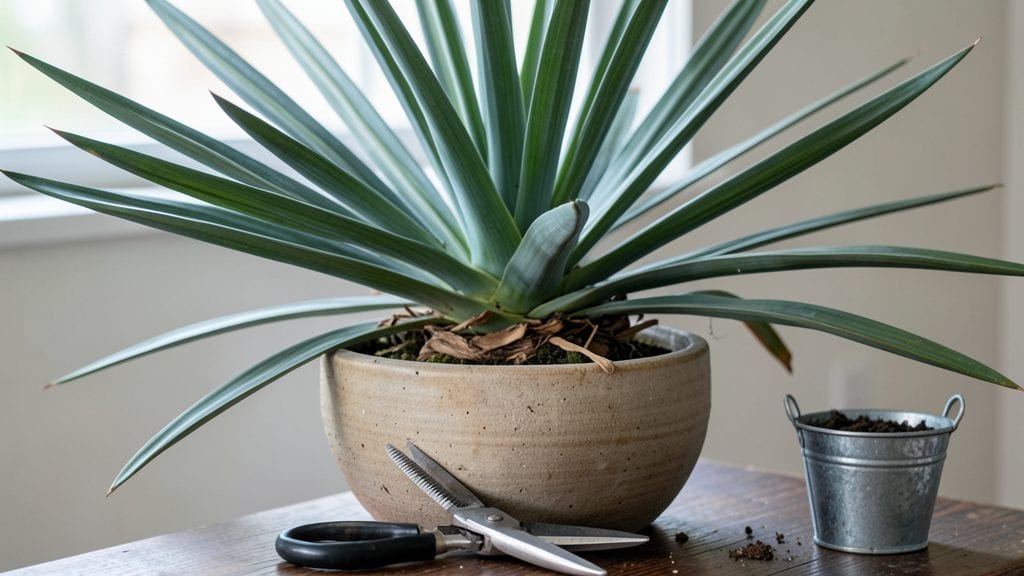
Trimming your yucca plant the right way turns those scraggly stems into vibrant, bushier growth—and it’s easier than you think. ✂️ I’ve trimmed mine every spring for years, and the difference is night-and-day: fewer dead leaves, more energy in the roots, and a plant that looks like it’s been professionally landscaped.
The key? Timing matters—do it after the last frost when new growth kicks in, and you’ll avoid shocking the plant.
You’ll only need three basic tools: sharp pruning shears (or a clean knife), rubbing alcohol to sterilize them, and a pair of gloves—yucca leaves pack a punch!
Focus on cutting back dead or brown fronds at the base, removing any spent flower stalks (they drain energy), and thinning out crowded stems to improve airflow. Every cut should be clean and angled just above a healthy growth node—no jagged edges, or you’ll invite disease.
The payoff comes fast: within weeks, you’ll see fresh green shoots pushing from the center, and the plant’s shape tightens up beautifully. My yuccas now bloom more reliably, and pests stay away because there’s no damp, rotting debris to hide in.
Just avoid trimming more than one-third of the plant at once, or you’ll stress it out—think of it like giving your yucca a haircut, not a buzz cut.
Pro tip: Save those cuttings! Stick the healthy bottoms in water or soil, and you’ll have new yucca plants in just a few weeks. It’s like getting free upgrades for your garden—no nursery required. Ready to give your yucca the refresh it deserves?
📚 In This Guide
- What you need
- Instructions
- Tips and common mistakes
- Wrapping up and next steps
What you need
- ● Pruning shears or bypass pruners – Choose sharp, sterilized tools with a 4- to 6-inch blade for precision cuts. Avoid dull tools that crush stems.
- ● Clean, disinfected cutting tool – A horticultural saw (for thick stalks) or sterilized knife (for finer cuts). Wipe with rubbing alcohol (70% or higher) before and after use.
- ● Gloves – Garden gloves (nitrile or leather) to protect your hands from sharp edges and yucca’s mild irritants.
- ○ Pruning sealant (optional but recommended) – A tree wound sealant (like Tanglefoot or Ortho brand) to prevent disease entry on large cuts.
- ● Disposable bags or bucket – For trimmings (compost or discard). A 5-gallon bucket works well for larger jobs.
- ● Hand lens or magnifying glass – To inspect pests or diseases on leaves/stems up close.
- ● Spray bottle with water – Keeps cuts clean and reduces dust while trimming.
- ● Marking spray (paint) – Useful if tagging sections for future reference (e.g., white or pink spray paint).
- ● Safety goggles – Recommended if your yucca has thorny varieties (like Yucca rostrata).
- ● Choose the right time – Trim in early spring (before new growth) or late summer (avoid winter in cold climates).
- ● Assess plant health – Look for yellowing, brown, or mushy leaves (disease) or chewed edges (pests).
- ● Clear workspace – Lay down newspaper or a tarp to catch debris and protect surfaces.
Step-by-Step guide to trimming your yucca plant
Here's how to revive your yucca's shape and vigor with precise cuts that encourage fresh, healthy growth.
✂️ Step 1: Identify and Mark Problem Areas
Examine your yucca for dead, damaged, or overcrowded growth. Look for brown, crispy leaves or stems that feel hollow when touched—these need removal. I mark cuts with a pencil to avoid guesswork later. Focus on stems taller than 3 feet or those growing too close to the base, which compete for nutrients.
Don't trim healthy green leaves just because they're long. Yuccas store water in their leaves, and removing too many causes stress. Only cut what's clearly dead or crowding the plant. If you're unsure, wait a week—sometimes leaves just look dry but recover with water.
✂️ Step 2: Sterilize Tools and Make Clean Cuts
Wipe your pruning shears or saw with rubbing alcohol to prevent disease spread. Yuccas heal faster from sharp, clean cuts than ragged ones. Cut at a 45-degree angle, about ¼ inch above a leaf node or where the stem meets the base. This prevents water from pooling and rotting the wound.
For large stems, use a handsaw for precision. I always cut just outside the rosette of leaves at the base to encourage new growth from that spot. Avoid leaving stubs—they trap moisture and invite pests. If you're trimming a long stem, cut it into 12-inch sections for propagation later.
💧 Step 3: Apply Wound Treatment and Monitor
Dust the cut ends with cinnamon powder or sulfur-based pruning powder to seal the wound and prevent infection. Yuccas are drought-tolerant, but freshly cut plants need 2-3 weeks of reduced watering to heal. Wait until the cut surface looks dry and calloused before watering normally.
Place the trimmed plant in bright, indirect light for 1-2 weeks—direct sun can scorch fresh cuts. You'll see new growth emerging from the base or nodes within 4-6 weeks if the cuts were clean. If no new shoots appear after 8 weeks, the plant may need more time or fertilizer.
☀️ Step 4: Encourage New Growth with Proper Care
After trimming, feed your yucca with a balanced, water-soluble fertilizer diluted to half-strength. I apply it every 4-6 weeks during the growing season (spring and summer). Avoid fertilizing in fall or winter when growth slows. Yuccas thrive in full sun, but newly trimmed plants appreciate morning sun and afternoon shade for a few weeks.
If your yucca has multiple stems, remove the smallest ones at the base to redirect energy to stronger growth. You'll notice new shoots pushing through the soil within 6-8 weeks if the plant is healthy. Keep the soil slightly dry—yuccas hate soggy roots, even after trimming.
⏰ Step 5: Propagate Cuttings (Optional)
Let your 12-inch stem cuttings dry out for 2-3 days until the ends callous over. Plant them in a mix of cactus/succulent soil and sand, burying half the stem length. Water lightly only when the soil is completely dry. Roots form in 4-6 weeks if kept in warmth (70-75°F) and bright light.
Don't overwater the new cuttings—they rot easily. I place them in a tray with pebbles and water to maintain humidity without soggy soil. Once rooted, treat them like mature yuccas. This is how I expand my collection without buying new plants!
Tips & tricks for perfect yucca plant trimming
Reviving your yucca's health starts with precision—these tips will help you avoid common mistakes and encourage robust regrowth.
Precision Matters in Step 1: When identifying problem areas, focus on stems that are truly dead or overcrowding the base. I've learned the hard way that trimming healthy leaves—even if they're long—can stress the plant. For those unsure about a leaf's condition, wait a week to see if it recovers with water. Remember, yuccas store water in their leaves, so you're not just cutting foliage, you're potentially removing the plant's water reserve.
The Technique That Changed Everything: In Step 2, that 45-degree angle cut isn't just about aesthetics—it's about proper healing. The angled cut prevents water from pooling at the base, which would otherwise create the perfect environment for rot. For large stems, I've found that using a handsaw gives me the precision to cut just outside the rosette of leaves, encouraging new growth from that exact spot. Don't leave stubs—those become moisture traps that invite pests.
Wound Care is Critical: After making your cuts, the 2-3 week reduced watering period is non-negotiable. I've seen yuccas recover beautifully when given this time to callous over, but when rushed, they develop infections. Place your trimmed plant in bright, indirect light for those first 1-2 weeks—direct sun can scorch the fresh cuts. Think of this as giving your yucca a spa treatment after surgery.
Propagation Strategy: If you're working with 12-inch stem cuttings, the 2-3 day drying period before planting is crucial. This callusing process helps prevent rot when you eventually plant them. I've had great success using a mix of cactus/succulent soil and sand, burying half the stem length. The warmth of 70-75°F and bright light create the perfect conditions for root formation in 4-6 weeks—just don't overwater those new cuttings, or you'll undo all your good work.
Pro Tips for Yucca Plant Trimming
- Reviving your yucca's health starts with precision—these tips will help you avoid common mistakes and encourage robust regrowth.
- Precision Matters in Step 1: When identifying problem areas, focus on stems that are truly dead or overcrowding the base.
- The Technique That Changed Everything: In Step 2, that 45-degree angle cut isn't just about aesthetics—it's about proper healing.
Frequently asked questions
Got questions about keeping your yucca plant in tip-top shape? Here are some of the most common ones—plus straightforward answers to help you trim with confidence!
When is the best time to trim a yucca plant?
The ideal time to trim your yucca is in early spring before new growth begins. This timing gives the plant energy to recover and prevents stress during dormancy. If you spot dead or damaged leaves year-round, you can trim those anytime—but avoid heavy pruning in winter.
How do I trim a yucca plant without killing it?
Use sterilized pruners or a sharp knife to make clean cuts at a 45-degree angle, about 1/4 inch above a leaf node or branch. Avoid over-trimming—never cut more than 1/3 of the plant’s height at once. Let cuts heal for a few days before fertilizing to reduce shock.
Can I propagate my yucca from trimmings?
After trimming, let cuttings dry for 1–2 days to form a callous. Plant them in well-draining soil, water lightly, and place in bright, indirect light. Roots should develop in 4–6 weeks. Yuccas are tough—just be patient!
What if my yucca plant turns yellow or brown after trimming?
Yellowing or browning can signal stress, but it’s often temporary. Ensure your plant gets full sun and water only when the soil is dry. If leaves stay crispy, reduce watering further—yuccas thrive on neglect! Severe browning may mean root rot; repot in fresh, dry soil if needed.
Do I need to fertilize after trimming my yucca?
Wait 4–6 weeks before fertilizing to let cuts heal. Then, use a balanced, diluted fertilizer (like 10-10-10) in spring and summer. Yuccas are low-maintenance—over-fertilizing can harm them. Skip fertilizer in fall/winter when growth slows.
Wrapping up and next steps
Trimming your yucca plant isn’t just about aesthetics—it’s a game-changer for its health and vibrancy! 🌿 By mastering the right techniques, timing, and tools, you’ll encourage lush growth, prevent pests, and keep your plant thriving year-round.
Remember, confidence comes with practice, so don’t hesitate to roll up your sleeves and give it a try.
Ready to take the next step? Grab your pruners, dust off those gloves, and schedule your first trim session—your yucca will thank you with stunning, healthy foliage! For extra inspiration, snap a before-and-after photo to track your progress. Happy pruning!