Pruning
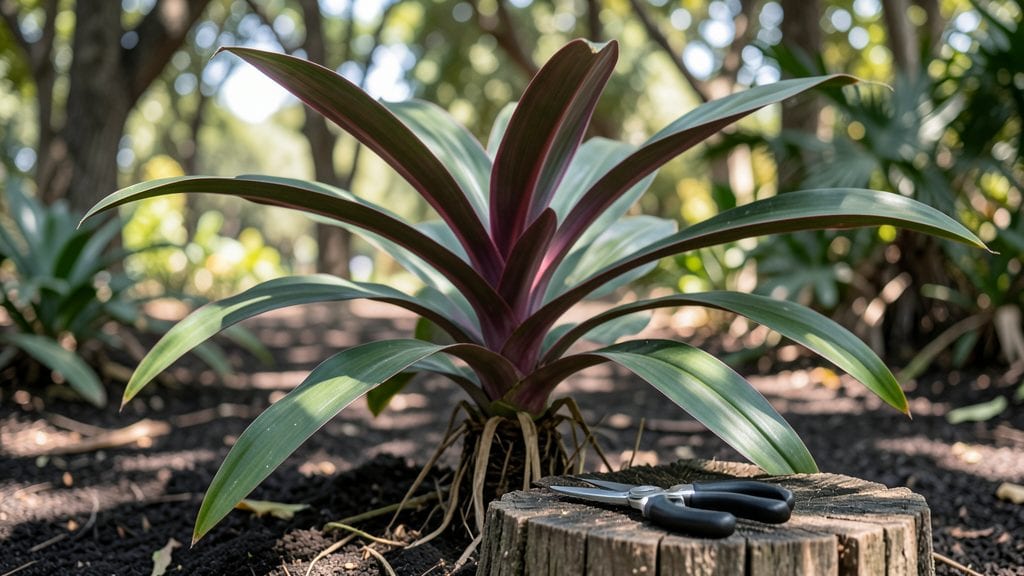
Trimming Cordyline plants is the secret to keeping them lush and upright year-round, not just a seasonal chore. 🌿 I’ve learned that skipping this step means watching your once-proud plants turn leggy and top-heavy, their lower stems bare and vulnerable.
The right cuts—made at the right time—keep those striking, sword-like leaves dense and vibrant from spring through winter.
You only need three basic tools: sharp bypass pruners for clean cuts, rubbing alcohol to sterilize them between plants, and a sturdy ladder if your Cordyline towers over your head.
Timing matters too—spring is ideal for major shaping, but light trims after summer storms keep them tidy without stressing the plant. The goal is to remove no more than one-third of the plant’s height at once, so you’re not sending it into shock.
After trimming, the results are immediate: fresh, crisp new growth emerges within weeks, and the plant’s structure tightens up. I’ve seen Cordylines that looked like overgrown weeds transform into showstopping focal points in just a month.
The key is always cutting just above a leaf node or branch, never leaving stubs—this prevents rot and encourages fuller regrowth.
Even in winter, a light cleanup removes dead or damaged leaves, keeping the plant healthy for spring’s big growth surge. Whether you’re dealing with a 6-foot-tall specimen or a compact patio variety, these same principles apply. Let’s get those shears sharp and those plants looking their best!
📚 In This Guide
- What you need
- Instructions
- Tips and common mistakes
- Wrapping up and next steps
What you need
- ● Sharp pruning shears or bypass pruners – Choose sterilized, high-quality tools (e.g., Felco or Fiskars) to make clean cuts and prevent disease. Size: 6–8 inch blades for medium-sized stems.
- ● Disinfectant (70% isopropyl alcohol or bleach solution) – 1 part bleach to 9 parts water to sterilize tools between cuts.
- ○ Gloves (optional but recommended) – Nitrile or leather gloves to protect hands from sap and sharp edges.
- ● Pruning saw (for thick stems) – A curved blade saw (e.g., 8–10 inch) if your Cordyline has woody, mature growth.
- ● Rubbing alcohol or hydrogen peroxide (3%) – For wiping down tools and cleaning minor sap spills.
- ● Trash bag or compost bin – To dispose of pruned foliage (check local compost rules—some areas prohibit diseased plant waste).
- ● Hand pruners (for fine-tuning) – Useful for smaller cuts or shaping delicate leaves.
- ● Plant food or fertilizer – A balanced liquid fertilizer (10-10-10) to nourish your Cordyline post-prune.
- ● Mulch (orchid bark or coconut coir) – Helps retain moisture and protect the base after trimming.
- ● Spray bottle with water – Keeps leaves hydrated during the process.
- ● Camera or phone – Snap before/after photos to track progress!
Step-by-step instructions for trimming cordyline plants
Here’s how to keep your cordylines lush and tidy without stressing the plant.
✂️ Step 1: Gather the Right Tools
Start with a sharp pair of pruning shears—dull blades tear stems and invite disease. I also grab rubbing alcohol and sterilized scissors for any small trims. Cordylines grow best when cuts are clean, so sharp tools are non-negotiable. Wipe blades with rubbing alcohol before and after use to prevent spreading bacteria between plants.
If you’re dealing with thicker stems, a pruning saw works better for clean cuts. Avoid using garden shears or scissors meant for paper—they’ll crush the stems instead of making precise cuts. You’ll notice the difference immediately when the cut surface looks smooth rather than jagged.
✂️ Step 2: Identify and Remove Dead or Damaged Foliage
Scan your cordyline for yellowed, brown, or mushy leaves—these are dead and should go first. Gently grasp the base of the leaf where it meets the stem and twist it off with a quick motion. If the leaf resists, use your pruning shears to cut just above the point where the leaf attaches. Never leave stubs—they can trap moisture and rot.
Watch for splits or tears in the leaves. These often happen from wind or improper handling. Trim away any damaged sections with clean cuts. You’ll see healthier growth return within weeks as the plant focuses energy on new, undamaged foliage.
✂️ Step 3: Trim for Shape and Size Control
Step back and assess the plant’s overall shape. Cordylines grow in a clumping or fan-like habit, so I aim to maintain that natural form. Use your shears to trim back any overly long or leggy leaves to about half their length. This encourages bushier growth and prevents the plant from toppling over.
Focus on the outer edges first—this keeps the center dense while opening up airflow. Avoid cutting more than one-third of the plant’s height at once. If you’re trimming for size, make cuts just above a leaf node (the bump where leaves attach). You’ll notice new growth sprouting from these nodes within a few weeks.
💧 Step 4: Clean Up and Encourage New Growth
After trimming, remove all debris from the base of the plant and surrounding area. Leaving cut leaves or stems can lead to fungal issues. I like to use a small broom to sweep up any fallen leaves and dispose of them in the trash—not the compost bin, since diseased material can spread.
Give your cordyline a light drink of water after trimming to help it recover. Avoid heavy watering for a few days, though—this lets the cuts heal without sitting in excess moisture. Within 4-6 weeks, you’ll see fresh, vibrant growth emerging from the trimmed areas, proving your efforts paid off.
☀️ Step 5: Monitor and Maintain Year-Round
Cordylines are tough, but they thrive with regular light checks. Place them in bright, indirect light (they tolerate some direct sun, but too much can scorch leaves). If you notice new growth stretching toward the light, it’s time to rotate the pot or move it closer to a window.
Trim again in early spring to shape the plant before its growth spurt. This keeps it looking polished all year. I also fertilize lightly after trimming to support new growth—just a balanced liquid fertilizer diluted to half strength. You’ll love how your cordyline stays compact, healthy, and full of life with just a little attention.
Tips & tricks for perfect cordyline trimming
A few sharp insights that'll transform your cordyline from ragged to radiant with minimal effort.
The Tool Factor: I can't stress this enough—sterilizing your tools between cuts is non-negotiable. After wiping blades with rubbing alcohol, give them a quick flame pass (if you have a lighter) to kill any lingering bacteria. This simple step prevents fungal infections that can creep in through open wounds on your plant.
Leaf Removal Technique: When you're twisting off those dead leaves in Step 2, use your thumb to press gently on the stem just below the leaf base. This creates a slight give that makes the leaf pop off cleaner. If you're dealing with thick, fibrous leaves, make a small cut at the base first to prevent tearing—your cordyline will thank you with less stress and faster regrowth.
Pruning Strategy: In Step 3, when you're trimming for shape, work in layers. First tackle the longest leaves, then move to the next longest. This gradual approach gives you better control and helps you visualize the plant's natural shape. Pro tip: Save any healthy cuttings—you can propagate them to create new plants! Just place them in water for a few weeks until roots form.
Recovery Wisdom: After your clean-up in Step 4, resist the urge to fertilize immediately. The plant needs time to recover from the trimming stress. Wait until you see new growth emerging (usually within those 4-6 weeks) before applying that diluted fertilizer. Think of it like giving your cordyline a spa day—rest first, then pamper.
Pro Tips for Trimming Cordyline Plants
- A few sharp insights that'll transform your cordyline from ragged to radiant with minimal effort.
- The Tool Factor: I can't stress this enough—sterilizing your tools between cuts is non-negotiable.
- Leaf Removal Technique: When you're twisting off those dead leaves in Step 2, use your thumb to press gently on the stem just below the leaf base.
Frequently asked questions
Got questions about trimming your Cordyline plants?
You’re not alone! Here are some of the most common concerns—plus quick, actionable answers to keep your plants thriving.
When is the best time of year to trim Cordyline plants?
Trim Cordyline plants in early spring (just as new growth begins) or late summer (after flowering). Avoid heavy pruning in winter, as the plant is dormant. Light shaping can be done year-round, but major cuts should align with growth cycles for the best recovery.
How much can I trim off without harming the plant?
You can safely remove up to 1/3 of the plant’s height in one session. For mature Cordyline, focus on dead, yellowed, or overgrown leaves first. Avoid cutting into the central stem unless rejuvenation is the goal—this can stress the plant. Always leave healthy foliage to support photosynthesis.
What should I do with the cuttings after trimming?
Cordyline cuttings root easily! Dip the base in rooting hormone, then place in a mix of perlite and peat moss (or water for propagation). Keep the soil moist and in bright, indirect light. Roots typically form in 4–6 weeks. Discard diseased or mushy cuttings to avoid spreading issues.
Why are my Cordyline leaves turning brown after truning?
Brown leaves after trimming usually mean over-pruning or stress. If it’s just the tips, it’s likely natural dieback. For widespread browning, check for underwatering (Cordylines love humidity!) or sunburn (move to partial shade). Trim only healthy growth next time, and fertilize lightly to boost recovery.
Can I trim Cordyline indoors, or is it only for outdoor plants?
Indoor Cordylines benefit from trimming too—just adapt the approach. Dust leaves first, then use sterilized scissors to snip leggy stems or yellowing fronds. Avoid heavy pruning, as indoor plants have less light to recover. Place cuttings in water to propagate new plants and brighten up your space!
Wrapping up and next steps
Trimming your Cordyline plants doesn’t have to be intimidating—it’s all about confidence, precision, and timing! 🌿 With the right tools, techniques, and a little patience, you’ll keep your plants thriving year-round while showcasing their natural beauty.
Whether you’re shaping for aesthetics, encouraging growth, or removing dead foliage, every snip brings your garden one step closer to perfection.
Ready to take the next step? Grab your pruners, dust off your gardening gloves, and give your Cordylines the care they deserve. Your future self—and your plants—will thank you! 🌟