Planting
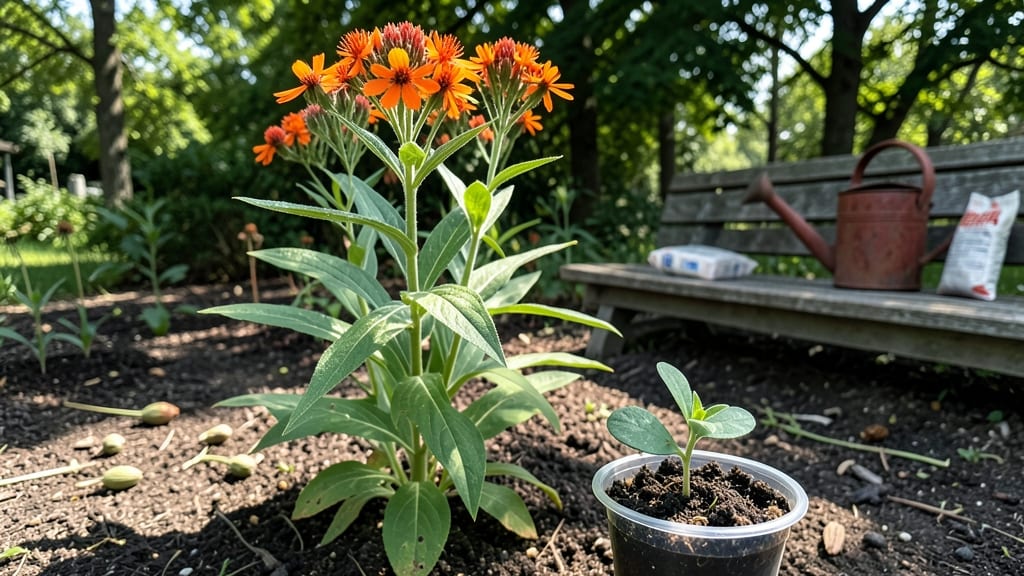
Transplanting milkweed plants can feel like moving a stubborn friend—too much fuss and they might sulk for weeks. 🌱 The secret lies in timing, soil prep, and gentle handling, which I learned after my first milkweed transplant wilted faster than a summer tomato in shade.
Early spring or fall, when soil stays cool and roots aren’t competing for water, gives them the best shot at survival.
You’ll need a shovel, compost-rich soil, a watering can, and a sunny spot with 6 hours of direct light—milkweed isn’t picky but it is hungry for nutrients. Dig a hole twice as wide as the root ball and mix in compost to give it a nutrient boost.
The key? Keep the roots moist but not soggy; milkweed hates wet feet just like we hate soggy shoes.
After planting, water deeply to settle the soil and encourage roots to spread. Within 2-3 weeks, you’ll see fresh growth—proof the plant is settling in.
Mulch around the base to retain moisture and deter weeds, which means less work for you and more energy for the plant to focus on growing strong stems for monarch caterpillars.
Pro tip: Transplant on a cloudy day to reduce stress from sun exposure. Pair milkweed with native grasses or wildflowers to mimic its natural habitat, and watch it thrive without the drama. Now, let’s get those monarchs some real estate!
📚 In This Guide
- What you need
- Instructions
- Tips and common mistakes
- Wrapping up and next steps
What you need
- ● Milkweed plants: Healthy, well-established plants (1–5, depending on desired garden size). Choose native species like Asclepias tuberosa (butterfly weed) or Asclepias syriaca (common milkweed).
- ● Garden trowel or transplant spade: A sharp, 6–12-inch tool for digging with precision.
- ● Pruning shears or scissors: For trimming damaged leaves or stems before transplanting.
- ● Watering can or hose with a gentle spray nozzle: To keep roots hydrated during the process.
- ● Compost or well-aged manure: 2–3 cups per plant to enrich the soil with nutrients.
- ○ Mulch (optional but recommended): Shredded bark, straw, or leaves (1–2 inches thick) to retain moisture and suppress weeds.
- ● Sunlight: A location with full sun (6+ hours daily)—milkweed thrives in bright, open spaces.
- ● Soil: Well-draining, slightly sandy or loamy soil. Amend heavy clay with compost if needed.
- ● Space: Plant milkweed 12–18 inches apart for optimal growth and monarch access.
- ● Water source: Easy access to water for the first 2–3 weeks post-transplant.
- ● Root stimulator or mycorrhizal fungi to boost root health.
- ● Plant tags or markers to track varieties.
- ● Gloves to protect your hands from sap (some milkweed species can be mildly irritating).
- ● Neighborhood or community members to help with larger transplants!
Step-by-Step instructions for transplanting milkweed plants
Milkweed is picky about moving—do this right and your monarchs will thrive.
🌱 Step 1: Choose the Best Time and Spot
Transplant milkweed in early spring or fall when temperatures stay between 50-70°F. Avoid peak summer heat, which stresses roots. Pick a location with full sun (at least 6 hours daily) and well-draining soil—milkweed hates soggy feet. I dig a hole twice as wide as the root ball but only as deep as the container’s drainage holes to prevent burying the crown.
Test the soil by squeezing a handful—if it crumbles when dry but holds shape when damp, it’s perfect. Amend heavy clay with 1 inch of compost mixed into the bottom of the hole. Milkweed tolerates poor soil, but better drainage means fewer diseases and stronger growth.
🪴 Step 2: Dig and Prepare the Root Ball
Water the milkweed 24 hours before moving to keep roots moist and flexible. Gently loosen the edges of the root ball with a trowel, working in a 1-inch circle around the container. Tap the pot’s sides firmly to release it—if it resists, slice the container with a utility knife. Never pull by the stems; milkweed’s deep taproot breaks easily.
Inspect the roots for blackened or mushy sections—trim those with clean shears. Healthy roots should be white or tan, not brown or slimy. Place the root ball in a bucket of lukewarm water for 10 minutes to revive any damaged roots before planting. This step cuts transplant shock by half.
☀️ Step 3: Plant and Stake for Stability
Lower the milkweed into the hole, keeping the top of the root ball level with the ground. Fill gaps with native soil, pressing lightly to remove air pockets. Insert a 3-foot bamboo stake at a 45-degree angle 6 inches from the plant, then tie the main stem loosely with soft garden twine. Milkweed grows tall but floppy—staking prevents stems from snapping in wind or rain.
Water deeply until moisture seeps 6 inches down into the soil. You’ll know it’s enough when the surface looks slightly damp but not puddled. Mulch with 2 inches of shredded leaves or straw to retain moisture and block weeds. Avoid thick mulch piles against the stem—milkweed’s shallow roots need airflow.
💧 Step 4: Water and Monitor Recovery
Keep the soil evenly moist (not soggy) for the first 2 weeks—water when the top 1 inch feels dry. Reduce watering to once weekly after new growth appears. Watch for yellowing leaves, which signal overwatering, or wilted stems, which mean underwatering. Milkweed’s deep roots store moisture, so it’s drought-tolerant once established.
Fertilize only if leaves look pale or stunted—use a balanced 10-10-10 formula at half strength 6 weeks after transplanting. Monarchs prefer milkweed with minimal nitrogen (too much makes it lush but less toxic to caterpillars). Prune any brown or damaged leaves with clean shears to redirect energy to root growth.
⏰ Step 5: Protect and Encourage Growth
Shade the plant with a frost cloth if nighttime temps drop below 40°F for the first month. Milkweed recovers from cold but struggles with sudden temperature swings. After 4-6 weeks, you’ll see new leaves—this is your cue to stop staking and let the plant grow naturally. Monarchs will find it within 2-3 weeks of healthy foliage appearing.
Real talk: Milkweed’s first year focuses on roots, so don’t expect blooms. Save energy for next season by avoiding heavy pruning until spring. Mark the location with a stake or flag—monarchs return to the same milkweed patches year after year.
Tips & tricks for perfect milkweed transplanting
A few key tricks will help your milkweed thrive after transplanting—these are the lessons I learned after watching too many monarchs abandon struggling plants.
Timing Secret: The 24-hour pre-watering in Step 2 is non-negotiable. I learned this the hard way after transplanting dry plants that wilted within hours. Watering creates a moisture barrier around roots, making them more flexible and reducing breakage when you remove them from containers. For container-grown milkweed, water again just before transplanting if the soil feels dry.
Root Revival Technique: That 10-minute soak in lukewarm water after root inspection does more than just revive damaged roots—it also helps flush out any residual salts that might have built up in potted soil. I use a clean bucket with just enough water to cover half the root ball. Pro tip: Add a splash of hydrogen peroxide (1 tablespoon per gallon) to the water for extra sterilization if your plant shows signs of root rot.
Staking Strategy: The 3-foot bamboo stake in Step 3 isn't just about wind protection—it's about training the plant's growth habit. I angle the stake away from the prevailing wind direction in my region (usually west) to prevent constant rubbing against the stem. Use soft garden twine, not wire, as milkweed stems are surprisingly delicate despite their sturdy appearance. Remove stakes after 4-6 weeks when you see new leaf growth.
Cold Protection: The frost cloth recommendation at 40°F is critical, but here's what nobody tells you—the cloth should only cover the top half of the plant. Milkweed needs some sunlight even in cold weather to prevent etiolation (those leggy, weak stems). Leave the bottom third exposed so roots can still absorb warmth from the ground. I've seen milkweed survive down to 28°F with this method, though it may lose some leaves.
Pro Tips for Transplanting Milkweed Plant
- A few key tricks will help your milkweed thrive after transplanting—these are the lessons I learned after watching too many monarchs abandon struggling plants.
- Timing Secret: The 24-hour pre-watering in Step 2 is non-negotiable.
- Root Revival Technique: That 10-minute soak in lukewarm water after root inspection does more than just revive damaged roots—it also helps flush out any residual salts that might have built up in potted soil.
Frequently asked questions
Got questions about transplanting milkweed? You’re not alone! Here are answers to the most common concerns—from timing to troubleshooting—to help your monarch haven thrive after relocation.
When is the best time to transplant milkweed?
Transplant milkweed in early spring or early fall when temperatures are mild (50–70°F). Avoid extreme heat or frost—roots need time to establish. Pro tip: If transplanting in summer, water deeply and shade plants for a week to reduce stress.
Can I transplant milkweed with monarch caterpillars on it?
Yes, but with caution! If caterpillars are present, wait until they pupate or leave (usually 2–3 weeks). If you must move it now, gently relocate the plant and monitor caterpillars closely. Monarchs are resilient—just give them a few days to adjust to their new home.
How often should I water after transplanting?
Water daily for the first 2 weeks, then taper to every 2–3 days as roots establish. Signs of overwatering: Yellowing leaves or soggy soil. Use mulch to retain moisture and prevent weeds. Morning watering is best to reduce evaporation.
What’s the best milkweed alternative if I can’t transplant?
If milkweed isn’t feasible, try swamp milkweed, butterfly weed, or tropical milkweed (for warmer climates). For non-milkweed options, Joe-Pye weed or goldenrod attract monarchs too. Just ensure plants are native to your region for optimal growth.
Why are my milkweed leaves turning yellow after transplanting?
Yellowing leaves often signal transplant shock, overwatering, or nutrient deficiency. Check soil moisture (it should be damp, not soggy) and amend with compost. If yellowing persists, test for pests like aphids or fungal issues. Fix it: Trim damaged leaves and adjust care.
How do I harden off milkweed before transplanting?
Hardening off takes 5–7 days. Gradually expose potted milkweed to outdoor conditions: Start with 1–2 hours of sunlight/day, then increase by 1 hour daily. Reduce watering slightly to mimic natural stress. Goal: Help roots and leaves adapt to outdoor temps and light.
Wrapping up and next steps
Transplanting milkweed isn’t just about moving a plant—it’s about nurturing a thriving habitat for monarch butterflies. 🌿 With the right timing, tools, and care, you’ve got everything you need to give these resilient plants a fresh start. Your garden (and the butterflies!) will thank you.
Ready to take the next step? Pick a sunny spot, prep the soil, and watch your milkweed flourish—one monarch-friendly patch at a time!
- 📅 Mark your calendar: Plan your transplant for early spring or fall when stress is minimal.
- 🌱 Start small: Begin with a few plants to build confidence and refine your technique.