Blooming
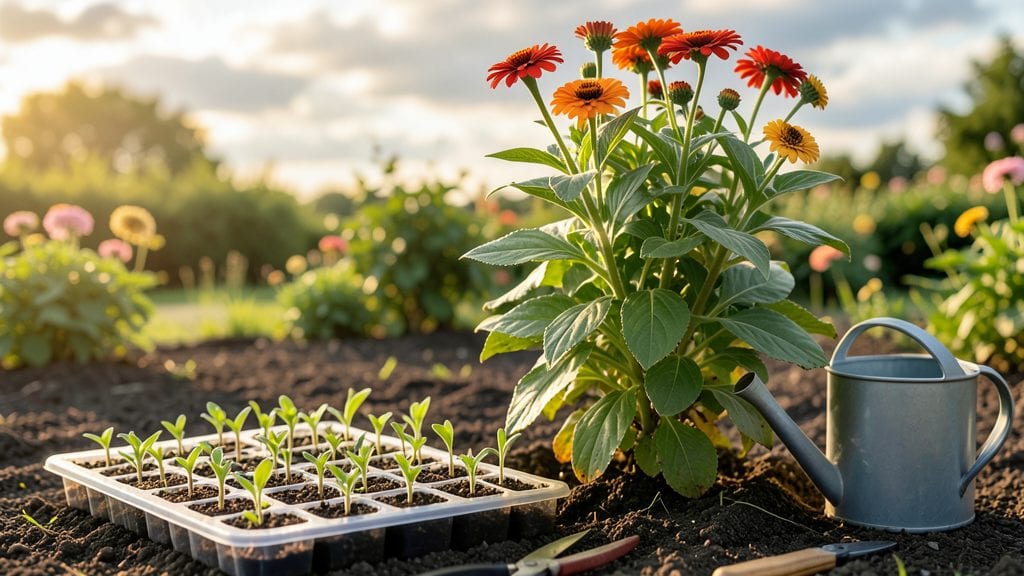
Succession planting zinnias means never-ending color from early summer through frost, even in the hottest climates. 🌻 I learned this after my first zinnias bolted by July—now I stagger plantings every three weeks to keep the blooms coming.
The key isn’t just timing; it’s choosing the right varieties and spacing them properly so each wave supports the next.
You’ll need three main components: heat-tolerant zinnia seeds (like ‘Benary’s Giant’ or ‘Crystal’), well-draining soil, and a sunny spot with at least 6 hours of direct light daily. Start seeds indoors 4-6 weeks before your last frost, then transplant outdoors when soil reaches 60°F.
Space seedlings 12-18 inches apart—crowding leads to leggy stems and fewer blooms.
The payoff is bold, striped blooms that attract pollinators and deter pests naturally. Each new planting takes over as the previous one fades, creating a continuous show that lasts until hard frost.
Deadhead spent blooms weekly to encourage more flowers, and watch your garden become a magnet for bees and butterflies.
This method works in zones 3-10, with adjustments for shorter or longer growing seasons. For cooler climates, extend the season with row covers, while hotter zones benefit from afternoon shade. The secret? Treating zinnias like a living bouquet—plant, nurture, and repeat.
📚 In This Guide
- What you need
- Instructions
- Tips and common mistakes
- Wrapping up and next steps
What you need
- ● Zinnia seeds: Choose a mix of varieties (e.g., Benary’s Giant, Profusion, or Crystal) for height and color diversity. Aim for 2–3 oz (57–85g) per 100 sq ft.
- ● Well-draining potting mix or garden soil: 1–2 cubic yards (or enough to fill raised beds/containers). Amend with compost for fertility.
- ● Fertilizer: Balanced 10-10-10 or slow-release organic fertilizer (e.g., 5 lbs per 100 sq ft). Avoid high-nitrogen blends—zinnias thrive on phosphorus and potassium!
- ● Watering can or hose with a gentle spray nozzle: Zinnias need consistent moisture, especially during germination.
- ● Garden twine or stakes: 6-inch stakes (1 per plant) for taller varieties to prevent flopping.
- ○ Plant markers (optional but helpful): Label varieties if mixing types for easy tracking.
- ● Row covers or shade cloth: Protect seedlings from pests or harsh sun during early stages.
- ● Mulch (straw or shredded leaves): 2–3 inches to retain moisture and suppress weeds.
- ● Organic pest control: Neem oil or insecticidal soap for aphids or spider mites.
- ● Garden journal: Track planting dates, varieties, and blooming times for future success!
Step-by-Step instructions for succession planting zinnias
Here’s how to keep your garden bursting with bold, striped zinnias all season long—no gaps, no fuss.
🌱 Step 1: Time Your First Planting for Peak Heat
Start your first batch of zinnias 2-3 weeks before your last frost date when soil temperatures reach at least 55°F. I test this by pressing my finger into the soil—if it’s warm enough to feel comfortable, it’s ready. Zinnias thrive in heat, so don’t rush them into cold ground; they’ll sulk until temperatures rise.
Sow seeds ¼ inch deep in well-draining soil, spacing them 6 inches apart in rows 12 inches apart. Thin seedlings later to avoid overcrowding. Use the 1 packet of zinnia seeds to plant a 4-foot-long row, which will give you plenty of blooms for cutting or pollinators.
☀️ Step 2: Plant Successive Batches Every 3 Weeks
After your first planting, repeat the process every 3 weeks until 6-8 weeks before your first fall frost. This staggered schedule ensures a continuous supply of blooms. I mark my calendar with reminders—zinnias grow fast, and missing a window means a lull in color.
Each new batch will mature in about 60 days, so time it so the last planting blooms just as the first frost threatens. You’ll see a seamless transition of color, with no bare patches in your garden beds.
💧 Step 3: Water Deeply but Infrequently
Zinnias hate soggy roots, so water them deeply once a week instead of frequent shallow drinks. I use the hose with adjustable nozzle to soak the soil until water runs out the bottom of the pot or bed—about 1 gallon per plant. Let the top inch of soil dry out between waterings; wilting leaves are a sign they need more, but yellowing stems mean you’ve overdone it.
Mulch around plants with 2 inches of organic mulch to retain moisture and suppress weeds. Keep the mulch 2 inches away from stems to prevent rot. This step is non-negotiable in hot climates—mulch keeps roots cool and happy.
✂️ Step 4: Deadhead and Fertilize for Nonstop Blooms
Snip off spent blooms with clean pruners every 2-3 days to encourage more flowers. I cut just above a set of leaves where new buds form—this triggers the plant to produce fresh stems. Deadheading also keeps zinnias bushy and prevents them from going to seed too soon.
Feed plants with ½ teaspoon of balanced fertilizer every 4 weeks after they’ve established. I mix it into the soil around the base, then water deeply to help roots absorb it. Avoid over-fertilizing—zinnias bloom best when slightly hungry, not pampered.
🪴 Step 5: Extend the Season with Fall Plantings
For a late-season show, sow a final batch of seeds 8-10 weeks before your first frost. These zinnias will bloom until frost, providing color when many other annuals have faded. Choose heat-tolerant varieties like ‘Benary’s Giant’ or ‘Profusion’ for the longest season possible.
If frost threatens early, cover plants with frost cloth on chilly nights. Zinnias can handle light frosts, but a hard freeze will kill them. Harvest any remaining blooms before frost hits—you’ll still get vibrant stems for indoor arrangements.
Tips & tricks for perfect succession planting zinnias
Here's the secret to making your zinnia succession planting foolproof—these are the tricks I've learned after years of trial and error in my own garden.
Soil Temperature Test: That 55°F soil temperature rule in Step 1 is non-negotiable. I've ruined multiple plantings by ignoring this—zinnias won't germinate properly in cold soil. If you're unsure, use a soil thermometer for accuracy. The finger test works but can be misleading in early spring when soil warms quickly during the day but cools at night. For extra insurance, plant in black plastic pots—they absorb heat and warm the soil faster.
Seed Spacing Precision: The 6-inch spacing between plants and 12-inch rows from Step 1 might seem generous, but trust me on this—crowded zinnias produce fewer, smaller blooms. I once planted them too close and ended up with leggy, weak stems that flopped over. Use a simple ruler or measuring tape to mark your rows before planting. For container gardening, reduce spacing to 4 inches between plants but keep rows 12 inches apart for proper air circulation.
Watering Strategy: The once-a-week deep watering in Step 3 works wonders, but timing matters. Water in the morning so leaves have time to dry before evening—this prevents fungal diseases that love damp foliage. I set a reminder on my phone for my watering day to avoid forgetting. For containers, check soil moisture daily during hot spells—potted plants dry out much faster than in-ground plantings. That 1 gallon per plant measurement is perfect for established plants, but young seedlings only need about ½ cup of water every other day until they're 3 inches tall.
Deadheading Discipline: Those 2-3 days between deadheading sessions in Step 4 might seem like overkill, but it's what keeps your zinnias producing continuously. I've seen plants that bloom nonstop for months when deadheaded religiously versus those that peter out after two weeks. Use clean pruners and make cuts just above a leaf node—this encourages new growth from that exact spot. For large plantings, consider wearing gardening gloves to protect your hands from the sharp stems and thorns on some varieties.
Pro Tips for Succession Planting Zinnias
- Here's the secret to making your zinnia succession planting foolproof—these are the tricks I've learned after years of trial and error in my own garden.
- Soil Temperature Test: That 55°F soil temperature rule in Step 1 is non-negotiable.
- Seed Spacing Precision: The 6-inch spacing between plants and 12-inch rows from Step 1 might seem generous, but trust me on this—crowded zinnias produce fewer, smaller blooms.
Frequently asked questions
Got questions about keeping your zinnias blooming all season with succession planting? You’re not alone!
Here are some common concerns—and clear answers—to help you grow a nonstop parade of striped blooms.
What’s the best time to start my first zinnia planting?
For a continuous display, start your first batch 4–6 weeks before your last frost date (direct-sow or transplant). Follow up with new plantings every 2–3 weeks until 6–8 weeks before your first fall frost. This keeps blooms overlapping beautifully!
Can I use succession planting for zinnias in containers?
Just choose compact varieties (like ‘Thumbelina’ or ‘Crystal’) and plant 3–4 seeds per 6-inch pot. Space pots 12–18 inches apart for airflow. Replace spent plants with new ones every 3–4 weeks—containers are perfect for small spaces or balconies!
Why aren’t my zinnias blooming after succession planting?
Check these fixes:
- Deadhead spent blooms regularly to encourage new flowers.
- Ensure they get 6+ hours of full sun daily—zinnias wilt in shade.
- Water at the base (not leaves) to prevent mildew.
- Fertilize lightly with balanced 10-10-10 when planting and mid-season.
What if I miss a planting window—can I still get blooms?
Don’t stress! Zinnias are fast growers—even late plantings (up to 8 weeks before frost) can yield flowers. Opt for heat-tolerant varieties like ‘Profusion’ or ‘Zahara’ for extra resilience. Just thin seedlings to 12–18 inches apart for better airflow.
Are there any low-maintenance zinnia alternatives for succession planting?
Yes! Try these easy-care swaps:
- Cosmos: Drought-tolerant, self-seeds, and blooms nonstop.
- Sunflowers (like ‘Moulin Rouge’): Fast-growing and dramatic.
- Marigolds: Repel pests and thrive in poor soil.
- Calendula: Edible, medicinal, and loves succession planting.
Wrapping up and next steps
Succession planting zinnias isn’t just a gardening hack—it’s your ticket to a nonstop parade of bold, striped blooms all season long! 🌻 By staggering your plantings and keeping up with deadheading, you’ll turn your garden into a vibrant, ever-changing masterpiece.
Whether you’re a seasoned gardener or just dipping your toes into the dirt, this method makes it easy to enjoy months of effortless beauty.
Ready to take the next step? Grab your gloves and plant your first batch this weekend—then sit back and watch your garden transform! For extra inspiration, check out our guide on companion plants for zinnias to maximize your blooms even further.