
Companion Plants
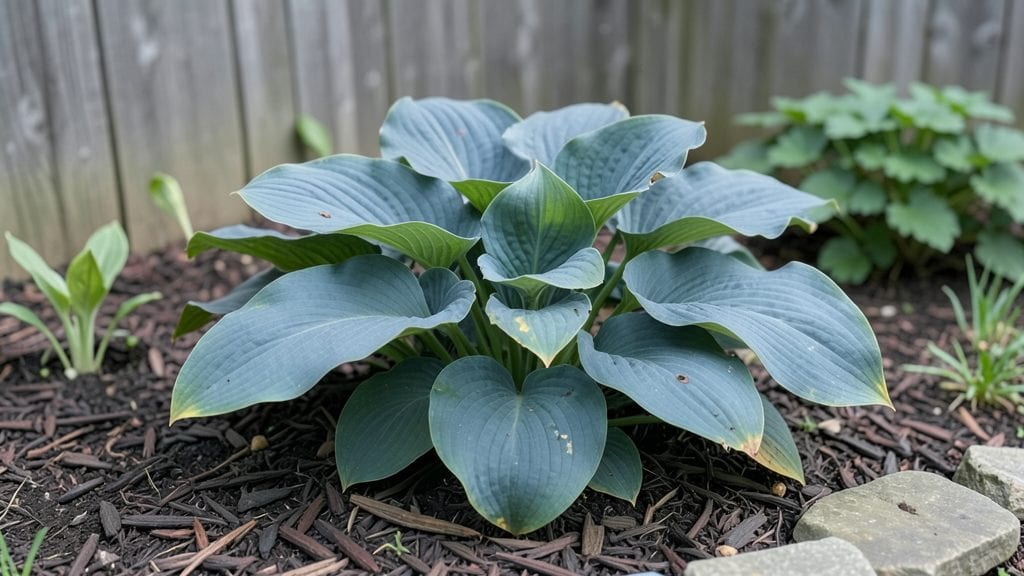
Shaded garden plants don’t just survive—they thrive with the right choices. 🌿 I’ve turned my dimly lit backyard into a lush retreat by swapping sun-lovers for plants that actually love the dappled light, and the difference is night and day.
These aren’t just filler plants; they’re the stars of the show, offering vibrant blooms, velvety foliage, and even edible surprises all season long.
The secret isn’t complicated: it’s about matching plants to their light levels. Deep shade? Try hostas, ferns, or astilbes—they’ll reward you with bold textures and year-round interest. Partial shade? Go for impatiens, heucheras, or even dwarf fruit trees that fruit better in cooler conditions.
My shade garden now has more color and less stress than my sunniest beds ever did, and it stays lush even in summer’s hottest stretches.
You’ll end up with a garden that feels alive, not just empty. Imagine walking through a space where every plant is happy—no leggy stems, no sparse blooms, just rich, healthy growth that keeps giving from spring through fall.
The best part? These plants handle humidity, poor soil, and even dry spells better than sun-lovers, so they’re low-maintenance once you get the layout right.
Whether you’re working with a north-facing yard, a tree canopy, or just a shady corner, this approach works.
I’ll show you how to layer plants for height, mix textures for depth, and pick colors that pop even in low light—so your garden becomes the envy of the neighborhood, not the forgotten spot at the back of the yard.
📚 In This Guide
- What you need
- Instructions
- Tips and common mistakes
- Wrapping up and next steps
What you need
- ● Shade-tolerant plants: 5–10 varieties (e.g., Hostas, Ferns, Hydrangeas, Heucheras, Astilbes, Lungwort, or Japanese Painted Ferns). Choose based on your shade level (full, partial, or dappled).
- ● Potting soil or garden soil: 10–20 bags (50 lbs each) of well-draining, organic-rich soil (amend with compost if your soil is heavy or clay-like).
- ● Mulch: 2–3 bags of organic mulch (e.g., shredded bark, wood chips, or pine straw) to retain moisture and suppress weeds.
- ● Fertilizer: Slow-release balanced fertilizer (10-10-10 or 20-20-20) or organic options like composted manure or worm castings.
- ● Garden tools: Trowel or hand shovel
- ● Pruners (bypass pruners for clean cuts)
- ● Garden fork (for aerating soil)
- ● Wheelbarrow or bucket (for mixing soil and transporting plants)
- ● Watering supplies: Watering can or hose with a gentle spray nozzle (shaded plants prefer consistent moisture)
- ○ Drip irrigation kit (optional, for automated watering)
- ● Soil test kit: To check pH and nutrient levels (ideal range for most shade plants: 5.0–7.0).
- ● Shade cloth: If your garden has partial shade and you want to filter extra light (30–50% shade cloth).
- ● Decorative stones or pebbles: For pathways or borders (e.g., river rocks or slate tiles).
- ● Garden stakes or labels: To mark plant varieties (especially useful for beginners!).
- ● Light-colored containers: If planting in pots (helps reflect light and reduce heat absorption).
How to design a thriving shaded garden layout
Here’s how to create a lush, low-maintenance shaded garden that blooms year-round without fighting for light.
🌿 Step 1: Assess Your Shade Levels
Not all shade is equal. Walk through your space at different times of day to note where light filters through. Dappled shade (sunflecks through trees) works for plants like ferns and astilbe, while deep shade (under dense canopies) needs hellebores or lungwort. Mark areas with a mix of partial shade (3-6 hours of light) and full shade (less than 3 hours).
Use a white board or stick flags to divide zones—this prevents overcrowding later. I like to sketch a rough map first; it saves time when arranging plants. If your yard has east-facing shade (morning sun), opt for moisture-loving plants like hostas or coral bells. West-facing shade (afternoon light) suits drier-tolerant varieties like Japanese painted ferns.
🪴 Step 2: Select Plants for Layered Texture
Layering creates depth and hides soil. Start with tall plants (3-5 feet) like Japanese anemones or astilbe at the back, followed by mid-height (1-3 feet) like heuchera or tiarella, and finish with ground covers (under 1 foot) like ajuga or sweet woodruff. This mimics a forest understory naturally.
Mix evergreens (like fern varieties) with deciduous foliage (like hostas) to ensure year-round interest. I always include at least one blooming plant (e.g., bleeding heart) to add color when others are dormant. Avoid grouping plants with identical leaf shapes—variety prevents a monotonous look.
☀️ Step 3: Amend Soil for Moisture Retention
Shade gardens thrive in well-draining but moisture-retentive soil. Work in 3 inches of compost and 1 inch of perlite or coarse sand to improve aeration. Test soil pH—most shade plants prefer 6.0-7.0. If your soil is heavy clay, add 2 inches of leaf mold or peat moss to lighten it.
Mulch with 3 inches of shredded bark or wood chips to suppress weeds and retain moisture. Avoid fresh wood chips (they can rob nitrogen). I like to refresh mulch annually in spring—it keeps the soil cool and reduces evaporation. This step is critical; poor soil drains the life out of shade plants faster than anything.
⏰ Step 4: Space Plants for Airflow and Growth
Check each plant’s mature spread on the tag and space them 12-24 inches apart, depending on size. Overcrowding leads to fungal issues in humid shade. Dig holes twice as wide as the root ball but only as deep as the root ball sits in its container. Loosen roots gently if they’re circling.
Plant in cool, overcast weather to reduce transplant shock. Water deeply right after planting to settle soil around roots. I always add a slow-release fertilizer (like 10-10-10) to the planting hole—it gives roots a nutrient boost without burning in shade conditions. Avoid high-nitrogen fertilizers; they encourage leafy growth at the expense of blooms.
💧 Step 5: Water and Maintain for Long-Term Health
Water deeply once a week (or more in extreme heat) until the top 6 inches of soil feels moist. Shade plants often show stress through yellowing leaves—this usually means underwatering. Use a soaker hose to water at the base and avoid wetting foliage (prevents fungal diseases like powdery mildew).
Prune spent blooms in spring to encourage new growth, but avoid heavy pruning in fall—it stresses plants before winter. Divide overcrowded perennials every 3-4 years in early spring. I mark my calendar to check for pests like slugs after rain; a few beer traps or diatomaceous earth keeps them in check without chemicals.
Tips & tricks for perfect shaded garden design
Creating a thriving shaded garden isn't just about choosing the right plants—it's about understanding the subtle details that make all the difference. Here are my most valuable insights to help you avoid common pitfalls and create a lush, low-maintenance space that truly thrives.
Light Assessment Secret: In Step 1, when you're assessing your shade levels, I recommend using a simple trick to track light changes throughout the day. Place a white piece of paper in different spots for a few hours—where you see distinct shadows during the day is your dappled shade area, while spots with almost no shadows indicate full shade. This visual test helps you make more accurate plant selections right from the start.
Layering Like a Pro: For Step 2's layered approach, think of your garden as a forest floor. Start with your tallest plants (3-5 feet) at the back, then work your way down to mid-height (1-3 feet) and finally ground covers (under 1 foot). Pro tip: Place your tallest plants where they won't cast too much additional shade on your shorter varieties. I like to position my Japanese anemones near the edges of shade areas where they can get just enough light to thrive without overwhelming the center.
Soil Prep Game-Changer: When amending your soil in Step 3, don't just focus on the quantities—pay attention to the texture. After mixing in your 3 inches of compost and 1 inch of perlite, do a simple squeeze test: Grab a handful of soil—it should hold together when squeezed but break apart easily when touched. If it feels like wet sand, you need more organic matter. This texture test is more reliable than just following measurements blindly.
Planting Timing Tip: For Step 4's planting window, I've found that early morning or late afternoon on cool, overcast days is ideal—but there's a trick to extend your planting window. If you must plant during the heat of day, soak the root balls thoroughly before planting and cover them with shade cloth for the first 24 hours. This gives your plants a head start on recovery from transplant shock, even if you're working outside the perfect weather window.
Pro Tips for Shaded Garden Plants
- Creating a thriving shaded garden isn't just about choosing the right plants—it's about understanding the subtle details that make all the difference.
- Light Assessment Secret: In Step 1, when you're assessing your shade levels, I recommend using a simple trick to track light changes throughout the day.
- Layering Like a Pro: For Step 2's layered approach, think of your garden as a forest floor.
Frequently asked questions
Got questions about keeping your shaded garden lush and vibrant? You’re not alone!
Here are answers to the most common queries about growing plants in low-light spaces—so you can enjoy year-round greenery without the guesswork.
What are the best fast-growing shaded garden plants for quick results?
If you want instant impact, opt for hostas, ferns (like maidenhair or Japanese), or astilbes. They thrive in shade and grow quickly—hostas can spread 1–2 feet per year, while ferns add texture in just a season. Caladiums (elephant ears) also deliver bold foliage fast, perfect for brightening dark corners.
How do I know if my shaded plants aren’t getting enough light?
Watch for tell-tale signs: leggy stems (stretching toward light), pale or yellowing leaves, or fewer blooms. If your plants look weak or sparse, they’re likely light-deprived. Try moving them to a slightly sunnier spot (even dappled light helps) or add a reflective surface (like white gravel) to bounce light upward.
Can I grow vegetables or herbs in a shaded garden?
While most veggies crave sun, leafy greens (kale, spinach, lettuce), radishes, and green onions thrive in partial shade. Herbs like cilantro, mint, and parsley also do well in low light. For best results, choose shade-tolerant varieties and keep soil rich with compost. Bonus: Shade helps prevent bolting (premature flowering) in heat-sensitive greens!
What’s the difference between “partial shade” and “full shade” for plants?
Partial shade
means 3–6 hours of direct sun daily (ideal for impatiens, hydrangeas, or coleus). Full shade gets less than 3 hours (perfect for heucheras, lungwort, or Japanese painted ferns). Pro tip: North-facing spots are often full shade, while east/west sides may offer partial shade. Check your space before planting!
How do I keep shaded plants from getting root rot or fungal issues?
Shady spots stay damp longer, inviting rot or mold. Improve drainage by amending soil with perlite or compost, and avoid overwatering. Airflow helps too! Space plants properly and prune dense foliage. Fungus-resistant picks like heucheras or carex sedges are great choices. When in doubt, let soil dry slightly between waterings.
Are there any shade-loving annuals for seasonal color?
Yes! Impatiens, fuchsias, and begonias bloom beautifully in shade and return yearly if you save seeds or replant. For longer seasons, try caladiums (elephant ears) or torenia. Tip: Deadhead spent blooms to encourage more flowers and extend your display!
Wrapping up and next steps
Creating a lush, thriving shaded garden is easier than you think—with the right shaded garden plants, your space can burst with color and life year-round! 🌿 From hardy ferns to vibrant impatiens, these low-light companions prove that shade doesn’t mean sacrifice.
Whether you’re a seasoned gardener or just starting, the key is patience, preparation, and the perfect plant palette.
Ready to transform your shady spots? Start small: Pick 1-2 plants from this guide, test your soil, and observe how they adapt. Over time, you’ll unlock the secrets to a self-sustaining, sun-kissed oasis—no direct sunlight required! Happy gardening! 🌱