Companion Plants
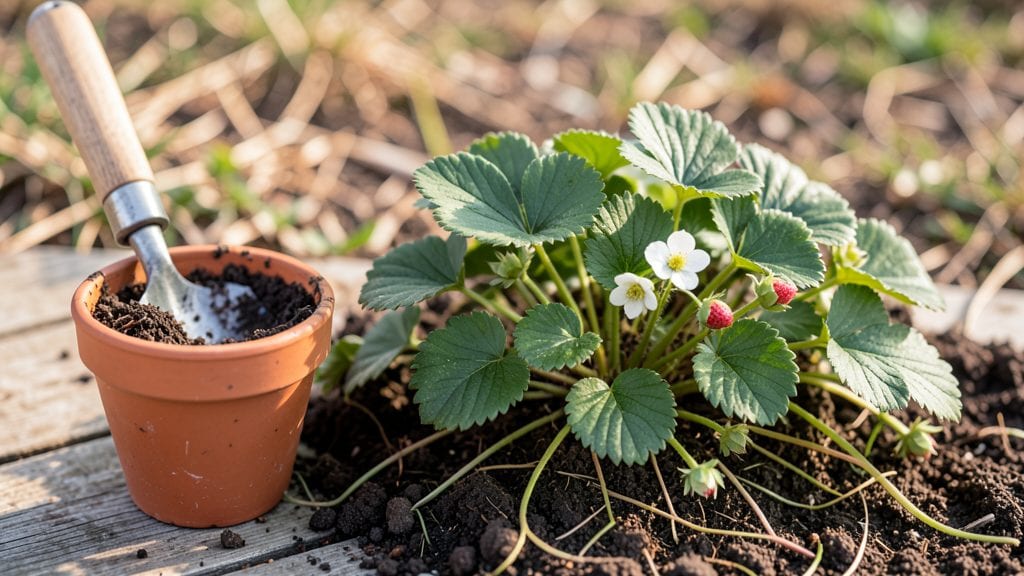
Repotting strawberry plants every two years keeps them producing lush berries and vibrant foliage for seasons to come. ✨ I learned the hard way that crowded roots mean fewer berries and more disease—so now I repot in early spring, just as the plants wake up but before they fruit.
The right container and soil mix make all the difference between a struggling plant and one that thrives.
You’ll need containers with drainage holes—at least 6 inches deep and 12 inches wide for each plant—and a well-draining soil mix that mimics their natural woodland habitat. A simple blend of 60% potting soil, 30% compost, and 10% perlite works wonders.
Gently loosen the roots before placing them in the new pot, and avoid disturbing the crown too much to prevent stress.
After repotting, keep the soil moist but not soggy for the first 7-10 days, and place the plants in partial shade to help them recover. You’ll notice new growth within 2-3 weeks, and by summer, they’ll be back to producing berries like they’re fresh from the nursery.
The key is patience—rushing the process leads to shock and stunted growth.
This method works year-round in mild climates, but spring or fall repotting gives plants the best chance to establish before extreme temperatures. Whether you’re reviving an old patch or expanding your garden, these steps ensure your strawberries stay productive for years to come. Let’s get those roots happy again!
📚 In This Guide
- What you need
- Instructions
- Tips and common mistakes
- Wrapping up and next steps
What you need
- ● New containers: Pots or raised beds with drainage holes (1-2 inches larger in diameter than current pots; e.g., 10-12" diameter for mature plants).
- ● High-quality potting mix: Well-draining, organic blend (avoid garden soil—it compacts!). Quantity: Enough to fill new pots (~1-2 gallons per plant).
- ○ Perlite or vermiculite: 1 part to improve aeration (optional but highly recommended for heavy soils).
- ● Slow-release fertilizer: Balanced 10-10-10 or organic options (1 tbsp per plant).
- ● Pruning shears: Sterilized (rubbing alcohol wipe between plants).
- ● Gloves: Garden or work gloves to protect from thorns and soil.
- ● Watering can or hose: With a gentle spray nozzle for post-repotting hydration.
- ○ Mulch (optional but helpful): Straw or shredded bark (1-2 inches) to retain moisture.
- ● Root stimulator: Mycorrhizal fungi or seaweed extract to boost root health (mix into soil).
- ● Copper tape: For raised beds to deter slugs/snails.
- ● Plant labels: To track varieties (especially if growing multiple types!).
- ● Knee pad: Because you deserve comfort during long repotting sessions! 😉
Repotting strawberry plants: year-round vigor with 3 stress-free steps
Strawberries thrive when roots aren’t cramped—here’s how to refresh their home without shock.
🪴 Step 1: Choose the Right Pot and Prep the Plant
Select a container at least 12 inches wide and deep—strawberries need room to spread roots horizontally. I prefer terracotta because it breathes and prevents soggy soil, but any pot with drainage holes works. Before repotting, water the plant thoroughly until water runs freely from the drainage hole. This ensures roots stay hydrated during the transition and minimizes transplant shock.
Gently remove the plant from its current pot by tipping it sideways and squeezing the container. If roots are tightly bound, use a butter knife to loosen them without tearing. You’ll see white, fibrous roots—these are healthy and ready for expansion. Trim any black or mushy roots with clean scissors, as they won’t recover. Healthy roots should feel firm and springy, not brittle.
🌱 Step 2: Refresh the Soil and Position the Roots
Fill the new pot one-third full with fresh well-draining potting mix (avoid garden soil—it compacts and suffocates roots). Strawberries prefer slightly acidic soil, so a mix formulated for container gardening works best. Create a small mound in the center of the pot, then place the plant on top so the crown (where leaves meet roots) sits just ½ inch below the rim. This prevents rot from sitting water.
Spread the roots evenly over the mound, then fill in around them with more potting mix, pressing lightly to eliminate air pockets. Leave 1 inch of space between the soil surface and the pot’s rim—this prevents spills when watering. Tap the pot gently on the table to settle the soil, then water until moisture seeps from the drainage hole. The soil should feel damp but not soggy to the touch.
☀️ Step 3: Acclimate and Maintain Post-Repotting Care
Place the repotted strawberry in a shaded spot for 3-5 days to reduce stress. Gradually reintroduce it to full sun over the next week—this mimics natural conditions and prevents leaf scorch. Strawberries need 6-8 hours of sunlight daily, but sudden exposure after repotting can shock the plant. Watch for wilting or yellowing leaves; these are signs to slow down the sun transition.
Water deeply every 2-3 days, keeping the soil consistently moist but never waterlogged. Mulch the surface with 1 inch of straw (yes, the same material you’ll eventually harvest) to retain moisture and suppress weeds. Fertilize lightly with a balanced, water-soluble fertilizer (10-10-10) 4 weeks after repotting—this gives roots time to establish before encouraging new growth. You’ll know it’s working when new leaves emerge within 2-3 weeks.
Tips & tricks for perfect strawberry repotting
Repotting strawberries might seem simple, but these pro tips will help you avoid common pitfalls and give your plants the best possible start.
Pot Selection Wisdom: While a 12-inch pot is the minimum, consider upgrading to 14-16 inches if you have multiple strawberry plants. Larger containers prevent root competition and allow for better drainage. I've found that terracotta pots work best because they wick away excess moisture, but plastic pots with drainage holes also work well if you're consistent with watering. The key is ensuring the pot is at least 50% wider than the plant's current root ball to prevent overcrowding.
Root Health Check: When examining the roots in Step 1, pay special attention to the color and texture. Healthy roots should be white or light tan, firm to the touch, and springy when gently squeezed. If you find roots that are black, brown, or mushy, trim them immediately with sterilized scissors. These damaged roots won't recover and can introduce rot to your healthy plant. Confession: I skipped this step for years and wondered why my plants struggled—turns out I was repotting with compromised roots!
Soil Preparation Strategy: For Step 2, mix your well-draining potting soil with a handful of perlite or vermiculite (about 10-15% of the total mix) to improve aeration. Strawberries are particularly sensitive to soggy soil, and this simple addition can make all the difference. I also recommend adding a slow-release fertilizer (like Osmocote) to the soil mix—this provides nutrients over time without the risk of over-fertilizing during the vulnerable repotting period.
Acclimation Timing: The 3-5 day shaded period in Step 3 is crucial for reducing transplant shock. If your strawberry shows signs of stress (yellowing leaves, wilting) during this time, extend the shaded period by another day or two. Real talk: I've seen plants recover from this extended shade period, but I've never seen one recover from sudden full sun exposure after repotting. Gradually move the pot to a spot with morning sun first, then gradually increase exposure over the week.
Pro Tips for Repotting Strawberry Plants
- Repotting strawberries might seem simple, but these pro tips will help you avoid common pitfalls and give your plants the best possible start.
- Pot Selection Wisdom: While a 12-inch pot is the minimum, consider upgrading to 14-16 inches if you have multiple strawberry plants.
- Root Health Check: When examining the roots in Step 1, pay special attention to the color and texture.
Frequently asked questions
Got questions about repotting strawberries? You’re not alone—let’s tackle the most common ones to keep your plants thriving! Whether you’re a newbie or just need a quick refresher, these answers will help you avoid pitfalls and maximize success.
When is the best time to repot strawberry plants?
The ideal time is early spring (just before new growth starts) or late summer (after harvest). Avoid repotting in extreme heat or cold—stress weakens roots. If you’re moving potted strawberries, spring is your best bet for a strong start.
How often should I repot strawberries?
Repot every 1–2 years or when roots crowd the container (check by gently tugging—if they’re root-bound, it’s time). For June-bearing varieties, repot in spring before fruiting. Ever-bearing or day-neutral plants can handle a summer refresh if needed.
Can I repot strawberries into the ground instead of pots?
If your climate allows, transplanting into well-draining soil with 3+ years of compost works great. Space plants 18–24 inches apart in rows 4 feet apart. Just avoid soggy soil—strawberries hate "wet feet." For containers, use 10+ inch pots with drainage holes.
My strawberries look wilted after repotting—what went wrong?
Don’t panic! Wilting often means transplant shock. Keep the soil moist (not soggy) for 1–2 weeks and avoid fertilizing until new growth appears. If leaves yellow (chlorosis), your plant may need iron or better drainage. Trim damaged roots during repotting to reduce stress.
Do I need to adjust care after repotting?
Yes! Pause heavy watering for 3–5 days post-repotting to let roots establish, then resume normal care. Hold off on fertilizer for 2–4 weeks—fresh soil has enough nutrients. Mulch with straw to retain moisture and protect berries from soil-borne diseases.
Wrapping up and next steps
Repotting your strawberry plants is a simple yet game-changing way to keep them thriving year-round! By choosing the right pot, soil, and timing—and giving them a little TLC—you’ll set the stage for bountiful harvests and healthier growth. 🌱
Now that you’re armed with the know-how, roll up your sleeves and give your strawberries the fresh start they deserve! Next up? Monitor their progress and adjust care as needed—your green thumb is about to shine even brighter. 🌟