
Planting
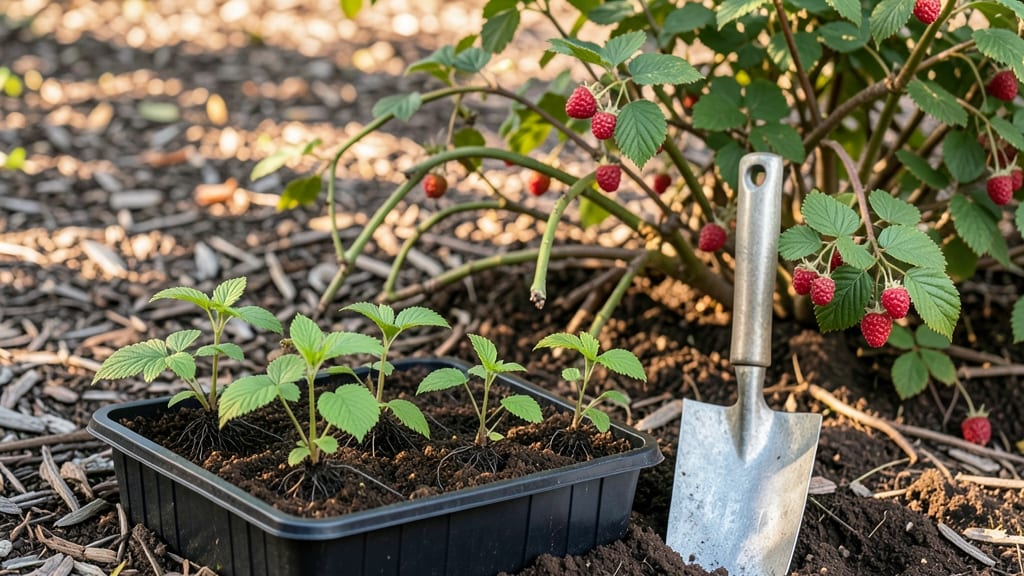
This raspberry planting guide reveals the secret to layered canes that yield fruit for years—not just one season, and I’ll show you why spacing matters. 🌱 timing right, you'll have a productive patch that keeps giving.
The secret isn't complicated: it's about matching the right soil, location, and care to how raspberries naturally grow.
You'll need bare-root canes (available in early spring), a sunny spot with at least 6 hours of light daily, and soil that drains well but holds moisture. Most gardeners overlook mulching, but a 3-inch layer of straw keeps roots cool and reduces weeds—saving you hours of maintenance later.
Planting in late winter or early spring gives roots time to establish before summer heat hits.
By following these three steps—preparing the soil, spacing canes 2 feet apart, and watering deeply after planting—you'll see new canes emerging within 4-6 weeks. The first harvest might be small, but each year, those layered canes will reward you with pounds of berries with minimal effort.
The best part? Once established, raspberries thrive with almost no extra work.
Works for both summer-bearing and fall-bearing varieties, and adapts to containers if space is tight. Here's how to get started without the common pitfalls that trip up beginners—like overwatering or planting too close together.
📚 In This Guide
- What you need
- Instructions
- Tips and common mistakes
- Wrapping up and next steps
What you need
- ● Raspberry canes: 3–5 healthy, dormant canes (bare-root or potted) from a trusted nursery. Choose varieties suited to your climate (e.g., Heritage for cold regions or Boyne for heat tolerance).
- ● Planting site: A sunny spot (6+ hours of sunlight daily) with well-draining soil. Test soil pH (ideal: 5.5–6.5).
- ● Compost or aged manure: 2–3 gallons per plant to enrich soil. Avoid fresh manure.
- ● Organic mulch: 2–3 inches of straw, wood chips, or pine needles to retain moisture and suppress weeds.
- ● Fertilizer: Balanced 10-10-10 or organic options like fish emulsion (follow package rates).
- ● Tools: Trowel or shovel
- ● Garden gloves
- ● Pruners (sterilized with rubbing alcohol)
- ● Watering can or hose with a gentle spray nozzle
- ● Trellis or stakes: 6–8 ft tall (for floricane types like Heritage) to support canes and improve airflow.
- ● Drip irrigation system: Automates watering and saves time.
- ● Soil amendments: Sulfur (to lower pH) or lime (to raise pH) if needed.
- ● Bird netting: Protects ripe berries from pests like birds or squirrels.
- ● Plant markers: Label varieties to track growth and harvest times.
Step-by-Step instructions for planting raspberries using layered canes
Here’s how to establish a high-yielding raspberry patch using the layered cane method—ideal for maximizing harvests in limited space.
🌱 Step 1: Select and Prepare Healthy Raspberry Canes
Choose primocanes (first-year canes) from a healthy, disease-free raspberry plant. Look for sturdy stems with 3-4 inches of new growth and at least 3-4 leaves. Avoid canes with yellowing, spots, or signs of pests. I like to harvest canes in early summer when they’re actively growing but not yet woody.
Trim the bottom 6 inches of each cane to remove any weak or damaged sections. This encourages stronger root development where you’ll later bury the layers. If you’re working with bare-root plants, soak the roots in lukewarm water for 1-2 hours before planting to rehydrate them. This step is critical—dry roots struggle to establish quickly.
🪴 Step 2: Plant Primocanes and Create Layering Points
Dig a trench 4-6 inches deep and 12 inches wide, spacing trenches 6 feet apart to allow for airflow and future cane spread. Raspberries thrive in full sun, so pick a location with at least 6-8 hours of direct sunlight daily. Amend the soil with 2-3 inches of compost and mix it into the top 6 inches of soil—raspberries love rich, well-draining earth.
Plant the primocanes vertically in the trench, spacing them 12 inches apart. Bury the bottom 6 inches of each cane, leaving the top 2-3 inches exposed. As the canes grow, they’ll develop roots at the buried nodes. Every 6-8 inches along the cane, gently bend a section down and secure it with a U-shaped stake or bent wire. Cover this section with 2-3 inches of soil, leaving just the tip exposed. This creates a layered cane, encouraging multiple fruiting points.
✂️ Step 3: Maintain and Encourage Root Development
Water the newly planted canes deeply immediately after planting, then 2-3 times per week for the first 4 weeks to encourage root establishment. Keep the soil evenly moist—not soggy, but never bone-dry. Mulch around the base with 2-3 inches of straw or wood chips to retain moisture and suppress weeds. Avoid thick mulch piles directly against the stems, as this can rot the cane.
By late summer, the layered sections should have developed roots. In early spring, carefully dig up the canes and separate the rooted layers. Plant these as individual canes in their final positions, 3-4 feet apart, with trenches spaced **6 feet apart. Prune back the old primocanes to the ground—they’ve done their job. The new canes (floricanes) will produce fruit the following year, while the primocanes will grow and layer again for next season’s harvest.
Tips & tricks for perfect raspberry layering success
Layering raspberry canes isn't just a clever trick—it's a game-changer for maximizing your harvest. Here's how to make it work flawlessly.
Cane Selection Matters: When choosing primocanes in Step 1, look beyond just the leaves. The ideal cane should have a diameter of about 1/4 inch and show vibrant green growth with no signs of stress. I've found that canes harvested in June (when they're actively growing but not yet woody) establish roots most reliably. Confession: I skipped this detail for years and wondered why my canes struggled—turns out, timing is everything.
Layering Technique: In Step 2, when creating those 6-8 inch layers, don't just bend the cane—gently score the underside with your thumb before burying. This small nick encourages faster root development at each layer point. I use bent wire instead of U-shaped stakes because it's more flexible and allows the cane to grow naturally while keeping the layers secure. The key is leaving just the tip exposed—this prevents the entire cane from becoming buried and suffocating.
Soil Preparation Insight: The 2-3 inches of compost you mix into the top 6 inches of soil should be well-aged. Fresh compost can burn young roots. I like to add a handful of bone meal to the trench before planting—it provides phosphorus for strong root development without overloading the plant. This is especially important if your soil is sandy or poor, as raspberries are heavy feeders.
Watering Strategy: Those first 4 weeks of watering are critical. I've learned the hard way that "evenly moist" doesn't mean constantly wet—aim for soil that's like a wrung-out sponge. Use a moisture meter if possible, or do the finger test: stick your finger 2 inches down—it should feel damp but not soggy. Mulching with straw (not wood chips) helps maintain this balance while suppressing weeds. Don't let the mulch touch the stems, though—this is a common mistake that leads to rot.
Pro Tips for Raspberry Planting Guide
- Layering raspberry canes isn't just a clever trick—it's a game-changer for maximizing your harvest.
- Cane Selection Matters: When choosing primocanes in Step 1, look beyond just the leaves.
- Layering Technique: In Step 2, when creating those 6-8 inch layers, don't just bend the cane—gently score the underside with your thumb before burying.
Frequently asked questions
Got questions about planting raspberries? You’re not alone! Here are answers to the most common concerns—so you can grow a thriving patch with confidence.
When is the best time to plant raspberries?
Plant raspberries in early spring (as soon as the soil is workable) or early fall (4–6 weeks before the first frost). Spring planting gives roots time to establish before summer heat, while fall planting avoids drought stress. Avoid planting in mid-summer—young plants struggle with heat and water competition.
Can I plant raspberries in containers?
Raspberries thrive in 5-gallon containers or larger with drainage holes. Use a well-draining mix (like 60% potting soil + 30% compost + 10% perlite). Dwarf varieties (e.g., ‘Heritage’ or ‘Boyne’) are ideal for containers. Just ensure they get 6+ hours of sunlight and regular watering—containers dry out faster than garden beds.
Why aren’t my raspberry canes fruiting?
Common culprits: age (primocanes—first-year canes—produce fruit the following year), lack of sunlight (<6 hours/day), or over-fertilizing with nitrogen (prioritize phosphorus for blooms). Check for pests (spider mites, Japanese beetles) or diseases (cane blight). If canes are thin or leggy, prune to encourage bushier growth.
Do raspberries need cross-pollination?
Nope! Raspberries are self-pollinating, so one plant is all you need for fruit. However, planting multiple varieties (e.g., ‘Heritage’ + ‘Nova’) can improve yield and flavor diversity. Just keep them 10+ feet apart to avoid cross-contamination if you’re saving seeds.
How do I protect raspberries from winter damage?
Mulch heavily with 4–6 inches of straw or wood chips after the first frost to insulate roots. For tender varieties in cold climates, bend canes to the ground and cover with burlap or frost cloth. Prune dead or damaged canes in early spring before new growth starts. Everbearing types need extra care—consider row covers for heavy snow loads.
Still stumped? Drop your question in the comments—we’re happy to help troubleshoot!
Wrapping up and next steps
You’ve got everything you need to grow bountiful raspberries using the layered cane method—now it’s time to roll up your sleeves and get planting! 🌱 With the right preparation, patience, and care, you’ll soon be harvesting sweet, juicy berries that’ll make your neighbors green with envy.
Start by selecting healthy canes, layering them strategically, and keeping them well-watered and mulched.
Ready to take the next step? Mark your calendar for your first harvest in about 1-2 years (yes, it’s worth the wait!) and enjoy the satisfaction of growing your own fruit. Happy planting—your future raspberry treats are just layers away! 🍓✨