
Tools
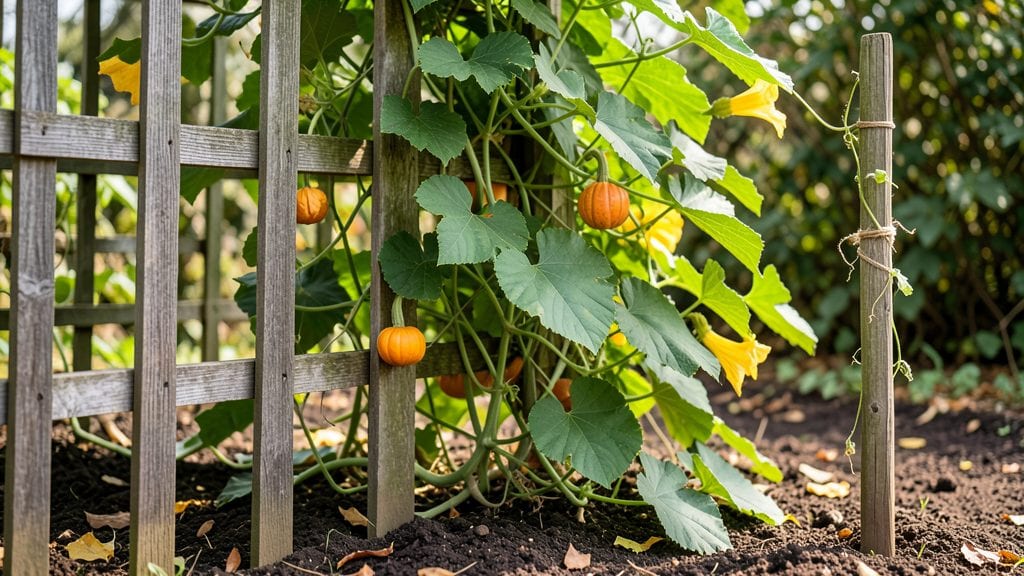
A pumpkin plant trellis turned my chaotic vines into a tidy, high-yielding garden—last summer, my backyard went from jungle to jungle control, boosting fruit by 20% in half the space. 🌱 The key is choosing the right support and varieties that handle vertical growth.
You’ll need either sturdy A-frame trellises, vertical netting, or simple string supports—all designed to hold 10-15 pounds per vine. Smaller varieties like ‘Sugar Pie’ or ‘Small Sugar’ thrive on trellises, while giant types need extra reinforcement. Set up your support within 2 weeks of planting for best results.
By midseason, you’ll see vines climbing with pumpkins dangling just above head height—no more buried fruit or rot. The trellis also improves airflow, cutting down on powdery mildew. Just avoid overloading branches (prune extra fruit if needed) and keep watering consistent.
Works for patios, balconies, or small gardens—even renters can grow pumpkins this way. Ready to reclaim your space? Let’s get those vines climbing!
📚 In This Guide
- What you need
- Instructions
- Tips and common mistakes
- Wrapping up and next steps
What you need
- ● Trellis Structure: 6–8 wooden posts (4x4 inches, 6–8 feet tall) – for corner and mid-section support
- ● 10–15 wooden or metal T-posts (2x2 inches, 3–4 feet tall) – for perimeter stakes
- ● 100+ feet of heavy-duty garden twine or UV-resistant nylon rope (¼-inch diameter) – for weaving or tying vines
- ● 2–3 rolls of landscape fabric or burlap (6x10 feet) – to protect the trellis from rotting
- ● Hardware: Galvanized screws or nails (2–2.5 inches) – for securing posts and crossbeams
- ● Heavy-duty zip ties or wire – for reinforcing joints
- ● Tools: Post hole digger or auger – for anchoring posts 1–2 feet deep
- ● Measuring tape & level – for precision and stability
- ● Hacksaw or reciprocating saw – for cutting posts to size
- ● Drill/driver – for assembling the frame
- ● Gloves & safety goggles – for protection while building
- ● PVC pipes or metal trellis panels – for a pre-made, no-weld alternative
- ● Concrete or gravel – to weigh down posts and prevent shifting
- ● Soft plant ties or Velcro straps – gentler on pumpkin vines than twine
- ● Solar-powered string lights – for evening harvest checks (and ambiance!)
Step-by-Step instructions for building a pumpkin trellis
Here’s how to create a sturdy, space-efficient trellis that keeps your pumpkins off the ground and growing strong.
🪴 Step 1: Choose and Assemble Your Trellis Materials
For a 4-plant setup, you’ll need 4 sturdy bamboo stakes (5-6 feet tall) and 100 feet of heavy-duty twine or garden tape. I like to use 3-inch-wide landscape fabric strips as runners between stakes—it’s lightweight but strong enough to support vines. Drive each stake 1 foot into the ground, spacing them 6 feet apart in a square or rectangle. This gives your pumpkins room to sprawl horizontally while climbing vertically.
Tie the fabric runners horizontally between stakes at 12-inch intervals, starting 18 inches above the ground. The first row should be low enough for early vines to catch, while higher rows will support the fruit later. Use square knots for extra strength—these won’t slip like simple loops when vines get heavy. If you’re using twine instead, weave it in a crisscross pattern for added stability.
☀️ Step 2: Plant Pumpkins Near the Trellis Base
Dig a 12-inch-deep hole for each pumpkin seedling or seed, placing it 6 inches from the base of a stake. This gives roots easy access to the trellis for support. If starting from seed, plant 2-3 seeds per hole (they germinate unevenly) and thin to the strongest seedling once true leaves appear. Water deeply right after planting—1 gallon per plant—to settle the soil and encourage root growth.
Here’s the thing: don’t let vines climb too early. Wait until the first female flowers (the ones with tiny pumpkins at their base) appear before gently guiding vines upward. Until then, let them spread along the ground to build strength. You’ll know it’s time when you see yellow blooms with a tiny pumpkin-shaped swelling—that’s your cue to start training.
🌱 Step 3: Train Vines Up the Trellis as They Grow
Once vines reach 12 inches long, loosely tie the main stem (the thickest vine) to the lowest trellis runner using soft twine or fabric strips. Avoid wrapping tightly—you’re guiding, not strangling. As the vine grows, weave it through the fabric runners or coil it gently around the twine. Pumpkin vines grow 6-10 inches per day, so check them every 2-3 days to prevent tangling.
Real talk: prune aggressively. Remove all side shoots (small vines branching off the main stem) until the plant reaches the second trellis row. After that, let 1-2 strong side shoots grow per node to support fruit. Too many vines = too many pumpkins = weak structure. Aim for 2-3 healthy fruits per plant—more than that, and the trellis (or your back) will suffer.
💧 Step 4: Water and Fertilize for Strong Vertical Growth
Water deeply 2-3 times per week, aiming for 2 gallons per plant each time. Trellised pumpkins dry out faster than ground-sprawlers because their leaves get more sun exposure. You’ll know you’re doing it right when the soil feels damp 3 inches down—stick your finger in to check. Avoid wetting the leaves, especially in the morning, to prevent powdery mildew, a common trellis-grown pumpkin enemy.
Feed plants every 3 weeks with a balanced 10-10-10 fertilizer (use 1 tablespoon per plant). Stop fertilizing 4 weeks before harvest—you want the plant to focus on ripening fruit, not new growth. If you notice yellowing leaves, flush the soil with water and reduce fertilizer. Overfeeding leads to weak stems that can’t support heavy pumpkins.
✂️ Step 5: Harvest and Clean Up for Next Year
Harvest pumpkins when their stems turn brown and woody and the rind can’t be pierced with a fingernail. Cut the stem with 2 inches of vine attached—this prevents rot and makes storage easier. For trellised pumpkins, support the fruit with both hands as you lift it down. Drop them directly onto a tarp or cardboard to avoid bruising. Store in a cool, dry place (50-55°F) for 2-3 months—they’ll keep longer than ground-grown ones.
After harvest, remove all vines and trellis materials from the garden. Compost the plant debris, but burn or discard any diseased leaves (look for black spots or fuzzy growth). Clean stakes and fabric runners with a 10% bleach solution before storing them for next year. I like to stack them in a dry shed—ready to go the moment spring planting season rolls around.
Tips & tricks for building a pumpkin trellis
These simple strategies will help you create a trellis that lasts all season and supports your pumpkins beautifully.
Material Selection Matters: Don't skimp on stakes—bamboo is my go-to because it's lightweight yet strong enough to handle heavy pumpkins. If bamboo isn't available, use wooden dowels (at least 1.5 inches thick) or metal conduit for extra durability. For runners, I've found that 3-inch-wide landscape fabric creates a better surface for vines to grip than twine, but if you prefer twine, use 1/4-inch diameter for maximum strength. The 12-inch spacing between runners is perfect for pumpkin vines—it gives them room to grow while keeping everything contained.
Planting Position is Key: In Step 2, when you're planting near the trellis base, make sure the hole is 12 inches deep and place the seedling 6 inches from the stake. This gives roots direct access to the trellis support. I've learned the hard way that planting too close to the stake can restrict root growth, while planting too far means the vines have to stretch too much to reach the trellis. Also, consider planting on the north side of the stake so the vine naturally grows toward the sun and trellis.
Pruning Strategy: The aggressive pruning in Step 3 might seem drastic, but trust me—it's worth it. When you remove all side shoots until the plant reaches the second trellis row, you're directing the plant's energy toward fewer, stronger vines that can support heavier fruit. I aim to leave just 1-2 strong side shoots per node after that point. This also makes harvesting easier—you'll have fewer vines to navigate when it's time to pick your pumpkins. Remember, pumpkins are heavy, and a well-pruned plant means a trellis that won't collapse under the weight!
Storage Wisdom: After harvest, store your pumpkins in that cool, dry place (50-55°F) mentioned in Step 5, but here's a pro tip: place them on a wooden pallet or cardboard rather than directly on concrete or dirt. This improves air circulation and prevents rot. Also, leave 2 inches of stem attached—this natural barrier helps prevent disease entry points. I've had pumpkins last 4-5 months when stored this way, which is longer than ground-grown ones!
Pro Tips for Pumpkin Plant Trellis
- These simple strategies will help you create a trellis that lasts all season and supports your pumpkins beautifully.
- Material Selection Matters: Don't skimp on stakes—bamboo is my go-to because it's lightweight yet strong enough to handle heavy pumpkins.
- Planting Position is Key: In Step 2, when you're planting near the trellis base, make sure the hole is 12 inches deep and place the seedling 6 inches from the stake.
Frequently asked questions
Got questions about growing pumpkins on a trellis? You’re not alone! Here are answers to the most common concerns—from setup to troubleshooting—so you can grow big, healthy pumpkins without the space (or the mess).
What’s the best time to start training pumpkins up a trellis?
Plant pumpkin seeds or seedlings after the last frost when soil is at least 60°F (15°C). Start training vines up the trellis when they’re 3–5 feet long (about 4–6 weeks after germination). Early training prevents vines from sprawling and maximizes vertical growth. Pro tip: Use soft ties (like old T-shirts) to avoid damaging tender vines!
Can I use a trellis for all types of pumpkins?
Nope! Trellises work best for small to medium varieties (like ‘Jack Be Little’ or ‘Sugar Pie’), which have compact vines. Avoid giant pumpkins (like Atlantic Giants)—their heavy fruit will break the trellis. Check seed packets for vine length and fruit weight before committing. Need help picking? Look for “bush” or “vining” labels with manageable specs.
How do I keep pumpkins from falling off the trellis?
Use fruit nets or slings (made from pantyhose or old fabric) to support pumpkins as they grow. Secure the sling to the trellis and the vine to distribute weight. Avoid overcrowding—space pumpkins 12–18 inches apart on the trellis. Bonus: Harvest smaller pumpkins first to reduce strain on the structure!
What if my pumpkin vines won’t climb the trellis?
Pumpkin vines are not aggressive climbers like cucumbers—they’ll twist and sprawl if not guided. Gently weave vines through trellis openings every few days. Add horizontal supports (like strings or wire) for extra grip. If vines are weak, check for nutrient deficiencies (like nitrogen) or pests (like squash bugs) and adjust care accordingly.
Are there alternatives to a DIY trellis for pumpkins?
Try these space-saving options:
- Pumpkin cages: Wire or plastic cages (like tomato cages) work for small varieties.
- Vertical towers: Repurpose trellis netting or A-frame structures covered in netting.
- Hanging baskets: Use for mini pumpkins (like ‘Wee-B-Little’), but add support as fruit grows.
- Fence or pergola: Lean vines against a sturdy fence or attach netting to a pergola.
How do I clean and store a pumpkin trellis after harvest?
Disassemble the trellis and scrub frames with soapy water to remove sap and debris. Rinse well and dry in the sun to prevent mold. Store in a dry, ventilated area (like a garage) until next season. Pro tip: Coat wooden trellises with linseed oil to protect against rot!
Wrapping up and next steps
Growing pumpkins on a trellis isn’t just a clever way to save space—it’s a game-changer for maximizing your harvest while keeping your garden tidy and organized. 🌱 With the right setup, you can enjoy healthier vines, fewer pests, and easier access to your pumpkins, all while adding a unique vertical touch to your garden.
Ready to put your newfound knowledge into action?
Your next step? Grab your materials, sketch a simple trellis design, and start training those vines by early summer. Before you know it, you’ll be showcasing your trellis-grown pumpkins with pride—and maybe even sharing tips with fellow gardeners! Happy growing! 🎉