Pruning
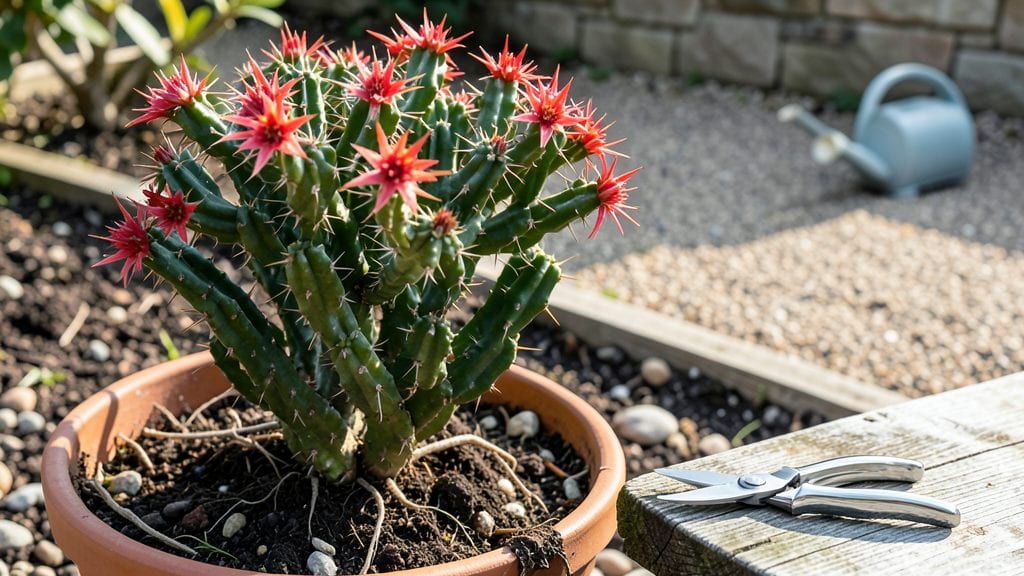
Pruning euphorbia plants transforms leggy stems into lush, bushy growth—if you do it right. 🌿 The key is timing, technique, and handling that irritating sap correctly.
I’ve pruned everything from delicate spurges to cactus-like euphorbias, and the difference between a scraggly plant and a thriving one comes down to these three precise steps.
The best time to prune is in early spring before new growth begins, though you can also trim back after flowering if needed. Use sharp bypass pruners and wear gloves—euphorbia sap is toxic and causes skin irritation.
For varieties like Euphorbia characias, cut back by one-third to encourage branching, while cactus-like euphorbias benefit from minimal pruning to maintain their shape.
After pruning, your plant will respond quickly with fresh, vibrant shoots within weeks. The key is to avoid over-pruning, which stresses the plant, and always cut just above a leaf node. For varieties prone to mildew, like Euphorbia amygdaloides, ensure good airflow by spacing cuts properly.
Common mistakes include pruning too late in the season or using dull tools, which can tear stems and invite disease. With the right approach, your euphorbia will reward you with denser foliage, longer blooming periods, and a fuller appearance—no matter the variety. Let’s get those shears ready!
📚 In This Guide
- What you need
- Instructions
- Tips and common mistakes
- Wrapping up and next steps
What you need
- ● Pruning shears: Bypass pruners (sharp, clean, and sterilized with rubbing alcohol or bleach solution—Euphorbia sap is toxic!). Quantity: 1 pair.
- ● Gloves: Heavy-duty, nitrile-coated gloves (latex may degrade with sap). Quantity: 1 pair (or 2 if working with multiple plants).
- ○ Safety goggles: To protect against sap splashes (optional but highly recommended).
- ● Disposable towels or paper plates: For wiping sap and tools. Quantity: 2–3.
- ● Rubbing alcohol (70%+ isopropyl) or bleach solution: 1:10 bleach-to-water ratio for sterilizing tools. Quantity: Small bottle or spray.
- ● Sharpie or permanent marker: For labeling cuttings if propagating. Quantity: 1.
- ○ Rooting hormone (optional): Gel or powder to boost cutting success. Quantity: Small tube.
- ● Small pots or trays: For propagating cuttings (4–6" pots work well). Quantity: 2–4, depending on cuttings.
- ● Well-draining potting mix: Cactus/succulent mix or perlite-heavy blend. Quantity: Enough to fill pots.
- ● Choose a bright, dry day to minimize stress on the plant (avoid pruning after watering).
- ● Ensure your Euphorbia is healthy and mature (at least 1–2 years old for best results).
- ● Have a clean workspace (outdoors or in a well-ventilated area).
- ● Check local weather forecasts—prune at least 2 weeks before heavy rain or extreme heat.
Step-by-Step instructions for pruning euphorbia plants
Euphorbias thrive when pruned correctly—here’s how to coax fuller, healthier growth without stressing the plant.
✂️ Step 1: Identify and Remove Dead or Damaged Growth
Start by inspecting your euphorbia for any stems that are brown, mushy, or brittle—these are dead or dying. Euphorbias are succulents, so they don’t regenerate well from damaged tissue. Use clean, sharp pruning shears to cut just above the healthy green tissue, making a clean slice at a 45-degree angle to prevent water from pooling on the wound.
Real talk: Euphorbia sap is irritating, so wear gloves and avoid touching your face or eyes. If you’re unsure whether a stem is dead, gently tug it—if it pulls away easily, it’s gone. If it resists slightly, it’s still alive. This step ensures your plant isn’t wasting energy on unsalvageable growth.
✂️ Step 2: Prune for Shape and Encourage Branching
Euphorbias grow best when pruned to promote bushiness. Focus on the upper third of the plant, cutting back leggy or overgrown stems to just above a leaf node or joint. This encourages new side shoots to form, creating a fuller, more compact plant. For taller varieties, like Euphorbia tirucalli, you can even shape them into small trees by leaving a single central stem and pruning side branches.
Here’s the thing—euphorbias store water in their stems, so they’ll survive light pruning without stress. But if you cut too aggressively, the plant may take weeks to recover. I like to prune in early spring, just as new growth begins, so the plant has the entire growing season to bounce back.
🌿 Step 3: Clean Up and Promote Recovery
After pruning, remove all fallen leaves or stems from the soil surface—they can harbor pests or disease. Euphorbias are sensitive to overwatering post-prune, so let the soil dry out completely between waterings for 1-2 weeks. This gives the plant time to heal and prevents rot. If you notice any weeping sap (a sign of stress), let it dry naturally—don’t wipe it away, as this can damage the plant further.
Once the plant shows new growth—usually within 2-4 weeks—you can resume normal care. I often fertilize lightly after pruning to support recovery, but only if the soil is dry. Too much fertilizer too soon can burn the fresh cuts. Watch for new shoots emerging from the nodes; that’s your sign the pruning worked!
⏰ Step 4: Time Your Pruning for Best Results
Prune euphorbias in early spring or late summer, when the plant is entering its active growth phase. Avoid pruning in winter, as the plant is dormant and won’t recover well. If you’re shaping a euphorbia for a specific look (like a topiary), do light touch-ups throughout the growing season, but never remove more than one-third of the plant’s foliage at once.
Don’t skip this: Euphorbias produce milky sap that can clog shears, so clean your tools with rubbing alcohol after each use. I also like to wear long sleeves and eye protection—trust me, you don’t want that sap on your skin or in your eyes. With the right timing and technique, your euphorbia will reward you with lush, vibrant growth all season long.
Tips & tricks for pruning euphorbia plants
A few simple tricks can make all the difference when pruning euphorbias—here's what I've learned from years of working with these striking succulents.
Tool Preparation: Always sterilize your pruning shears with rubbing alcohol before and after use—euphorbia sap can clog blades and introduce pathogens. I also recommend using a dedicated pair of shears for euphorbias only to prevent cross-contamination with other plants. The 45-degree angle mentioned in Step 1 is crucial for preventing water accumulation, which can lead to rot.
Visual Cues for Pruning: In Step 2, look for the small leaf nodes or joints where new growth emerges. These appear as tiny bumps or indentations along the stem. Cutting just above these nodes (about 1/8 inch) maximizes your chances of new shoots forming. For taller varieties, I often leave the lower third of the plant untouched to maintain stability while encouraging bushiness in the upper sections.
Recovery Strategy: The 1-2 week watering restriction in Step 3 is non-negotiable—euphorbias are succulents that store water, and overwatering after pruning can drown the fresh cuts. I've found that placing pruned plants in bright, indirect light during this recovery period actually speeds up the healing process. Watch for new growth appearing within 2-4 weeks as your signal to resume normal care.
Seasonal Timing: Early spring and late summer are ideal because these are the plant's active growth phases. In Step 4, I recommend checking your local climate—if you're in a region with mild winters, you might get away with light pruning in early winter, but avoid heavy pruning when the plant is dormant. The one-third foliage rule is a good guideline, but I often err on the conservative side with first-time prunings.
Pro Tips for Pruning Euphorbia Plants
- A few simple tricks can make all the difference when pruning euphorbias—here's what I've learned from years of working with these striking succulents.
- Tool Preparation: Always sterilize your pruning shears with rubbing alcohol before and after use—euphorbia sap can clog blades and introduce pathogens.
- Visual Cues for Pruning: In Step 2, look for the small leaf nodes or joints where new growth emerges.
Frequently asked questions
Got questions about pruning your Euphorbia plants? You’re not alone! Here are some of the most common concerns—plus quick, actionable answers to keep your plants thriving.
When is the best time to prune Euphorbia?
Prune your Euphorbia in early spring (just as new growth begins) or after flowering, if applicable. Avoid pruning in winter—these plants are dormant and more vulnerable to stress. For tropical varieties, late summer works too, but always wait until temperatures are mild.
Do I need special tools to prune Euphorbia?
Yes! Use sterilized, sharp pruning shears or bypass pruners to make clean cuts. Wear gloves—Euphorbia sap is irritating (it causes skin rashes). A latex-free option is best. Disinfect tools with rubbing alcohol before and after pruning to prevent disease spread.
What should I do with the cuttings?
Euphorbia cuttings root easily! Let them dry for 1-2 days to callus over (prevents rot), then plant in well-draining soil or water. For propagation, use a rooting hormone to speed up growth. Avoid overwatering—these plants hate soggy roots!
My Euphorbia looks leggy after pruning—what went wrong?
Leggy growth usually means too little light or over-pruning. Move your plant to a sunnier spot (6+ hours of light daily) and prune only 1/3 of the plant at a time. If the stems are woody, prune back to a leaf node to encourage bushier regrowth.
Can I prune Euphorbia indoors vs. outdoors differently?
Indoor Euphorbia needs more frequent pruning (every 3-4 months) due to limited light, while outdoor varieties can go longer. Indoors, use grow lights if natural light is poor. Outdoors, prune after last frost to avoid cold damage. Both thrive with well-draining soil—just adjust watering!
Wrapping up and next steps
Pruning your euphorbia plants doesn’t have to be intimidating—it’s all about timing, technique, and a little patience! With the right tools, a clear method, and safety precautions, you’ll encourage lush, bushier growth while keeping your plants thriving.
Remember, consistency is key, so make it a habit to check your euphorbias regularly and trim as needed.
Now that you’re armed with knowledge, grab those shears and get pruning! 🌿✂️ Start with one plant at a time, and soon, your euphorbia collection will be the envy of the neighborhood. Happy gardening!