Pruning
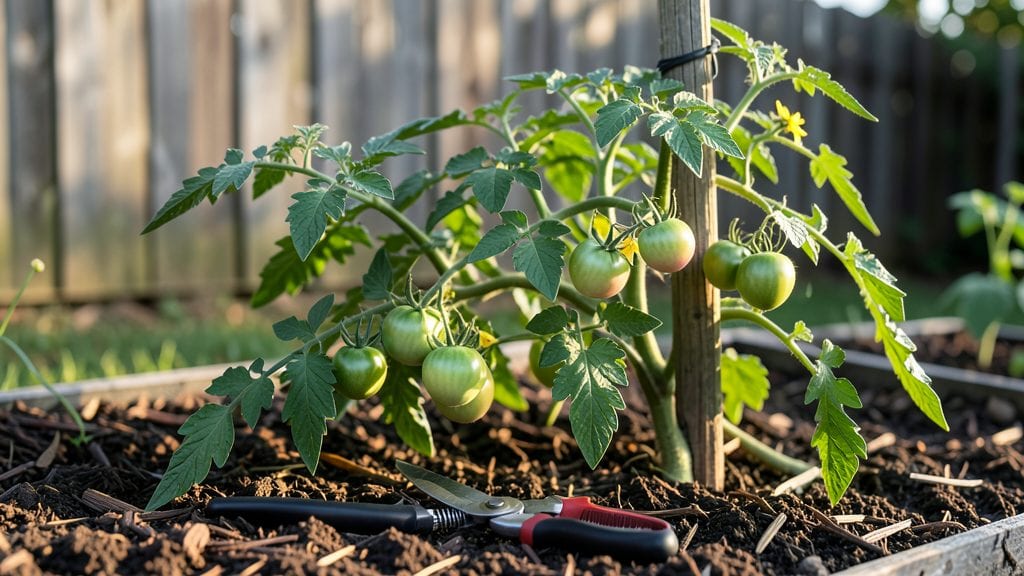
Pruning vegetable plants isn't just trimming—it's the secret to doubling your harvest and keeping plants healthy all season long. 🌱 I learned the hard way that skipping this step means fewer tomatoes, more disease, and plants that sprawl everywhere.
The right cuts at the right time transform weak growth into strong, productive bushes that keep yielding until frost.
You only need three basic tools: sharp pruners, a clean knife, and a small spray bottle of rubbing alcohol to sterilize between cuts. Timing matters most—early season pruning shapes plants, mid-season trims boost fruit production, and late-season cuts prevent disease.
Even beginners can master this with just 15 minutes of practice, and the results speak for themselves: bigger, healthier plants that produce for weeks longer.
Imagine your tomato plants standing tall instead of flopping, cucumbers climbing neatly instead of tangling, and peppers packed with fruit instead of leggy and sparse.
That's the power of strategic pruning—more space for air circulation means fewer fungal problems, and targeted cuts encourage plants to focus energy on what you want: juicy tomatoes, crisp cucumbers, and plump peppers. The key is working with the plant's natural growth habits, not against them.
This method works for nearly every vegetable—tomatoes, peppers, cucumbers, beans, even herbs like basil. Whether you're dealing with a crowded backyard plot or container gardens on a balcony, these simple techniques adapt to any space. Let's get those plants shaped up for maximum productivity!
📚 In This Guide
- What you need
- Instructions
- Tips and common mistakes
- Wrapping up and next steps
What you need
- ● Sharp pruning shears – Bypass pruners (for clean cuts on stems up to ½ inch thick). Anvil pruners (for thicker branches, but avoid crushing stems).
- ● Hand pruners – Ergonomic, bypass-style for precision work (e.g., Felco F2 or Corona).
- ● Garden gloves – Heavy-duty, cut-resistant (e.g., Mechanix or Wolverine) to protect hands from thorns or rough stems.
- ● Disinfectant (70% isopropyl alcohol or bleach solution) – 1 part bleach to 9 parts water to sterilize tools between cuts and prevent disease spread.
- ● Sharp knife or razor blade – For ultra-fine trimming (e.g., tomato suckers or delicate herbs).
- ● Compost bin or bag – To dispose of pruned material (avoid leaving it on the ground to prevent pests/disease).
- ● Loppers – For thicker stems (up to 1.5 inches) in larger plants like squash or pumpkins.
- ● Hose with nozzle – To rinse tools and plants post-pruning (reduces disease risk).
- ○ Plant growth regulator (optional) – Hormone-free gel (e.g., rooting powder) for encouraging faster regrowth on cut stems.
- ● Labeling tags – To mark pruned areas if tracking plant progress (e.g., for heirloom varieties).
- ● Sunhat & sunscreen – Because even gardeners need shade breaks! ☀️
Step-by-step instructions for pruning vegetable plants
Here's how to boost yields and plant health with precise, seasonal trims.
✂️ Step 1: Identify the Right Time for Each Trim
Vegetable plants respond best to pruning during their active growth phases. For leafy greens like kale or Swiss chard, I harvest outer leaves when they reach 6-8 inches—this encourages continuous production. For tomatoes and peppers, wait until the plant has developed 4-6 main stems before pruning suckers (the small shoots that form in the leaf axils).
Spring is ideal for fruit-bearing plants like berries or grapes, as new growth is vigorous and can handle pruning. In summer, focus on deadheading spent blooms from herbs like basil or cilantro to redirect energy into leaf production. Always prune in the morning when plants are hydrated and temperatures are mild—this reduces stress.
✂️ Step 2: Use the Right Tools and Technique
Sharp, clean pruners are non-negotiable. I sterilize my tools with 70% isopropyl alcohol before each session to prevent spreading disease. For larger stems, use bypass pruners—avoid anvil pruners, which crush tissue and invite infection. Cut at a 45-degree angle, ¼ inch above a leaf node or outward-facing bud to encourage healthy regrowth.
Never prune more than ⅓ of the plant at once. For example, if you're shaping a bushy plant like rosemary, remove only the oldest, leggiest stems first. Watch for sap bleeding in plants like tomatoes—this is normal and indicates vigorous growth. If you see yellowing leaves after pruning, it’s a sign of over-pruning; wait until new growth appears before trimming again.
✂️ Step 3: Trim for Airflow and Light Penetration
Thin crowded stems to improve air circulation, which prevents fungal diseases like powdery mildew. For plants like cucumbers or squash, remove the weakest vine when it’s 6-8 inches long, leaving the strongest two or three. In herbs like mint or oregano, cut back by ⅓ to encourage bushier, more flavorful growth.
Look for shady spots where leaves block sunlight. Prune out any stems growing toward the center of the plant—this opens it up and reduces humidity buildup. For trellised plants like peas or beans, pinch off side shoots to direct energy into pod production. You’ll see a noticeable difference in 3-5 days as new, vibrant growth emerges.
✂️ Step 4: Post-Prune Care for Recovery
Water deeply after pruning to help the plant recover. I use a slow, thorough soak to encourage root activity, especially if the day is warm. Avoid fertilizing immediately—pruned plants need time to redirect energy into healing. Instead, wait 5-7 days and then apply a balanced, water-soluble fertilizer to support regrowth.
Monitor pruned plants closely for the first 72 hours. If you notice wilting or drooping, it’s a sign of shock—provide shade and keep the soil moist until the plant stabilizes. For fruit-bearing plants, prune in stages over 2-3 weeks to avoid overwhelming the plant. You’ll know you’ve done it right when you see new buds forming within 10-14 days.
⏰ Step 5: Plan Seasonal Maintenance Trims
Fall is the time to clean up spent plants. For perennials like asparagus or rhubarb, cut back dead foliage to ground level after harvest to prevent pests from overwintering. In late winter, prune woody plants like artichokes or globe artichokes to remove dead wood and shape the plant for the coming season.
I mark my calendar for early spring pruning to stimulate new growth before the growing season kicks off. For annuals like basil or lettuce, focus on harvesting regularly rather than heavy pruning—this keeps them productive until frost. By following this schedule, you’ll extend the harvest season and keep your vegetable plants thriving year-round.
Tips & tricks for pruning vegetable plants
Here's what I've learned after years of trial and error to maximize your vegetable garden's potential.
Timing is Everything: The morning hours are your best friend for pruning—this is when plants are fully hydrated and temperatures are mild, reducing stress. I've noticed that trimming leafy greens like kale or Swiss chard when leaves reach exactly 6-8 inches creates that perfect balance between harvest and regrowth. For tomatoes and peppers, wait until they've developed 4-6 main stems before tackling suckers, or you'll stunt their growth potential.
Tool Technique Matters: Sterilizing your pruners with 70% isopropyl alcohol before each use prevents disease spread better than any other method I've tried. When cutting, aim for a 45-degree angle about ¼ inch above a leaf node—this precise cut encourages healthier regrowth. I always use bypass pruners for larger stems because they make cleaner cuts that heal faster than anvil pruners ever could.
Seasonal Strategy: Spring is your prime time for heavy pruning of fruit-bearing plants like berries, while summer calls for deadheading spent blooms from herbs. The key is working with your plants' natural growth cycles rather than against them. In fall, I make it a point to cut back dead foliage from perennials to ground level—this simple step prevents pests from overwintering in your garden.
Recovery Watch: After pruning, monitor your plants closely for the first 72 hours. Wilting or drooping indicates shock, so provide shade and keep soil moist until they stabilize. I've found that waiting 5-7 days before fertilizing gives plants the time they need to redirect energy into healing rather than immediate growth. You'll know you've done it right when you see new buds forming within 10-14 days.
Pro Tips for Prune Vegetable Plants
- Here's what I've learned after years of trial and error to maximize your vegetable garden's potential.
- Timing is Everything: The morning hours are your best friend for pruning—this is when plants are fully hydrated and temperatures are mild, reducing stress.
- Tool Technique Matters: Sterilizing your pruners with 70% isopropyl alcohol before each use prevents disease spread better than any other method I've tried.
Frequently asked questions
Got questions about pruning your vegetable plants? You’re not alone! Here are answers to the most common concerns—so you can trim with confidence and keep your garden thriving.
When is the best time to prune vegetable plants?
Timing depends on the plant! For leafy greens (like kale or Swiss chard), prune in early spring or after harvest to encourage regrowth. For tomatoes and peppers, prune suckers (side shoots) when they’re small—typically every 2-3 weeks during the growing season. Root crops (carrots, beets) usually don’t need pruning, but you can trim foliage to reduce disease risk.
What if I prune too much? Will my plants die?
Over-pruning can stress plants, but most vegetables are resilient. If you’ve cut back too aggressively, don’t panic! Focus on removing only 1/3 of the plant at a time and ensure it gets proper water and sunlight. For example, if you’ve over-trimmed a tomato plant, it may take longer to fruit, but it’ll recover with care.
Can I prune vegetable plants in winter?
Winter pruning is a great way to prep for spring! For perennial plants (like asparagus or rhubarb), prune dead or yellowed leaves in late winter to encourage new growth. For annuals (tomatoes, cucumbers), wait until spring—winter pruning can expose tender stems to frost damage. Always prune on a dry day to avoid spreading disease.
Are there any vegetables I shouldn’t prune?
Some plants hate pruning! Avoid trimming root vegetables (carrots, potatoes, radishes) or herbs like dill or cilantro, as it can stunt growth. Even lettuce and spinach may bolt (go to seed) if pruned too aggressively. Stick to leafy greens, tomatoes, peppers, and bush beans for safe pruning.
Why are my pruned plants looking sickly afterward?
Sickly plants after pruning often signal stress or disease. Check for these red flags:
- Yellow leaves: Likely from over-pruning or nutrient deficiency. Feed with compost tea.
- Wilted stems: Could mean underwatering or fungal infection. Trim infected areas with sterilized shears and improve airflow.
- No new growth: Prune too late in the season or in poor weather. Next time, prune in the morning on a warm, dry day.
If issues persist, isolate the plant and inspect for pests.
Wrapping up and next steps
Pruning your vegetable plants isn’t just about maintenance—it’s your secret weapon for bigger yields, healthier growth, and year-round productivity! 🌱 By mastering the art of strategic trims, you’ll unlock the full potential of your garden while keeping pests and diseases at bay.
Whether you’re a seasoned gardener or just starting out, every snip is a step toward a more abundant harvest.
Ready to take your gardening game to the next level? Start small—pick one plant type from this guide, grab your pruners, and give it a try! Track your progress, experiment with techniques, and watch your garden thrive. Happy pruning—and happy harvesting! 🌿