
Pruning
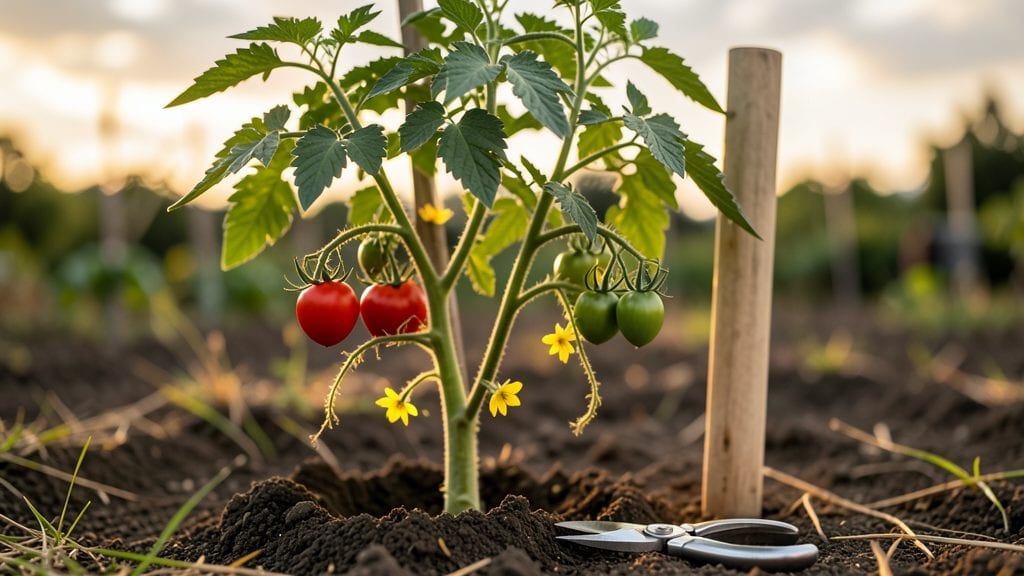
Learn how to prune tomato plants like a pro with this step-by-step YouTube guide—it’s the secret to bushier growth and a bountiful harvest all season. I learned the hard way that skipping this step leaves you with sparse fruit and tangled vines.
The right cuts redirect energy where it matters most: to more tomatoes, not just more leaves. Watch this step-by-step video for visual guidance, because seeing the difference between determinate and indeterminate plants makes all the difference.
You only need sharp pruners, a sunny morning, and 15 minutes of focused attention. The key is timing: start when plants hit 12 inches tall, then prune every 2-3 weeks until first frost.
For indeterminate varieties, remove suckers (those little shoots in the leaf axils)—they’re the secret to vertical growth and bigger yields. Determinate types need less pruning, just a light trim to improve airflow and prevent disease.
By the end of summer, you’ll have plants that look like they’re fighting for space in a jungle gym, but with twice the fruit. The vines stay sturdy, the tomatoes ripen faster, and you avoid the heartbreak of blight ruining your harvest.
This isn’t just pruning—it’s a game-changer for anyone who’s ever stared at a tomato plant wondering why it’s not producing.
Works for both backyard gardens and container setups, and the same principles apply whether you’re growing heirlooms or hybrids. Once you master this, you’ll never go back to letting tomato plants grow wild. Let’s get those shears out and turn those vines into fruit factories.
📚 In This Guide
- What you need
- Instructions
- Tips and common mistakes
- Wrapping up and next steps
What you need
- ● Pruning shears or sharp bypass pruners – Choose sterilized, sharp tools (avoid dull blades to prevent tearing). Recommended: Felco F2 or equivalent.
- ○ Gloves (optional but recommended) – Wear gardening gloves to protect hands from thorns and dirt (nitrile or leather works best).
- ● Disinfectant (rubbing alcohol or bleach solution) – 1 part bleach to 9 parts water to sterilize tools between cuts and prevent disease.
- ● Compost or mulch – 1-2 gallons to cover pruned areas and retain moisture.
- ● Sturdy pruning twine or clips – For supporting indeterminate varieties (e.g., 50-ft roll of 1/8" twine).
- ● Tomato cages or stakes – 1-2 per plant (5-6 ft tall for indeterminate types; 3-4 ft for determinate).
- ● Watering can or hose with a gentle nozzle – To hydrate plants before and after pruning.
- ● Plant growth regulator (e.g., seaweed extract) – 1 tsp per gallon of water to boost recovery post-pruning.
- ● Label markers – To track pruning dates and plant varieties.
- ● Knee pad or small stool – For comfortable access to lower stems.
- ● Camera or phone – Capture before/after pruning for progress tracking!
Instructions for pruning tomato plants for bushier growth
Here's my foolproof method for shaping tomato plants that rewards you with more fruit and stronger stems.
Identify the Right Time to Prune
Wait until your tomato plants have reached 12-18 inches tall and show at least 4-5 true leaves—this usually happens 3-4 weeks after transplanting. Pruning too early stresses young plants, while pruning too late reduces yield. I always check for new leaves appearing above the first flower cluster before touching the scissors. This ensures the plant has enough energy to recover.
Morning is the best time to prune—between 8 AM and 10 AM—when the plants are dry and less prone to disease. Avoid pruning in the evening or after rain, as wet foliage invites fungal infections like early blight. If you must prune later, let the cut ends dry completely before nightfall.
Remove Suckers for Better Airflow and Fruit Production
Suckers are the small shoots that grow in the V-shaped junction between the main stem and a branch. Pinch or cut these off just above the leaf where they emerge—never leave a stub, as it can rot. I use my thumb and forefinger to snap them cleanly for small suckers, but for larger ones, I grab my pruning shears for a precise cut.
Focus on removing suckers below the first flower cluster—these compete with fruit production. You’ll know you’re doing it right when you see more energy directed toward the main stem and branches rather than upward growth. If you miss a sucker, don’t stress; just catch it in the next round of pruning.
Thin Out Overcrowded Branches
Once your plant has 3-4 main stems, start thinning branches to improve airflow and sunlight penetration. Remove any weak, spindly, or crossing branches—these steal resources from the plant and create shaded areas where disease lurks. Use clean, sharp pruning shears to make cuts at a 45-degree angle, about ¼ inch above a leaf node or outward-facing bud.
Pay special attention to the bottom 12 inches of the plant, where branches often grow densely. This area is prone to moisture buildup, so thinning here reduces the risk of rot. You’ll notice fewer yellowing leaves and healthier green stems after a few weeks of proper thinning.
Encourage Bushier Growth with Strategic Cuts
To promote bushier growth, prune the top of the plant once it reaches your desired height—typically 5-6 feet for indeterminate varieties. Cut just above a leaf that faces outward to encourage lateral branching. For determinate (bush) tomatoes, prune lightly to remove only damaged or diseased foliage, as they don’t benefit from heavy pruning.
After pruning, I always water deeply at the base to help the plant recover. You’ll see new side shoots emerging within 1-2 weeks—this is your sign that the plant is responding well. Avoid fertilizing immediately after pruning, as fresh cuts are more susceptible to rot in nutrient-rich soil.
Maintain Pruned Plants for Continuous Harvest
Prune weekly during the growing season to keep the plant in check and encourage ongoing fruit production. Always sterilize your pruners with rubbing alcohol between cuts to prevent spreading disease. Remove any yellow or brown leaves immediately, as they signal stress or infection.
By mid-season, your pruned tomato plants should look fuller, with more branches and flowers than unpruned ones. You’ll also notice larger, riper fruit with fewer cracked tomatoes—a direct result of improved airflow and sunlight distribution. Keep an eye out for new suckers and repeat the process until the first frost.
Tips & tricks for pruning tomato plants for bushier growth
A few key insights will help you maximize your tomato harvest and keep plants healthy all season long.
Timing is Everything: In Step 1, when checking for new leaves above the first flower cluster, look for leaves that are fully unfurled and vibrant green—this is your cue the plant has enough energy for pruning. I've learned the hard way that pruning too early can stunt growth, while waiting too long means you're sacrificing potential fruit production. The 3-4 week mark after transplanting is your sweet spot for that perfect balance.
Pruning Technique Matters: When removing suckers in Step 2, always make clean cuts just above the leaf where they emerge. I used to leave small stubs, which led to rot and infection. Now I either snap them cleanly with my fingers for small suckers or use sharp pruning shears for larger ones. This simple technique prevents disease while directing the plant's energy where you want it—toward fruit production rather than upward growth.
Strategic Pruning for Airflow: In Step 3, pay special attention to the bottom 12 inches of your plant. This area often becomes a hotspot for moisture buildup, which creates perfect conditions for fungal diseases. By thinning out crowded branches here, you're not just improving airflow—you're preventing future problems. I've seen plants go from yellowing leaves to vibrant green stems within just two weeks after proper thinning.
Post-Pruning Care: After making your cuts in Step 4, don't forget the recovery phase. Deep watering at the base helps the plant heal, but here's the secret: wait 24 hours before fertilizing. Fresh cuts are vulnerable to rot when nutrients are too readily available. I've seen plants struggle when fertilized immediately after pruning, but they thrive when given that extra day to recover first.
Pro Tips for Prune Tomato Plants Youtube
- A few key insights will help you maximize your tomato harvest and keep plants healthy all season long.
- Timing is Everything: In Step 1, when checking for new leaves above the first flower cluster, look for leaves that are fully unfurled and vibrant green—this is your cue the plant has enough energy for pruning.
- Pruning Technique Matters: When removing suckers in Step 2, always make clean cuts just above the leaf where they emerge.
Frequently asked questions
Got questions about pruning tomato plants?
You’re not alone! Here are answers to the most common concerns—so you can prune like a pro and keep those tomatoes coming.
When is the best time to prune tomato plants?
Prune indeterminate tomatoes (like Sungold or Beefsteak) weekly once they’re 12–18 inches tall, focusing on suckers (side shoots). For determinate varieties (like Roma), minimal pruning is needed—just remove diseased leaves. Morning pruning avoids stressing plants, and always use clean, sharp tools to prevent infections.
Can I prune tomato plants too much?
Yes! Over-pruning weakens plants, reduces fruit production, and invites pests. Indeterminate tomatoes thrive with 1–2 main stems, while determinate types rarely need pruning. Stop pruning 4–6 weeks before your first frost to let energy focus on ripening fruit. Rule of thumb: Never remove more than 20% of the plant’s foliage at once.
What if my tomato plant has no suckers?
No suckers? Your plant might be determinate (bush-type) or stressed from heat, drought, or poor nutrition. Check for balanced NPK fertilizer (like 10-10-10) and consistent watering. If it’s indeterminate, wait 2–3 weeks—suckers often appear as the plant matures. Pro tip: Pinch off flowers early to encourage sucker growth!
Why are my tomato leaves turning yellow after pruning?
Yellowing leaves can signal over-pruning, nutrient deficiency, or disease. If only lower leaves yellow, it’s likely natural aging. For widespread yellowing, check for blight (remove affected leaves immediately) or lack of magnesium (sprinkle Epsom salt around the base). Avoid pruning if leaves are already yellow—focus on fixing the root cause first.
Do I need to prune tomato plants in containers?
Container tomatoes benefit from pruning—just adapt to their smaller space! Use cage supports or trellises to guide growth upward. Prune aggressively to improve airflow and prevent soil-borne diseases. Key difference: Container plants need more frequent pruning (every 5–7 days) due to limited root space. Use a lightweight potting mix to reduce stress.
Wrapping up and next steps
Pruning your tomato plants is a game-changer for bushier growth, bigger yields, and healthier vines—and with the right techniques, you’ll enjoy a year-round harvest! 🌱 Whether you’re trimming suckers, pinching leaves, or staking for support, each step keeps your plants thriving.
Don’t let fear of pruning hold you back—confidence comes with practice, and soon, you’ll be reaping the rewards of your green thumb.
Ready to take your tomato-growing skills to the next level? Watch our YouTube tutorial for step-by-step visual guidance, then grab your pruners and get growing! 🎥✨ Happy pruning—and may your harvest be plentiful!