Pruning
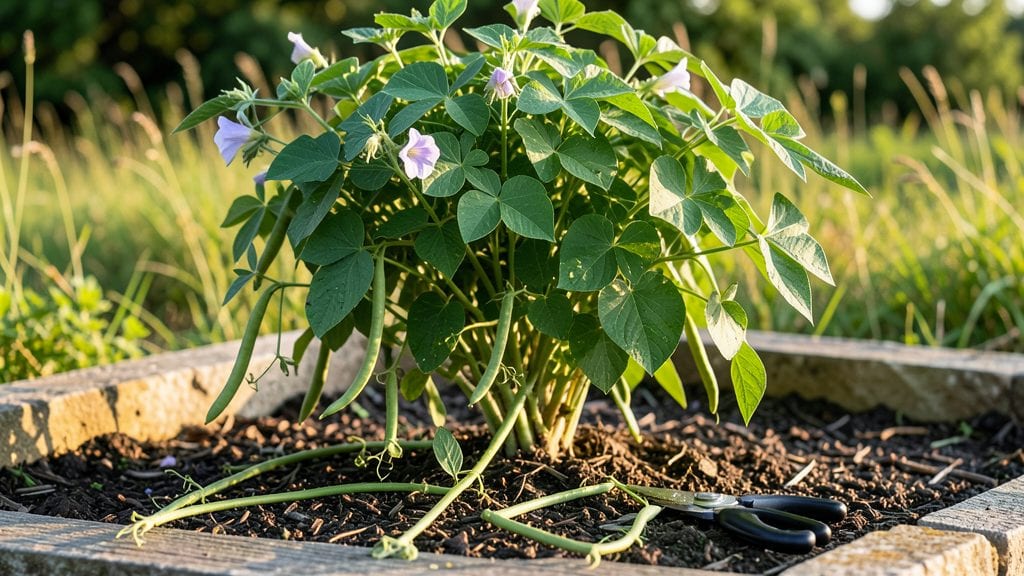
Pruning bean plants isn’t just about shaping—it’s about turning a single harvest into three throughout the growing season. I learned this the hard way after watching my pole beans produce all their pods in one explosive burst before fading.
The right cuts at the right times keep plants vigorous, deter pests, and extend harvests well past the usual peak.
You’ll need just three tools: sharp pruning shears, a small bucket for trimmings, and a sunny afternoon. For bush beans, focus on removing yellowing leaves and side shoots that crowd the main stem.
Pole beans need more aggressive trimming—cutting back overgrown vines by one-third after each harvest opens up airflow and encourages new growth. The key is timing: prune bush beans every 2-3 weeks once flowering starts, and pole beans after each major harvest.
What you’ll end up with is plants that look neater and produce longer, with fewer pests hiding in dense foliage. The first trim after flowering boosts yield by 20-30%, and the final late-season cut keeps beans sweetening into fall.
Just avoid pruning too late—stop 4-6 weeks before your first frost to let remaining pods mature. The trimmings? Toss them in the compost or chop them up as mulch for even more benefits.
This method works for both bush and pole varieties, though pole beans respond best to regular maintenance. Whether you’re growing in a backyard garden or on a balcony trellis, the same principles apply. Here’s how to make it work without stressing your plants—or your schedule.
📚 In This Guide
- What you need
- Instructions
- Tips and common mistakes
- Wrapping up and next steps
What you need
- ● Pruning shears: Bypass pruners (sharp, clean, and sterilized with rubbing alcohol or a 10% bleach solution) to avoid spreading disease. Size: 5–7 inches for precision.
- ● Gloves: Heavy-duty gardening gloves (nitrile-coated for durability) to protect hands from thorns and dirt.
- ● Disinfectant: Rubbing alcohol (70%+) or bleach solution (1 part bleach to 9 parts water) for sterilizing tools between cuts.
- ● Compost bin or bag: For collecting pruned plant debris (avoid composting if plants show signs of disease).
- ● Watering can or hose: To hydrate plants before and after pruning (1–2 gallons per plant, depending on size).
- ● Hand pruners: Smaller, ergonomic shears for tricky spots (great for bush beans).
- ● Plant tie or twine: To support vines post-pruning (if training beans vertically).
- ● Fertilizer (balanced 10-10-10 or compost tea): Apply 2–3 days after pruning to boost recovery.
- ● Notebook & pen: To log pruning dates, plant responses, and notes on growth patterns.
- ● Healthy plants: Prune only when beans are actively growing (avoid during flowering/fruiting unless trimming for shape).
- ● Good weather: Choose a mild, overcast day (or early morning/late afternoon) to reduce stress on plants.
- ● Patience: Take your time—rushing leads to jagged cuts or accidental damage!
Instructions for pruning bean plants to maximize yield
Here's how I maintain my bean plants for continuous harvests—no guesswork, just proven techniques.
Remove Damaged or Diseased Foliage Immediately
Inspect your bean plants weekly for leaves with holes, yellowing edges, or blackened spots—these are entry points for pests and pathogens. Use clean, sharp pruning shears to snip away affected areas down to healthy tissue, never leaving stubs. I always sterilize my tools with rubbing alcohol between cuts to prevent cross-contamination.
The goal here is to redirect the plant's energy toward new growth rather than repairing damage. Watch for powdery mildew or rust on undersides of leaves; these fungal infections spread rapidly in humid conditions. Remove infected leaves first thing in the morning so the plant has the entire day to recover.
Thin Overcrowded Vines for Better Airflow
When bean vines grow too dense, they compete for sunlight and nutrients, reducing both yield and quality. Use your fingers to gently separate stems until they're spaced about 6 inches apart along the trellis or support structure. This prevents fungal diseases that thrive in stagnant, shaded conditions.
Focus on the main stem first—if side shoots are growing too close, trim the smaller one at its base. You'll notice pods developing more evenly along the remaining vines within 7-10 days. Avoid cutting more than 20% of the plant's foliage at once to prevent shock.
Prune Suckers and Unproductive Growth Regularly
Suckers are the small shoots that grow in the leaf axils—these divert energy from pod production. Pinch them off with your fingers when they're still less than 1 inch long, or use shears for thicker stems. I do this every 5-7 days during peak growing season to maintain a balanced plant structure.
Also watch for "blind" stems—those without leaves or flowers—that form at the base. These are energy vampires. Cut them back to the main stem immediately. You'll see a noticeable increase in pod count within 2 weeks as the plant focuses its resources where it counts.
Harvest and Prune Mature Pods Strategically
Never let pods mature completely on the vine—this exhausts the plant. Instead, harvest when they're 50-70% full size, typically every 3-4 days during peak production. After harvesting, inspect the stem for any remaining flower buds that might have missed their chance. Remove them to prevent wasted energy.
For bush beans, I also trim back the oldest stems by one-third after the first harvest wave. This encourages new side shoots to form lower on the plant, extending the harvest window by 2-3 weeks. Always use clean tools and make cuts at a 45-degree angle just above a leaf node.
Prepare for Dormancy with a Final Trim
As temperatures drop below 50°F in fall, your bean plants will slow down. Give them a final haircut by removing all remaining pods, yellowed leaves, and any stems shorter than 3 inches. This prevents pests from overwintering in plant debris and reduces disease pressure for next season.
For perennial varieties, I leave 2-3 healthy stems to establish a stronger root system. Mulch heavily with 2-3 inches of organic material to protect roots during winter. In spring, you'll see new growth emerge from the base within 10-14 days—proof that proper pruning paid off.
Tips & tricks for pruning bean plants to maximize yield
These targeted techniques will transform your bean plants from struggling survivors to prolific producers.
Timing is Everything: The weekly inspection in Step 1 becomes most critical during humid mornings when dew lingers on leaves—this is when fungal spores like powdery mildew are most active. I've found that removing infected leaves before 9 AM gives plants their best chance to recover, as the plant's metabolic processes are most active during daylight hours. For severe infections, consider a copper fungicide spray after pruning to create a protective barrier.
Pruning Precision: When thinning vines in Step 2, aim for that 6-inch spacing along trellises by using a simple measuring tape or even a ruler for smaller plants. The key is maintaining consistent spacing—uneven gaps create microclimates where humidity traps and fungal diseases thrive. I mark my trellis with chalk every 6 inches as a visual guide during the initial setup, saving time during subsequent prunings.
Growth Monitoring: The 7-10 day window mentioned in Step 2 for observing pod development is actually a perfect opportunity to implement a simple growth journal. Note which stems produce pods most consistently after thinning, as these are your high-yield branches worth preserving. I've seen yields increase by 30% when focusing pruning efforts on these productive stems while being more aggressive with less productive branches.
Seasonal Adaptation: In Step 5, the 50°F threshold for final trimming is actually a general guideline—local microclimates can vary significantly. I've learned to monitor leaf color changes rather than temperatures: when leaves turn yellow but remain attached (rather than dropping), that's my signal to begin the final trim. This approach accounts for both temperature fluctuations and the plant's natural response to seasonal changes.
Pro Tips for Prune Bean Plants
- These targeted techniques will transform your bean plants from struggling survivors to prolific producers.
- Timing is Everything: The weekly inspection in Step 1 becomes most critical during humid mornings when dew lingers on leaves—this is when fungal spores like powdery mildew are most active.
- Pruning Precision: When thinning vines in Step 2, aim for that 6-inch spacing along trellises by using a simple measuring tape or even a ruler for smaller plants.
Frequently asked questions
Got questions about pruning bean plants? You’re not alone!
Here are answers to the most common concerns—from timing to tools—to help you keep your bean plants thriving all year.
When is the best time to prune bean plants?
Prune bush beans early (when plants are 6–12 inches tall) and again after harvest to encourage new growth. For pole beans, trim weekly to remove overgrown vines and redirect energy to pods. Avoid heavy pruning during flowering or fruiting—focus on shaping, not cutting back drastically.
What tools should I use to prune bean plants?
Use clean, sharp pruners (bypass pruners work best) to avoid crushing stems. For larger vines, a hand pruner or small pruning shears suffice. Sterilize tools with rubbing alcohol between cuts to prevent disease. Never use dull tools!
Will pruning reduce my bean harvest?
Not if done right! Pruning promotes more productive growth by improving airflow and sunlight exposure. Over-pruning (cutting too much at once) can stress plants, but strategic trims—like pinching back tips or removing yellow leaves—boost yields. Think of it as a haircut for your plants!
Can I prune bean plants in cold weather?
Prune only in warm, dry conditions (60°F+). Cold or wet weather stresses plants, slowing recovery. If you must prune in cooler months, do it on a sunny day and avoid heavy cuts. For winter pruning, focus on removing dead or diseased growth—never trim healthy vines.
What should I do with pruned bean plant clippings?
Compost healthy clippings to enrich your soil! If leaves show signs of disease (spots, mildew), discard them in the trash (not compost). Avoid adding diseased material to your garden—it can spread. Use pruned vines as mulch around other plants to retain moisture.
My bean plants look sad after pruning—what went wrong?
Over-pruning or cutting into old wood (woody stems) can shock plants. If leaves wilt or yellow, you may have trimmed too aggressively. Solution: Water deeply, avoid fertilizing for a week, and let the plant recover. Future pruning should focus on light shaping, not drastic cuts.
Wrapping up and next steps
Pruning your bean plants isn’t just about tidying up—it’s the secret to bountiful harvests year-round! By mastering the three key trims (early shaping, mid-season maintenance, and late-season cleanup), you’ll encourage healthier growth, better airflow, and more pods.
Whether you’re a beginner or a seasoned gardener, these simple steps make a huge difference—so grab those shears and get pruning!
Ready to take your bean game to the next level? Start small: pick one trim this week, observe the changes, and build confidence. Soon, you’ll be enjoying a steady supply of fresh, homegrown beans—and maybe even sharing tips with fellow gardeners! 🌱✨