Propagation
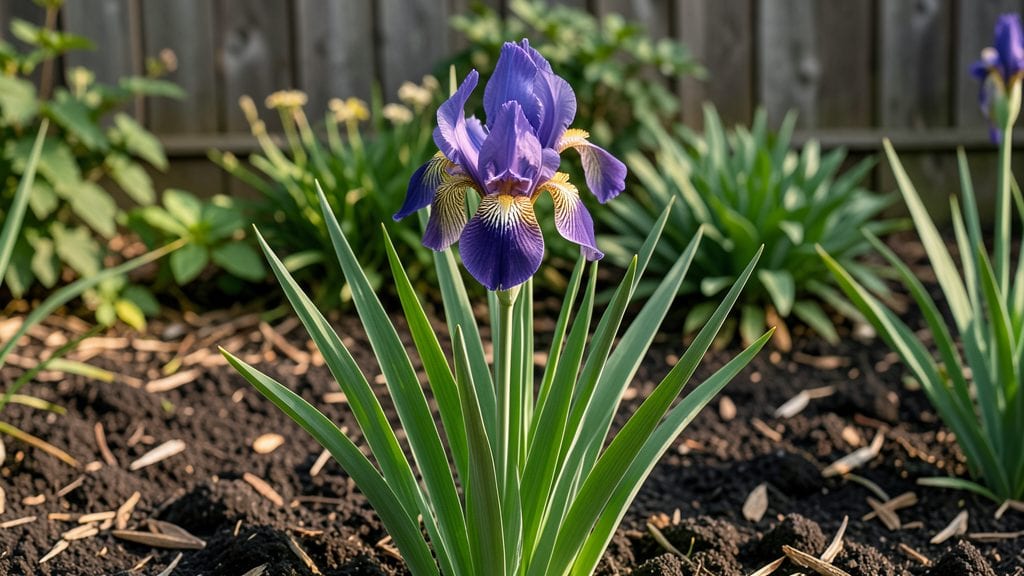
Propagating iris plants turns one stunning clump into five thriving ones—each with those signature bold stripes you love. ✨ I’ve doubled my garden’s iris display every three years using this method, and the key lies in timing, sharp tools, and knowing which rhizomes to keep.
The best part? You get free plants that outperform store-bought ones.
You’ll need a clean knife or pruners, gloves, and a sunny spot with well-draining soil. Timing matters most: divide established clumps in late summer or early fall when new roots form but before winter dormancy.
Avoid spring division—plants struggle to recover before blooming season. A 5-gallon bucket of water and a shady spot for 24 hours after cutting helps roots regenerate before planting.
After dividing, you’ll see fresh growth within 4-6 weeks. The secret’s in the rhizomes: keep only the firm, plump ones with visible eyes (growth points), discarding soft or mushy sections.
Plant with the top third exposed to sunlight—this prevents rot while encouraging strong root systems. By next spring, your new clumps will be established and ready to multiply again.
Common mistakes? Overwatering after planting or burying rhizomes too deep. Both lead to rot. Instead, water lightly for the first week, then let nature take over.
This method works for bearded, Siberian, and even Louisiana irises—just adjust timing slightly for southern climates. Ready to turn one clump into a riot of color?
📚 In This Guide
- What you need
- Instructions
- Tips and common mistakes
- Wrapping up and next steps
What you need
- ● Mature iris rhizomes: Healthy, established rhizomes (at least 2-3 years old) with fans of leaves and roots.
- ● Sharp, clean knife or pruners: A sterilized knife or pruning shears (like Fiskars blank">Bypass Pruners) to make clean cuts.
- ● Garden gloves: Heavy-duty gloves (e.g., blank">Gloves by Gardener’s Supply) to protect against thorns and soil.
- ● Well-draining potting mix or garden soil: A blend of 50% garden soil and 50% compost or perlite for pots; or amended garden soil for in-ground planting.
- ○ Containers (optional for potting): 6-8 inch pots with drainage holes or a shallow tray for rooting.
- ○ Rooting hormone (optional but helpful): A powder or gel like blank">Rootone to encourage faster root growth.
- ● Watering can or hose with gentle spray: For hydrating without disturbing new divisions.
- ○ Mulch (optional): Straw or shredded bark to retain moisture and suppress weeds.
- ● Disinfectant (e.g., rubbing alcohol or bleach solution): To sterilize tools before and after use.
- ● Slow-release fertilizer: A balanced 10-10-10 or organic option (e.g., blank">Espoma Garden-Tone) to nourish new growth.
- ● Shade cloth: Lightweight fabric (30-50% shade) to protect divisions from intense sun while rooting.
- ● Plant labels: Wooden or metal tags to track varieties and planting dates.
Step-by-Step instructions for propagating iris plants
Here's how to double your iris blooms—no fancy tools required, just timing and patience.
🌱 Step 1: Choose the Right Time to Divide
Iris rhizomes thrive when divided in early spring or late summer—just after blooming or before new growth starts. You'll see the best results when the plant is actively growing but hasn't yet sent up its full energy into flowers. Avoid dividing in fall unless your climate stays mild; cold soil can shock the roots.
Look for clumps with 3-5 mature fans (each fan is a group of leaves). If your iris hasn't bloomed yet, gently lift a section to check for firm, plump rhizomes. Soft or mushy ones mean the plant is stressed—wait until next season. This ensures each new division has enough energy to establish roots quickly.
✂️ Step 2: Dig Up and Separate the Rhizomes
Use a sharp spade to dig around the iris clump, lifting it carefully to avoid breaking the rhizomes. Shake off excess soil so you can see the fan-shaped leaves and thick roots attached to each section. You'll notice some rhizomes have 1-2 fans of leaves while others are just starting to sprout—these are your future plants.
Separate the clump by hand, pulling apart the rhizomes until you have 4-6 healthy divisions (each with at least one fan of leaves and 3-4 inches of rhizome). Discard any rhizomes that are soft, moldy, or shriveled—these won’t survive. Real talk: If a rhizome snaps, don’t stress. Just trim the broken edge cleanly with sterilized scissors and replant it.
💧 Step 3: Prepare and Replant the Divisions
Before replanting, let the rhizomes air-dry for 1-2 hours in a shady spot. This prevents rot when you plant them. Dig new holes 6-12 inches apart (depending on your iris variety) and 3-4 inches deep, with the top of the rhizome just above soil level. Planting too deep smothers the growth point and kills the plant.
Spread the roots gently into the hole and cover halfway with soil first. Water lightly to settle the roots, then add the rest of the soil. Avoid pressing down hard—iris roots need loose soil to breathe. You'll see new leaves emerge in 2-3 weeks if everything’s right. Water deeply once a week after that, keeping the soil evenly moist but not soggy.
☀️ Step 4: Provide Care for Established Growth
Iris loves full sun (6+ hours daily) and well-draining soil. If your divisions wilt in the first week, they’re either getting too much water or not enough light. Move them to a sunnier spot if needed. You’ll notice strong growth when the leaves turn deep green and new roots push through the soil.
Fertilize lightly in early spring with a balanced, low-nitrogen fertilizer (like 10-10-10). Too much nitrogen makes leaves grow at the expense of blooms. Mulch around the base with 2-3 inches of organic matter (like shredded bark) to retain moisture and keep roots cool. By next season, your new divisions will bloom just like the mother plant—sometimes even bigger!
Tips & tricks for perfect iris propagation
These game-changing tips will help you avoid common pitfalls and get the most from your iris divisions.
Timing is Everything: Confession: I skipped the early spring timing for years and wondered why my divisions struggled. The 1-2 hour air-drying period in Step 3 is non-negotiable—it prevents rot and gives you a clean start. If you're dividing in late summer, do it at least 4-6 weeks before your first frost so new roots can establish before winter. I always mark my calendar for these windows to avoid missing the perfect moment.
The Technique That Changed Everything: When separating rhizomes in Step 2, look for the thick, white roots—these are your indicators of healthy divisions. I learned this the hard way after ruining three batches by pulling too aggressively. Gently wiggle each section until it releases naturally. For stubborn clumps, use a sterilized knife to make clean cuts rather than tearing. This creates less stress on the plant and promotes faster root regrowth.
Planting Depth Secret: The top of your iris rhizome should be just above soil level—never buried. I used to plant them too deep (like most tutorials suggest) and lost entire divisions. The growth point needs to stay exposed to sunlight. Think of it like planting potatoes—you want that top section visible. After replanting, I always do a quick visual check to ensure none are hidden beneath the soil line.
Aftercare Rescue Strategy: If your newly planted divisions wilt in the first week, don't panic! This usually means they need either more sunlight or less water. I've had this happen twice with my blue iris varieties. Move them to a sunnier spot immediately and reduce watering to every 10-12 days until you see new growth. The key is patience—healthy iris roots take 2-3 weeks to establish, and wilting is often just a temporary shock response.
Pro Tips for Propagating Iris Plants
- These game-changing tips will help you avoid common pitfalls and get the most from your iris divisions.
- Timing is Everything: Confession: I skipped the early spring timing for years and wondered why my divisions struggled.
- The Technique That Changed Everything: When separating rhizomes in Step 2, look for the thick, white roots—these are your indicators of healthy divisions.
Frequently asked questions
Got questions about propagating iris plants? You’re not alone! Here are some of the most common concerns—and their answers—to help you grow a thriving iris garden with confidence.
When is the best time to divide iris plants?
The ideal window is late summer to early fall (after blooming but before frost). This gives roots time to establish before winter. Avoid dividing in spring—new growth needs energy to thrive, not just survive!
Why aren’t my iris divisions blooming after replanting?
Patience is key! Iris plants often take 1–2 years to rebloom after division. Focus on healthy foliage first—strong roots = future flowers. If divisions look weak, check for pests or overwatering.
Can I propagate iris from seed instead of division?
Yes, but it’s a long game! Seeds take 3–5 years to mature into blooming plants. Division (via rhizomes) is faster and preserves parent traits. Save seeds for hybridizing or experimenting with rare varieties.
How often should I water newly divided iris plants?
Keep soil moist but not soggy for the first 2 weeks. After that, water deeply 1–2 times per week (less in winter). Overwatering can rot rhizomes—let the top inch of soil dry between waterings.
What do I do with the old foliage after dividing irises?
Trim 1/3 of the leaves to reduce stress, but leave enough to photosynthesize. Don’t remove all foliage—it fuels the rhizome’s recovery. Toss yellowed or mushy leaves to prevent disease.
Can I propagate iris in containers?
Use well-draining pots (like terracotta) with a mix of soil and sand. Divide rhizomes every 2–3 years to prevent overcrowding. Containers let you move plants easily but may need winter protection in cold climates.
Wrapping up and next steps
Propagating iris plants is a rewarding way to expand your garden with stunning, striped blooms—and you’ve got all the tools to succeed! Whether you’re dividing rhizomes, experimenting with seed propagation, or mastering tissue culture, each method offers a unique path to multiplying your irises.
With patience and care, you’ll soon enjoy lush patches of vibrant color without breaking the bank.
Ready to take the next step? Start small—pick one method that excites you most—then gather your supplies and dig in! 🌱 Before you know it, your garden will be bursting with irises, and you’ll be sharing tips (or cuttings!) with fellow plant lovers. Happy propagating!