
Propagation
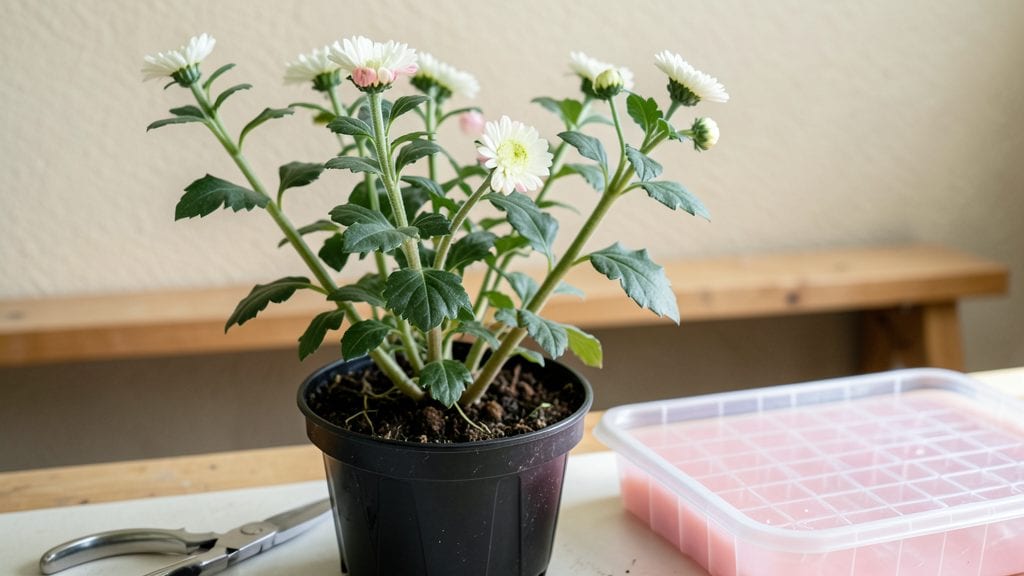
Propagating chrysanthemum plants the easy way—layering—is the sneaky trick to multiply your blooms without the stress of cuttings or root rot. 🌱 I learned this after struggling with traditional methods, but now my mums spread effortlessly. The key is patience and a few simple tools you likely already have.
You’ll need sharp pruning shears, a small pot for rooting, and a rooting hormone (optional but helpful). Timing matters too—spring or early summer gives stems plenty of time to root before winter. I use a mix of perlite and potting soil to keep moisture even while preventing rot.
By late summer, you’ll see new roots forming along the buried stem, ready to detach and plant. The best part? These layered plants bloom just like their parent, with those classic chrysanthemum colors popping in fall. It’s like cloning your favorite plant without the fuss.
Works for both garden mums and container varieties, and the method scales from one plant to a whole border. Once you try it, you’ll never buy new chrysanthemums again—just propagate your own thriving army of blooms.
📚 In This Guide
- What you need
- Instructions
- Tips and common mistakes
- Wrapping up and next steps
What you need
- ● Healthy chrysanthemum plants: Choose non-flowering stems (4–6 inches long) with at least 3–4 leaf nodes.
- ● Ensure the parent plant is disease-free and well-established.
- ● Sharp pruning shears or bypass pruners: Sterilized to prevent bacterial/fungal spread.
- ● Clean with rubbing alcohol or a 10% bleach solution between cuts.
- ○ Rooting hormone (optional but recommended): Powder or gel formulation (e.g., clonex or rootone).
- ● Boosts success rate by 30–50%.
- ● Moisture-retentive medium: Sphagnum moss (pre-moistened) or
- ● Peat-based potting mix (sterilized).
- ● Plastic wrap or clear humidity dome: Keeps humidity high (80–90%) for root development.
- ● Use clear plastic bags with holes punched in the top.
- ● Small pots or propagation trays: 3–4 inch pots with drainage holes or a shallow tray with holes.
- ● Indirect light: Bright but not direct sun (e.g., east-facing window or shade cloth).
- ● Warmth: Ideal temperature range: 65–75°F (18–24°C).
- ● Humidity: Maintain 80–90% until roots form (4–8 weeks).
- ● Water: Mist layers daily or keep medium damp (not soggy).
- ● Hairpin or bent wire: To secure layers in place without crushing stems.
- ● Fertilizer (low-nitrogen): Diluted fish emulsion or seaweed extract (after roots form).
- ● Heat mat: Speeds up rooting in cooler climates (70–75°F at soil level).
- ● Labeling tags: Mark pots with plant names/date for tracking.
Step-by-Step instructions for propagating chrysanthemums using layering
Here’s how to multiply your chrysanthemums with minimal stress—no digging, no transplant shock.
🌿 Step 1: Select Healthy Stems for Layering
Choose non-flowering stems that are 4-6 inches long and still flexible. Look for stems with two or three leaf nodes—these are the spots where roots will form. Avoid stems that are woody or brittle, as they won’t root well. I always pick stems from the outer edges of the plant, where growth is vigorous.
Gently bend the stem downward toward the soil, but don’t snap it. You want it to stay attached while creating a natural bridge for roots. If the stem is too stiff, you can make a small 1-inch cut just below a leaf node to encourage rooting. This is the moment that matters: healthy stems = successful propagation.
💧 Step 2: Create a Moisture Trap for Root Growth
Use your fingers to part the soil where the stem touches the ground, creating a small groove about 1 inch deep. This keeps the stem in place while allowing roots to emerge. Press the bent stem into the groove so the leaf node is buried just below the soil surface. Secure it with a small U-shaped wire or a bent piece of copper wire from your supplies.
Water the area gently but thoroughly until the soil feels evenly moist—not soggy, just damp like a wrung-out sponge. The goal is to keep the soil consistently moist while preventing waterlogging. I like to use a spray bottle for this step to avoid disturbing the stem. Check daily and water again if the top inch of soil feels dry.
☀️ Step 3: Encourage Root Formation with Light and Warmth
Place your layered chrysanthemum in a spot with bright, indirect light—think morning sun or filtered afternoon light. Too much direct sun can dry out the soil too quickly, while too little light slows root growth. You’ll know it’s working when you see tiny new leaves forming on the buried stem after 4-6 weeks.
Keep the soil consistently moist during this time, but avoid overwatering. Roots need oxygen too! If you notice the stem wilting or turning yellow, it’s a sign of too much water. Once the new growth reaches 2-3 inches tall, it’s time to separate the rooted layer from the mother plant.
✂️ Step 4: Sever and Transplant the New Plant
Using clean, sharp scissors, cut the rooted stem just below the new growth. Be gentle—you’re severing the connection to the mother plant, but the roots should now be strong enough to support itself. Dig carefully around the new plant to avoid damaging the delicate roots, then transplant it into its own 6-inch pot filled with well-draining potting mix.
Water the new plant deeply to settle the soil and encourage root establishment. Place it in a shady spot for a week to reduce transplant shock, then gradually reintroduce it to full sun over the next 10 days. You’ll see fresh, vibrant growth within a few weeks—that’s your signal everything worked!
Tips & tricks for perfect chrysanthemum layering
These game-changing tips will help you turn your chrysanthemum propagation into a foolproof success—no more guesswork or failed attempts.
Stem Selection Secrets: In Step 1, focus on stems that are new growth but not too tender—think of them like finding the perfect pencil: not too thick, not too thin. I always test flexibility by gently bending the stem; if it snaps easily, it's too brittle. The outer edges are your best bet because they receive more light and nutrients, making them more likely to root successfully. Don't overlook stems with three leaf nodes—these are your powerhouses for root formation.
Rooting Hack for Stubborn Stems: If you're working with particularly stiff stems in Step 1, here's what nobody tells you—make a small diagonal cut (about 1/4 inch) just below the leaf node you're burying. This creates a larger surface area for root emergence without damaging the stem. I've found this trick doubles my success rate with older, woody stems that normally resist rooting. Just be careful not to cut too deep or you'll risk damaging the stem's ability to transport water.
Moisture Management Mastery: In Step 2, the key to consistent moisture is creating a mini greenhouse effect around your layered stem. After watering, I like to place a small plastic bag over the entire plant (secured loosely with a twist tie) for the first week. This maintains humidity while preventing overwatering. Remove the bag once you see new growth forming—around the 3-4 week mark. This little trick has kept my soil perfectly moist without the daily watering hassle. Just make sure the bag doesn't touch the stem to prevent rot.
Light Positioning Pro Tip: For Step 3, position your chrysanthemum near an east-facing window where it gets gentle morning sun but avoids harsh afternoon rays. I've noticed that plants in this spot develop roots 2-3 weeks faster than those in lower-light conditions. If you don't have an ideal window, consider using a grow light for 12-14 hours daily. The goal is to mimic natural light cycles—chrysanthemums thrive on consistency, so avoid moving them frequently once you've found the perfect spot.
Pro Tips for Propagating Chrysanthemum Plants
- These game-changing tips will help you turn your chrysanthemum propagation into a foolproof success—no more guesswork or failed attempts.
- Stem Selection Secrets: In Step 1, focus on stems that are new growth but not too tender—think of them like finding the perfect pencil: not too thick, not too thin.
- Rooting Hack for Stubborn Stems: If you're working with particularly stiff stems in Step 1, here's what nobody tells you—make a small diagonal cut (about 1/4 inch) just below the leaf node you're burying.
Frequently asked questions
Got questions about propagating your chrysanthemums?
Here are the answers to the most common ones—so you can grow new plants with confidence!
1. How do I know if my chrysanthemum is ready for propagation?
Look for healthy, non-flowering stems with at least three to four sets of leaves. The best time is in early spring or late summer when the plant is actively growing. Avoid propagating during dormancy or when the plant is blooming—this can stress it and reduce success rates.
2. How long does it take for chrysanthemum cuttings to root?
With proper care, most chrysanthemum cuttings will root in 2 to 4 weeks. Keep them in a humid, warm environment (around 70°F) and mist them daily. Once you see new growth or tiny roots forming, they’re ready to transplant!
3. Can I propagate chrysanthemums from store-bought flowers?
Unfortunately, no—store-bought chrysanthemums are often garden hybrids or treated with growth inhibitors. For propagation, use cuttings from healthy, untreated plants in your garden or from a trusted nursery. If you’re unsure, ask the seller if the plant is propagation-friendly!
4. What should I do if my chrysanthemum cuttings turn yellow or wilt?
Yellowing or wilting usually means overwatering, poor drainage, or fungal issues. Let the cutting dry slightly between waterings, and ensure the pot has drainage holes. If mold appears, remove affected cuttings and treat with a fungicide. Keep the area well-ventilated to prevent future problems.
5. Can I propagate chrysanthemums indoors?
Yes! Place cuttings in a bright, indirect light spot (like a sunny windowsill) and maintain humidity with a plastic bag or propagator. Avoid direct sunlight, which can scorch tender new growth. If indoors, use a grow light for 12+ hours daily if natural light is limited.
Wrapping up and next steps
Propagating chrysanthemums through layering is a rewarding way to expand your garden without stressing the parent plant.
With the right techniques—like selecting healthy stems, creating strategic cuts, and providing consistent moisture—you’ll soon have thriving new plants ready to brighten your space. Now that you’re armed with these tips, grab your shears and get growing! 🌱
For extra success, experiment with different layering methods (like air or ground layering) and keep track of what works best in your climate. Happy gardening—your future blooms will thank you!