
Propagation
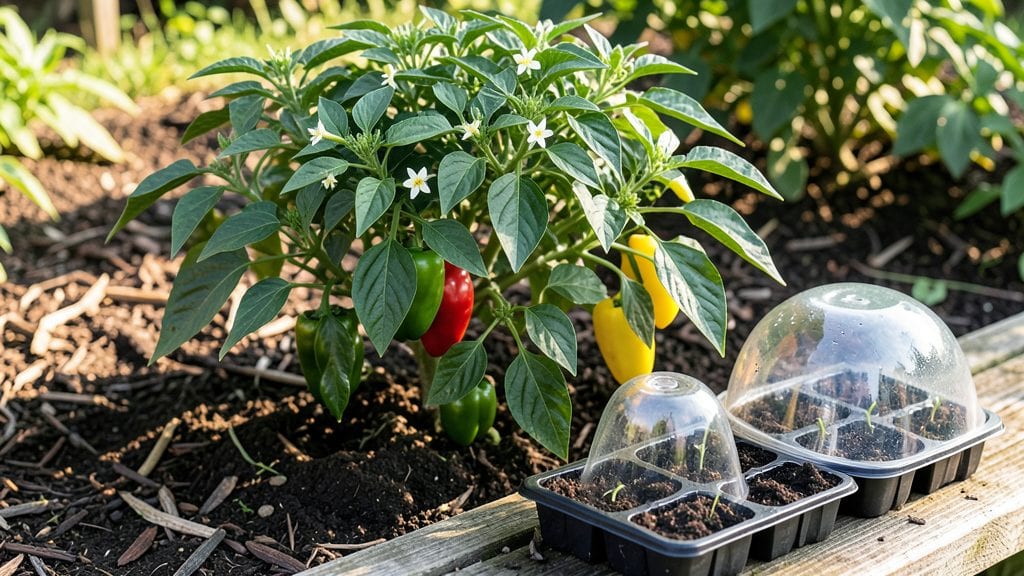
Propagating pepper plants from cuttings gives you fast, ready-to-plant seedlings without waiting for seeds to germinate. The first time I tried this with a jalapeño cutting, roots appeared in just 10 days—shockingly quick compared to the months it takes from seed.
I’ve since propagated dozens of varieties this way, from bell peppers to ghost peppers, and the results are always stocky, vigorous plants that outperform store-bought seedlings.
You only need three things to start: healthy pepper stems (4-6 inches long), clean water or potting mix, and a bright spot with indirect light. The water method is foolproof for beginners—just place the cut stems in a jar, change the water every few days, and watch roots form.
For soil propagation, use a well-draining mix and keep it consistently moist. Either way, you’ll avoid the hit-or-miss germination rates of seeds and get plants that mature weeks earlier than store-bought starts.
What you end up with is a thriving pepper patch that produces faster and more abundantly than anything from a nursery. The plants develop stronger root systems, adapt better to transplanting, and often handle heat and pests like pros.
Plus, you can propagate favorites year after year—no need to buy new plants or risk genetic surprises. The first harvests arrive 2-3 weeks ahead of schedule, and the flavor? Unbeatable.
This method works for indoor windowsills, greenhouse setups, or backyard gardens—just adjust light and humidity to your space. Whether you’re expanding a collection or just want a head start on the growing season, propagating pepper plants is the game-changer that turns casual gardeners into pepper enthusiasts.
Let’s get those cuttings growing!
📚 In This Guide
- What you need
- Instructions
- Tips and common mistakes
- Wrapping up and next steps
What you need
- ● Pepper plant cuttings: Healthy, non-flowering stems (4–6 inches long) with at least 2–3 leaf nodes. Quantity: 3–5 cuttings per batch.
- ● Sharp pruning shears or scissors: Sterilized to prevent disease. Spec: Clean, sharp blades for clean cuts.
- ○ Rooting hormone (optional but recommended): Powder or gel to boost root growth. Spec: Contains auxins (e.g., Clonex or Dip ’N Grow).
- ● Water propagation: Clear glass or jar (8–12 oz).
- ● Room-temperature water (changed every 2–3 days).
- ● Soil propagation: Well-draining potting mix (e.g., 50% perlite + 50% peat moss or coconut coir). Spec: Sterilized, moisture-retentive, and airy.
- ● Small pots or seedling trays (2–4 inches deep). Spec: Drainage holes required!
- ● Humidity dome or plastic bag: To retain moisture (for soil method). Spec: Clear plastic wrap or a propagator.
- ● Spray bottle: For misting cuttings (especially in dry climates).
- ● Fertilizer: Diluted seaweed extract or liquid fertilizer (1/4 strength) after roots form (4–6 weeks).
- ● Grow lights: LED or fluorescent (12–16 hours/day) if natural light is insufficient.
- ● Rooting cubes: Pre-moistened coco coir or peat cubes for easy transplanting.
- ● Label markers: To track pepper varieties (e.g., jalapeño, habanero).
Step-by-step instructions for propagating pepper plants
Here’s the quick, proven method I use to root pepper cuttings—whether in water or soil—without losing plants to rot or stress.
Select Healthy Pepper Cuttings
Choose non-flowering stems from your pepper plants, ideally 4-6 inches long with at least 3-4 leaf nodes. The best cuttings come from the middle section of the plant, where stems are mature but still flexible. Use clean, sharp pruning shears to make a 45-degree angle cut just below a node—this increases surface area for root growth.
Remove all but the top 2-3 leaves to reduce moisture loss and stress. If leaves are large, trim them in half to further minimize evaporation. Work in the early morning when plants are hydrated and temperatures are cooler, giving your cuttings the best start.
Prepare the Rooting Medium
For water propagation, use room-temperature distilled or filtered water in a clean glass jar. Add 1-2 drops of hydrogen peroxide to prevent bacterial growth—this keeps the water clear and healthy for root development. Place the cutting in the jar so only the bottom 1-2 inches are submerged, keeping the leaves dry.
For soil propagation, fill a small pot with light, well-draining potting mix (avoid garden soil—it compacts and suffocates roots). Moisten the mix until it’s damp but not soggy, then create a small hole with your finger or a pencil. Dip the cut end of the stem in rooting hormone (optional but speeds growth) before inserting it 1-2 inches deep into the hole.
Create Ideal Conditions for Root Growth
Place your cuttings in a bright, indirect light spot—direct sun can overheat the water or dry out soil too quickly. Maintain 70-75°F for optimal rooting; a seedling heat mat under soil pots helps if your home runs cooler. For water propagation, change the water every 3-4 days to prevent algae and bacterial buildup.
Cover the cuttings with a clear plastic bag secured loosely with a rubber band to trap humidity. Check daily for condensation—if the bag fogs up, roots are forming. In 2-4 weeks, you’ll see white, fuzzy roots in water or slight resistance when gently tugging soil cuttings. This is your signal to transplant.
Transplant Rooted Cuttings
Once roots reach 1-2 inches long (for water) or show new leaf growth (for soil), it’s time to move your cuttings. For water-rooted plants, rinse off any algae from the roots and plant them in individual pots with fresh potting mix. Press the soil gently around the stem to eliminate air pockets.
Keep newly transplanted cuttings in partial shade for 3-5 days to reduce stress. Water lightly at the base—avoid wetting leaves to prevent disease. After a week, gradually reintroduce them to full sun and normal watering routines. You’ll notice stronger growth within 10 days as the plants establish their root systems.
Tips & tricks for perfect pepper plant propagation
These insider tricks will help you achieve fast, healthy root growth without the common pitfalls that derail so many propagation attempts.
Cutting Selection Strategy: The middle section of your pepper plant yields the most successful cuttings because it's mature enough to handle propagation but still flexible enough to root. I always look for stems with at least three visible leaf nodes—the more nodes, the more potential growth points for roots. Avoid using flowering stems, as they contain hormones that can inhibit root development and focus instead on non-flowering sections where energy is directed toward vegetative growth.
Rooting Medium Optimization: For water propagation, I've found that using room-temperature distilled water creates the ideal environment for root development. The 70-75°F temperature range is critical—any cooler and root growth slows dramatically, while warmer temperatures can promote bacterial growth. When using soil, the "damp but not soggy" texture is essential; you should be able to squeeze a small amount of mix and have just a few droplets of moisture appear. This balance prevents both root suffocation and fungal growth.
Humidity Management: The clear plastic bag technique works wonders for maintaining humidity, but there's a science to it. I always secure the bag loosely with a rubber band—too tight and you'll trap excess moisture that can lead to mold, while too loose defeats the purpose. Check daily for condensation on the bag's interior; this is your visual cue that the humidity level is perfect for root formation. If you notice water droplets forming on the leaves, it's time to adjust the bag's position or increase airflow slightly.
Transplant Timing Insight: The 3-5 days of partial shade after transplanting is crucial for minimizing transplant shock. During this period, the plant's energy goes toward establishing new root connections rather than producing leaves. I've noticed that plants transplanted in the early morning hours recover fastest, as they have the entire day to adjust to their new environment before nightfall. After this initial period, gradually reintroducing full sun over a week helps harden the plant without causing stress.
Pro Tips for Propagate Pepper Plants
- These insider tricks will help you achieve fast, healthy root growth without the common pitfalls that derail so many propagation attempts.
- Cutting Selection Strategy: The middle section of your pepper plant yields the most successful cuttings because it's mature enough to handle propagation but still flexible enough to root.
- Rooting Medium Optimization: For water propagation, I've found that using room-temperature distilled water creates the ideal environment for root development.
Frequently asked questions
Got questions about propagating pepper plants? You’re not alone! Here are some of the most common queries to help you grow like a pro.
How long does it take for pepper plants to root in water?
Most pepper cuttings will develop roots in 2–4 weeks when placed in water. Keep the water warm (around 70°F) and change it every 2–3 days to prevent bacteria. Patience is key—some varieties (like jalapeños) may take slightly longer than others!
Can I propagate peppers directly in soil instead of water?
Soil propagation works well if you use a moist, well-draining mix (like perlite and peat). Dip cuttings in rooting hormone first, then plant at a 45° angle. Keep the soil consistently damp (not soggy) and cover with a plastic bag for humidity. Roots usually form in 3–6 weeks.
Why are my pepper cuttings rotting in water?
Rotting often happens due to bacteria or fungus from stagnant water. To fix this:
- Use filtered or distilled water (tap water can contain chlorine/fluoride).
- Change the water every 2–3 days.
- Trim any black/mushy stems and replant in fresh water.
- Add a drop of hydrogen peroxide (3%) to sterilize.
What’s the best time of year to propagate pepper plants?
The ideal window is early spring (after last frost) or late summer (before first frost). Peppers thrive in warm soil (60°F+), so avoid winter propagation unless you’re using a heat mat. Start indoors 6–8 weeks before the last frost date for outdoor planting.
Can I propagate pepper plants from store-bought peppers?
Yes, but with a catch! Only heirloom or open-pollinated peppers (not hybrids) will produce true-to-type plants. Save seeds from the pepper or take a cutting from a healthy plant. If buying seeds, check the label for "heirloom" or "non-hybrid" to ensure reliability.
Pro Tip:
For faster rooting, try adding a pinch of cinnamon to water or soil—it’s a natural antifungal! Also, place cuttings near a grow light (not direct sun) to encourage root growth without stressing the plant.
Wrapping up and next steps
Growing your own pepper plants from cuttings is a rewarding way to expand your garden—whether you’re aiming for spicy jalapeños or sweet bell peppers! 🌱 With the right techniques, you can achieve fast root growth in water or soil, ensuring healthy, thriving plants.
Whether you’re a beginner or a seasoned gardener, propagation opens doors to endless flavorful harvests.
Now that you’re armed with the knowledge, take the plunge and start propagating! Try a few cuttings today, and soon you’ll be sharing your green thumb success with friends—or enjoying homegrown peppers straight from your kitchen garden. Happy growing! 🌶️