Container Gardens
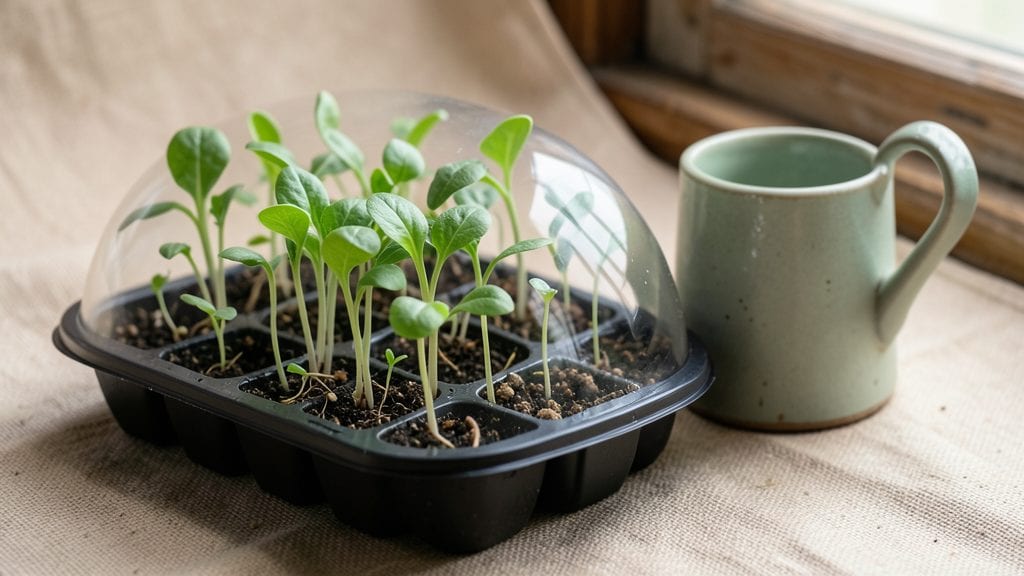
Planting sprouts indoors delivers crisp, nutrient-packed greens in just three days—no soil, no mess, no waiting for spring. 🌱 I spent years growing herbs and veggies the traditional way, but sprouts changed everything: they’re the fastest, most rewarding indoor crop I’ve ever tried.
The secret lies in the perfect balance of moisture, warmth, and airflow, which turns a simple jar into a mini greenhouse where seeds transform into edible greens overnight.
All you need is a clean quart-sized mason jar, a mesh lid or cheesecloth, a handful of seeds (alfalfa, broccoli, or radish work best for beginners), and a sink. The process is foolproof—no green thumb required—just rinse, drain, and repeat twice daily.
My first batch surprised me with bright green shoots by day three, and I’ve been hooked ever since. The best part? You can grow them on a windowsill, kitchen counter, or even under a grow light in a closet.
You’ll end up with fresh, crunchy greens that taste sweeter than store-bought and pack more protein than spinach. They’re perfect for salads, sandwiches, or snacking straight from the jar—no cooking required. Plus, they’re space-efficient and ready when you are, so you’ll never buy wilted sprouts from the grocery store again.
The only downside? You might get addicted to the satisfaction of watching seeds turn into food in just 72 hours.
This method works year-round, in any climate, and even on a college student’s budget. Whether you’re a beginner or a seasoned gardener, sprouts are the fastest, most rewarding indoor crop you’ll ever grow. Let’s get those seeds sprouting!
📚 In This Guide
- What you need
- Instructions
- Tips and common mistakes
- Wrapping up and next steps
What you need
- ● Sprouting container: Choose a glass jar (16–32 oz), plastic or mesh sprouting pod, or a dedicated sprouting tray with drainage. Pro tip: Mason jars are ideal for beginners!
- ● Sprouting seeds: Pick organic, raw seeds like alfalfa, lentils, broccoli, radish, or sunflower. Start with 1–2 tablespoons per jar (adjust based on seed size).
- ● Fine-mesh sprouting lid or cheesecloth: A breathable cover to keep seeds contained while allowing airflow. If using cheesecloth, secure it with a rubber band.
- ● Water: Use filtered or room-temperature water (avoid tap water with chlorine if possible).
- ● Colander or strainer: For rinsing sprouts (if not using a jar with a built-in strainer).
- ● Sprouting tray with lid: Great for larger batches or if you prefer a hands-free setup.
- ● Seed germination paper: Eco-friendly alternative for some sprouts (check compatibility with your seeds).
- ● Small fan or dehydrator: Speeds up drying for crispier sprouts (use on low setting).
- ● Food processor or blender: For chopping sprouts into nutrient-dense salads or smoothies.
- ○ Grow light (optional): If your space lacks natural light, a LED grow bulb can help (though sprouts don’t need it for germination).
- ● Clean workspace: Sanitize containers and tools with hot water or vinegar to prevent mold.
- ● Time commitment: 3–7 days (depending on seed type) for full germination.
- ● Patience: Sprouts are delicate—handle them gently during rinsing!
- ● Space: A cool, dark place (65–75°F) for the first 2–3 days, then bright light for greening.
Step-by-step instructions for planting sprouts indoors
Here’s how to grow vibrant, nutrient-packed sprouts in just 3 days—no soil, no mess, and no waiting weeks for germination.
🌱 Step 1: Soak the Seeds for Maximum Germination
Start by rinsing ½ cup of seeds (like alfalfa, broccoli, or radish) under cool water to remove debris. Place them in a quart-sized mason jar and cover completely with room-temperature water. Let them soak for 8-12 hours—this softens the seed coat and kickstarts germination. I like to use a jar with a wide mouth so seeds spread evenly.
After soaking, drain the water through a fine-mesh strainer and give the seeds a quick rinse. This removes excess water, preventing mold. Now, leave them in the jar at a 65-75°F spot—like your countertop—until you see tiny white sprouts peeking out, usually within 12-24 hours. This is the moment everything starts working!
💧 Step 2: Rinse and Drain Twice Daily
Once sprouts appear, rinse them gently under running water for 30-60 seconds to remove seed casings and keep them fresh. Drain them thoroughly in the strainer—no soggy seeds here! Place the jar back in its drainage rack (if using one) or prop it at a 45-degree angle on a plate to allow excess water to escape. This prevents anaerobic conditions that cause rot.
Repeat the rinse-and-drain routine every 12 hours—morning and night. You’ll notice the sprouts grow longer and greener with each rinse. By day 2, they’ll be ½ inch tall, and by day 3, they’ll be ready to eat or transfer to a growing tray for more leafy growth. Never let them sit in water longer than a few minutes, or you’ll risk bacterial growth.
☀️ Step 3: Provide Indirect Light for Strong Growth
Sprouts need bright, indirect light to prevent legginess. Place your jar near a south-facing window or under a grow light set to 12-14 hours of light daily. If using a window, avoid direct midday sun, which can overheat the jar. You’ll see the best results when sprouts stand upright and develop a deep green color—a sign of chlorophyll production.
If sprouts start leaning toward the light, rotate the jar quarter-turn daily to encourage even growth. By day 3, they should be 1-2 inches tall with vibrant leaves. This is when they’re at peak flavor and nutrition—perfect for salads, sandwiches, or snacks! If you want longer sprouts, transfer them to a sprouting tray with a mesh screen for better airflow and continued growth.
✂️ Step 4: Harvest or Store for Freshness
Harvest your sprouts by cutting the stems just above the jar’s rim with a clean knife or scissors. Rinse them one last time under cold water to remove any remaining seed casings, then drain well. For immediate use, enjoy them raw in salads, wraps, or smoothies—they’re packed with enzymes and antioxidants that boost digestion and immunity.
To store, wrap the sprouts in a damp paper towel, place them in an airtight container, and refrigerate for up to 5 days. Check daily and mist lightly if they dry out. The key is keeping them cool and moist—this preserves their crisp texture and vibrant color. If you notice any slimy spots or off smells, discard them immediately, as this signals spoilage. With this method, you’ll have fresh sprouts ready in just 3 days—no soil, no garden, just pure, fast-growing nutrition!
Tips & tricks for perfect indoor sprout germination
These game-changing techniques will help you grow vibrant, nutrient-dense sprouts in just three days—no green thumb required!
The Soak Factor: That 8-12 hour soak is your secret weapon for breaking seed dormancy. I've found using a wide-mouth quart mason jar makes draining and rinsing effortless later. For faster germination, try soaking seeds in a bowl of filtered water with a pinch of sea salt—this prevents mold while encouraging even sprouting.
Temperature Matters: Maintain that 65-75°F range consistently during the 8-12 hour soak and beyond. If your kitchen runs cooler, place the jar on top of your refrigerator or near a sunny window. I've seen sprouts fail completely when left in drafty areas—consistent warmth is key for those first critical hours!
Lighting Strategy: For the 12-14 hours of daily light, position your jar within 12 inches of a south-facing window or under a grow light. Rotate the jar quarter-turn daily to prevent leggy growth—this ensures even light exposure and those perfect deep green leaves. If using natural light, avoid direct midday sun which can overheat and scorch delicate sprouts.
Harvest Timing: By day 3, when your sprouts reach 1-2 inches tall, harvest immediately for peak freshness. I've learned the hard way that waiting too long leads to tougher stems—cut just above the jar rim for the cleanest harvest. For storage, keep them in a damp paper towel wrapped container to maintain crispness for up to 5 days!
Pro Tips for Planting Sprouts Indoors
- These game-changing techniques will help you grow vibrant, nutrient-dense sprouts in just three days—no green thumb required!
- The Soak Factor: That 8-12 hour soak is your secret weapon for breaking seed dormancy.
- Temperature Matters: Maintain that 65-75°F range consistently during the 8-12 hour soak and beyond.
Frequently asked questions
Got questions about sprouting indoors? You’re not alone—here are some of the most common concerns and quick solutions to keep your sprouts thriving!
How long do sprouts take to grow indoors?
Most sprouts are ready in 3–7 days! Fastest varieties like alfalfa or radish sprout in 3–4 days, while slower ones (e.g., broccoli or sunflower) may take up to a week. Check daily—harvest when they’re 1–3 inches tall and tender.
Can I grow sprouts without sunlight?
Sprouts don’t need sunlight for germination—just warmth and moisture. Use a dark cabinet or cover the jar with a towel for the first 2–3 days. Once they sprout, move them to bright indirect light (like a sunny windowsill) to prevent legginess.
Why are my sprouts moldy or slimy?
Mold (fuzzy spots) or sliminess means excess moisture or poor airflow. Rinse sprouts 2x daily with clean water, drain thoroughly, and use a well-ventilated sprouting lid or mesh. Discard any moldy batches immediately—it’s unsafe to eat!
What’s the best indoor setup for beginners?
Start with a quart mason jar + sprouting lid (or a clean kitchen towel secured with a rubber band). No fancy tools needed! For variety, try a stackable sprouter (like a BPA-free tower) to save space and organize multiple batches.
Can I eat sprouts raw, or do I need to cook them?
Most sprouts (alfalfa, broccoli, radish) are safe and delicious raw—just rinse well before eating! Cooking (lightly steaming or sautéing) is optional but can soften tougher sprouts like mung beans. Never eat moldy sprouts—they can cause food poisoning.
How often should I rinse sprouts?
Rinse sprouts 2 times a day (morning and night) for the first 3–4 days to keep them moist but not soggy. After they sprout, reduce to 1 rinse daily until harvest. Always drain well to prevent bacteria growth.
Pro Tip:
For faster germination, soak seeds in warm water (not hot) for 8–12 hours before planting. And if your kitchen’s too cold, place the jar on top of the fridge for a warm, dark environment!
Wrapping up and next steps
Planting sprouts indoors is a game-changer—fast, soil-free, and packed with nutrients! 🌱 With just a jar, seeds, and a few days of patience, you’ll harvest fresh, crunchy greens for salads, sandwiches, or snacks.
Whether you’re a beginner or a seasoned gardener, this method proves that growing food at home is easy, rewarding, and fun.
Ready to take the next step? Start with one or two types of sprouts (like alfalfa, broccoli, or radish) and experiment with flavors. Once you master the basics, expand your indoor garden with herbs or microgreens—your kitchen (and taste buds) will thank you!