
Vegetables
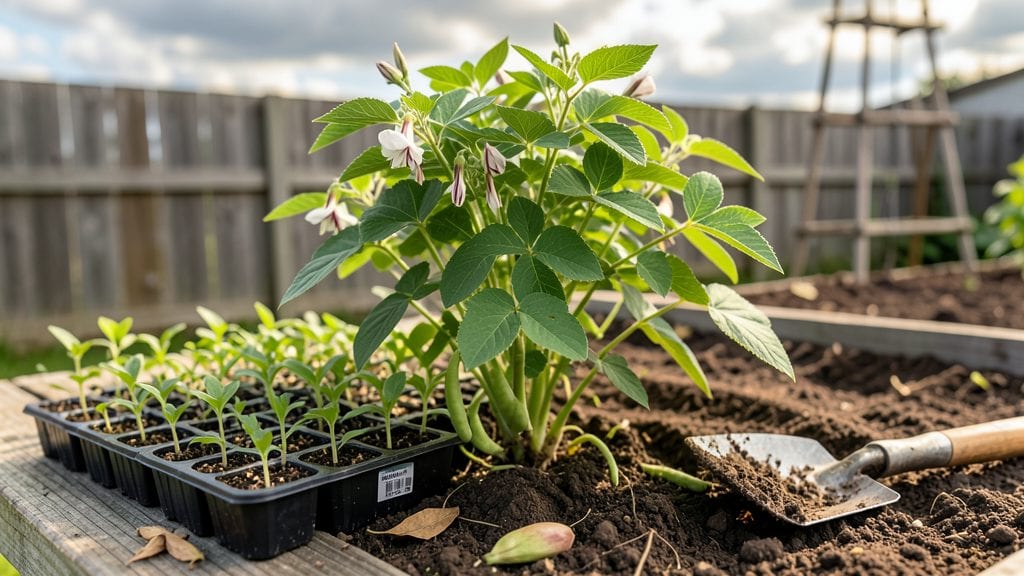
Planting snap beans delivers crisp, fresh harvests faster than you'd expect—50 days from seed to table is no exaggeration. I remember my first time growing them: I planted a row in May, and by early July, we were snacking on beans straight from the garden.
The key is timing, soil warmth, and a little patience while waiting for those first green shoots to break through.
You’ll need a sunny spot with well-draining soil—beans hate soggy roots—and a packet of seeds (try 'Blue Lake' or 'Contender' for reliability). Plant after the last frost when soil reaches 60°F, and keep the seeds 1 inch deep, spaced 3-4 inches apart.
A simple trellis or stakes help save space and keep pods off the ground. Most varieties thrive in 55-85°F, so spring and early summer are ideal.
Once planted, water consistently—1 inch per week—but avoid wetting the leaves to prevent disease. Thin seedlings to 4 inches apart when they’re a few inches tall, and watch for those first true leaves.
Within 7-10 days, you’ll see tiny bean plants emerging, and by week 6, you’ll be harvesting. The flavor? Nothing beats fresh-picked snap beans, still warm from the sun.
Pro tip: Interplant with radishes or lettuce to maximize space, and mulch to keep soil moist. If germination stalls after 10-14 days, try soaking seeds overnight before replanting. With the right care, you’ll have a steady supply of beans all season—no grocery store needed.
📚 In This Guide
- What you need
- Instructions
- Tips and common mistakes
- Wrapping up and next steps
What you need
- ● Snap Bean Seeds: 1–2 lbs (adjust based on garden size; ~10–12 seeds per foot of row for bush varieties, ~4–5 seeds per foot for pole varieties). Choose disease-resistant varieties like 'Blue Lake' or 'Contender' for best results.
- ● Well-Draining Soil: Snap beans thrive in loose, fertile soil with a pH of 6.0–7.0. Amend clay or compacted soil with compost or aged manure (2–3 inches mixed into the top 6–12 inches of soil).
- ● Fertilizer: A balanced, low-nitrogen fertilizer (e.g., 5-10-10 or compost) to avoid leafy growth at the expense of pods. Apply at planting and again when flowers appear.
- ● Water: Consistent moisture is key! Aim for 1–1.5 inches per week, either from rainfall or irrigation.
- ● Garden Trowel or Transplanter: For digging small holes (1–2 inches deep) or creating furrows.
- ● Garden Rake or Hoe: To loosen soil and create planting rows (4–6 inches deep).
- ● Measuring Tape or Ruler: To space seeds correctly (2–4 inches apart for bush beans, 4–6 inches for pole beans).
- ○ Trellis or Bamboo Poles (Optional for Pole Beans): 6–8 ft tall, spaced 3–4 ft apart for vertical growth.
- ● Mulch (Straw or Grass Clippings): 2–3 inches thick to retain moisture and suppress weeds.
- ● Garden Gloves: To protect your hands while handling soil and seeds.
- ● Warm Soil: Snap beans love warmth! Wait until the soil temperature reaches at least 55°F (13°C)—use a soil thermometer to check.
- ● Sunlight: Full sun (6–8 hours daily) for optimal growth.
- ● Last Frost Date: Plant after the last frost in spring or 80–100 days before the first fall frost for a second harvest.
- ○ Succession Planting Plan (Optional): For continuous harvests, sow seeds every 2–3 weeks until 6–8 weeks before the first frost.
Step-by-step instructions for planting snap beans
Here’s how to get a speedy harvest in just 50 days—no waiting around.
Choose the Right Variety and Prepare the Soil
Snap beans thrive in warm soil, so pick a quick-maturing variety like 'Blue Lake' or 'Contender' for a fast harvest. Work in 2-3 inches of compost into the top 6 inches of soil to loosen it and boost fertility. The soil should crumble easily when squeezed—like damp sand—and drain well to prevent waterlogged roots.
Test your soil’s warmth by pressing your hand into it. If it feels comfortably warm to the touch (around 60-65°F), it’s ready. If cooler, wait until the soil reaches that temperature before planting. Cold soil slows germination, and you’ll be watching for sprouts for weeks instead of days.
Plant Seeds at the Correct Depth and Spacing
Plant seeds 1 inch deep and 2-3 inches apart in rows spaced 18-24 inches apart. This gives roots room to spread without competing for nutrients. I like to use a small hand trowel to make a shallow furrow, drop in 2-3 seeds per spot, then cover lightly with soil. Planting extra seeds ensures a full row even if a few fail to sprout.
Water gently right after planting to settle the soil around the seeds. Avoid soaking the area—you want the soil moist but not soggy. Once seeds are in, mark the row with a small stake to avoid disturbing the soil later. Snap beans hate being moved, so precise planting now saves headaches later.
Provide Consistent Moisture and Warmth
Keep the soil evenly moist but never waterlogged, especially during germination. Snap beans need 1-1.5 inches of water per week, delivered through light, frequent watering rather than deep soakings. Mulch with 2-3 inches of straw or shredded leaves to retain moisture and suppress weeds, which compete for nutrients.
Watch for the first true leaves to appear in 7-10 days. If the soil dries out before then, germination slows or stops. Once sprouts emerge, thin to the strongest plant per spot, snipping weaker seedlings at soil level with scissors. This reduces competition and gives remaining plants more space to thrive.
Support Vines and Monitor for Pests
As plants grow, install 5-foot tall trellises or stakes to support climbing varieties. This saves space and keeps pods clean and accessible. Tie vines loosely with soft garden twine every 6-8 inches as they grow—too-tight ties can damage stems.
Check plants weekly for pests like Mexican bean beetles or aphids. A strong spray of water usually dislodges them, but if infestations persist, treat with neem oil or insecticidal soap. Yellowing leaves or stunted growth often signal overwatering or nutrient deficiency—adjust watering or add a balanced fertilizer if needed.
Harvest at Peak Ripeness for Maximum Yield
Harvest snap beans when pods are 4-6 inches long and crisp—this happens about 50-60 days after planting. Pick every 2-3 days to encourage continuous production. Use sharp scissors or pruners to snip stems just above the pod to avoid damaging the plant.
Stop harvesting when pods start to bulge or turn woody—this means the plant is shifting energy to seed production. At this stage, you can either let the beans mature fully for drying or pull the plants and compost them to enrich the soil for next season.
Tips & tricks for perfect snap bean planting
Here’s how to maximize your 50-day harvest and avoid the most common gardening pitfalls.
Soil Temperature Timing: The 60-65°F soil temperature range is non-negotiable for quick germination. Use a soil thermometer if unsure—cold soil can delay sprouting by weeks. I’ve seen seeds take 21 days to germinate in 55°F soil versus just 7-10 days at the ideal range. Plant only when your hand test confirms warmth, and cover with row fabric if night temperatures dip below 50°F to maintain that critical heat.
Precision Planting Technique: Those 1-inch deep seed placements matter more than you might think. Plant too shallow and seeds dry out; too deep and they struggle to emerge. Use a ruler to verify depth after covering with soil. For the 2-3 inch spacing, I mark rows with a stick and measure between seeds with a tape measure—this ensures proper airflow and prevents fungal issues that can slow growth.
Watering Strategy: The 1-1.5 inches of water per week recommendation assumes consistent moisture, not occasional deep waterings. I set up a drip irrigation system on a timer for 15 minutes twice daily to maintain even moisture without overwatering. For hand watering, use a gentle spray nozzle to avoid displacing seeds, and always water at soil level rather than overhead to prevent disease.
Harvest Optimization: When pods reach 4-6 inches but still feel crisp, that’s your window—harvest immediately. I carry a basket and check plants every morning; beans picked at this stage stay fresh longer and produce more consistently. If you miss this window, the pods quickly become tough and fibrous. For continuous production, harvest every 2-3 days without fail—this signals the plant to keep producing rather than maturing seeds.
Pro Tips for Planting Snap Beans
- Here’s how to maximize your 50-day harvest and avoid the most common gardening pitfalls.
- Soil Temperature Timing: The 60-65°F soil temperature range is non-negotiable for quick germination.
- Precision Planting Technique: Those 1-inch deep seed placements matter more than you might think.
Frequently asked questions
When is the best time to plant snap beans?
Snap beans thrive in warm soil, so wait until after the last frost date when soil temperatures reach at least 60°F (15°C). For cooler climates, start seeds indoors 2–3 weeks before transplanting. In warm regions, plant in early spring or late summer to avoid heat stress.
How long does it take for snap beans to grow?
Most snap bean varieties mature in 50–60 days from planting! With proper care (sunlight, water, and soil), you can enjoy a fresh harvest just two months after sowing. Bush beans often mature faster than pole beans, so check seed packets for exact timelines.
Can I plant snap beans in containers?
Snap beans grow well in containers as long as the pot is at least 12 inches deep and wide enough for air circulation. Use a lightweight potting mix, and choose bush varieties for smaller spaces. Pole beans need a trellis or sturdy support, even in containers.
What should I do if my snap bean plants have holes or yellow leaves?
Holes in leaves usually mean bean beetles or slugs—handpick pests or use organic sprays like neem oil. Yellow leaves often signal overwatering, nitrogen deficiency, or fungal issues. Adjust watering, ensure well-draining soil, and rotate crops next season to prevent disease.
Are snap beans easy to grow for beginners?
Yes! Snap beans are low-maintenance and fast-growing, making them perfect for beginners. They tolerate poor soil better than many veggies, require minimal pruning, and even self-pollinate. Just ensure they get 6+ hours of sunlight daily and consistent moisture for best results.
Wrapping up and next steps
Planting snap beans is a rewarding and beginner-friendly way to enjoy fresh, homegrown veggies in no time! With just 50 days to harvest, you’ll relish the satisfaction of a quick, bountiful crop—plus, their versatility in dishes makes them a kitchen staple.
Whether you’re a seasoned gardener or a curious newbie, get your hands dirty and start planting—your taste buds (and dinner plate) will thank you!
🌱 Next step: Mark your calendar for planting, then grab those seeds and soil—your garden (and future salads) are waiting!