Vegetables
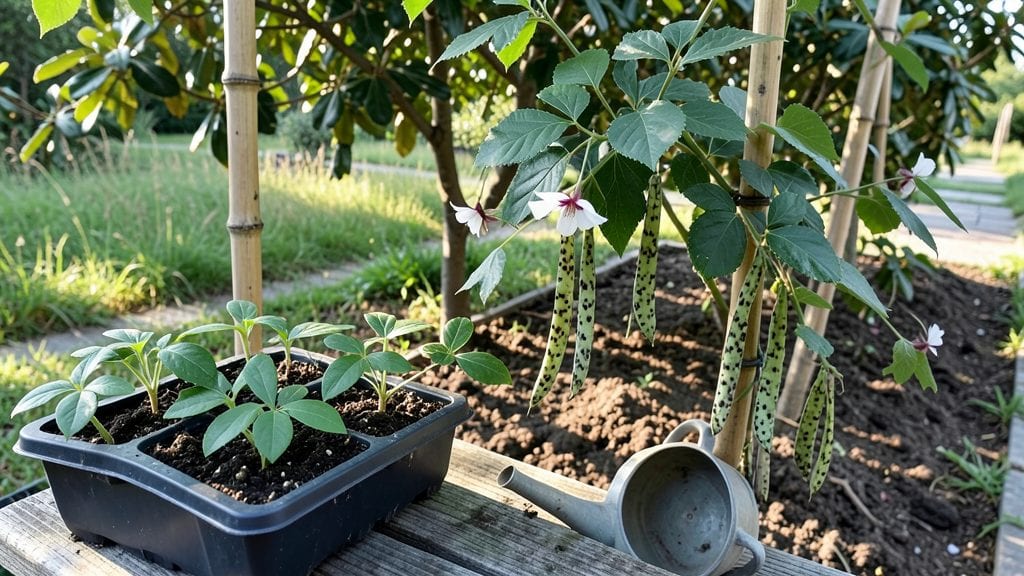
Planting rattlesnake beans turns your garden into a lush, edible jungle—those bold vines climb like crazy while delivering 60-day harvests of crisp, flavorful beans.
I’ve grown them for years, and they’re one of my favorite summer crops because they’re disease-resistant, high-yielding, and even pretty enough to use as ornamental vines.
The key is getting them started right, whether you’re tucking them into a raised bed or letting them sprawl across a trellis in your backyard.
The secret to their success starts with well-draining soil mixed with compost—rattlesnake beans hate soggy roots. Plant seeds 1 inch deep and 4-6 inches apart, giving them plenty of room to spread (they can reach 10-15 feet if left unchecked!).
Warm soil is critical—wait until your last frost has passed and temperatures stay above 60°F—or you’ll end up with slow, leggy plants. If you’re in a cooler zone, opt for a black plastic mulch to speed up germination.
By midsummer, you’ll be harvesting long, straight pods that snap like fresh green beans but pack a nutty, earthy flavor—perfect for stir-fries or steamed sides. The vines also produce beautiful purple flowers that attract pollinators, making your garden buzz with activity.
With proper trellising, you can even grow them vertically in containers, saving space on patios or balconies. Just be ready for a prolific harvest—these beans don’t mess around.
Here’s the thing—rattlesnake beans thrive in hot, humid climates but can handle USDA Zones 4-10 with the right timing. In short seasons, treat them like a fast-growing annual and succession-plant every 2-3 weeks for continuous harvests.
And if you love them as much as I do, save some seeds for next year—they store well and grow true from season to season. Ready to let your garden go wild with these vines?
📚 In This Guide
- What you need
- Instructions
- Tips and common mistakes
- Wrapping up and next steps
What you need
- ● Seeds: 1–2 packets of rattlesnake bean seeds (e.g., Phaseolus vulgaris ‘Rattlesnake’ or similar heirloom varieties). Start with 10–20 seeds for a small garden patch.
- ● Growing Space: Outdoor: A sunny spot (6+ hours of direct sunlight daily) with well-draining soil. A 3–4 ft tall trellis or sturdy fence (beans are vining!).
- ● Container: 5-gallon pots or larger (for balconies/patios). Ensure drainage holes are present.
- ● Soil: Loose, nutrient-rich soil with a pH of 6.0–7.0. Mix in 2–3 inches of compost or aged manure before planting.
- ● Watering Can or Hose: With a gentle spray nozzle to avoid disturbing seedlings.
- ○ Fertilizer (Optional but Helpful): Balanced organic fertilizer (e.g., 10-10-10) or compost tea. Apply lightly at planting and again when flowers appear.
- ● Avoid high-nitrogen fertilizers—beans fix their own nitrogen!
- ● Mulch (straw or grass clippings) to retain moisture and suppress weeds.
- ● Plant markers or stakes to label your rattlesnake bean patch.
- ● Pruning shears (for trimming excess vines or dead leaves).
- ● Row cover or shade cloth if your climate has hot summers (beans dislike extreme heat).
- ● Harvest basket or mesh bag to carry pods without bruising them.
Step-by-step instructions for planting rattlesnake beans
Here's how to grow these dramatic, fast-maturing beans with minimal fuss—perfect for warm-season gardens.
Choose the Right Location and Prepare Soil
Rattlesnake beans thrive in full sun, so select a site that receives at least 6-8 hours of direct sunlight daily. These vines grow aggressively, so avoid planting near delicate perennials or structures they could climb onto. I always choose a spot with well-draining soil—they despise soggy roots.
Before planting, loosen the soil to a depth of 12 inches using a broadfork or tiller. Work in 2-3 inches of compost to enrich the soil, as rattlesnake beans respond well to organic matter. The goal is loose, fertile soil that allows roots to penetrate easily. Test the pH—these beans prefer a slightly acidic to neutral range (6.0-7.0). If your soil is heavy clay, mix in 1-2 inches of coarse sand to improve drainage.
Plant Seeds at the Correct Depth and Spacing
Plant rattlesnake bean seeds 1 inch deep and 4-6 inches apart in rows spaced 2-3 feet apart. These beans germinate quickly in warm soil (70-85°F), so wait until all danger of frost has passed. I like to soak the seeds overnight in lukewarm water to soften the outer coating and speed up germination—this cuts germination time by nearly half.
After planting, water gently but thoroughly to settle the soil around the seeds. Avoid disturbing the seeds once planted, as rattlesnake beans are sensitive to transplant shock. If you're using a trellis or support structure, install it now—these vines can reach 10-12 feet if given the chance, but they’ll still produce well at 6-8 feet with proper pruning.
Provide Consistent Moisture and Support
Keep the soil evenly moist but not waterlogged during the growing season. Rattlesnake beans are drought-tolerant once established, but young plants need 1 inch of water per week to prevent wilting. I water deeply in the morning to allow foliage to dry before evening, which reduces the risk of fungal diseases like rust.
As the vines grow, gently guide them onto the trellis or support structure. These beans have a twining habit, meaning they’ll climb naturally if given something to latch onto. If you notice the vines becoming tangled or overcrowded, prune back excess growth to improve air circulation. This also encourages larger, more productive pods. Harvest begins in 55-60 days, so keep an eye out for the distinctive dark green, slightly curved pods that give these beans their name.
Monitor for Pests and Diseases
Rattlesnake beans are relatively pest-resistant, but you may encounter bean beetles or aphids during the growing season. I recommend inspecting the undersides of leaves weekly—early intervention is key. If you spot pests, spray with neem oil or introduce ladybugs for natural control. Avoid chemical pesticides, as they can harm pollinators and leave residues on the edible pods.
Watch for signs of powdery mildew, which appears as white, powdery patches on the leaves. This fungal disease thrives in humid conditions, so improve airflow by pruning crowded vines and watering at the base rather than overhead. If mildew appears, treat with a baking soda spray (1 tablespoon baking soda + 1 quart water + a drop of dish soap) applied in the early morning.
Harvest and Extend the Season
Harvest rattlesnake beans when the pods are 4-6 inches long and still firm, typically 55-60 days after planting. Use a sharp knife or pruners to avoid damaging the vine. I harvest every 2-3 days during peak production to encourage continuous flowering and pod development. The beans inside should be tender and crisp—if they feel tough or the pods start to yellow, you’ve missed the window.
To extend the harvest, succession plant every 2 weeks after the initial planting. These beans grow fast, so you can enjoy a steady supply throughout the summer. After the first frost, cut the vines back to 6 inches and cover the soil with 2-3 inches of mulch to protect the roots. Many gardeners find that rattlesnake beans resprout in the spring, giving you an early harvest the following year.
Tips & tricks for perfect rattlesnake bean planting
These game-changing strategies will help you maximize your rattlesnake bean harvest with minimal effort—trust me, the difference between a modest yield and a bountiful garden lies in the details.
Soil Preparation Secret: While the instructions call for loosening soil to 12 inches, I take it a step further by adding a handful of wood ash to the compost mix—just 1/2 cup per square foot. This subtle adjustment raises soil pH slightly toward that ideal 6.0-7.0 range while also providing trace minerals. The beans respond with noticeably stronger vines and more abundant flowering. For clay-heavy soils, I mix in 1 part perlite to 2 parts compost to create pockets of aeration at the 12-inch depth.
Germination Hack: The overnight lukewarm water soak in Step 2 is brilliant, but here's the pro move: use filtered water with a pinch of honey (1/4 teaspoon per cup) to prevent mold growth during germination. I also plant seeds in small biodegradable pots filled with peat moss—this lets me transplant seedlings without disturbing their delicate root systems. The pots dissolve in the soil, eliminating transplant shock completely.
Watering Strategy: While the instructions recommend 1 inch per week, I've found that morning watering every other day with 1/2 inch at a time works better in my climate. The key is to water deeply enough that moisture reaches the 12-inch depth—use a moisture meter to verify. I also mulch with 2 inches of straw immediately after planting to lock in moisture and prevent soil crusting, which can suffocate emerging seedlings.
Harvest Timing: The 55-60 day window is precise, but here's how I extend it: I harvest the largest pods first (6 inches) while leaving the smaller ones (4 inches) to mature. This staggered approach gives me a 2-week extended harvest without sacrificing quality. I also watch for the pods to develop a slight curve—their signature shape—rather than relying solely on length measurements. This visual cue often appears 2-3 days before they reach maximum size.
Pro Tips for Planting Rattlesnake Beans
- These game-changing strategies will help you maximize your rattlesnake bean harvest with minimal effort—trust me, the difference between a modest yield and a bountiful garden lies in the details.
- Soil Preparation Secret: While the instructions call for loosening soil to 12 inches, I take it a step further by adding a handful of wood ash to the compost mix—just 1/2 cup per square foot.
- Germination Hack: The overnight lukewarm water soak in Step 2 is brilliant, but here's the pro move: use filtered water with a pinch of honey (1/4 teaspoon per cup) to prevent mold growth during germination.
Frequently asked questions
Got questions about growing rattlesnake beans? You’re not alone—these bold climbers can be tricky for beginners! Here are answers to the most common queries to help you plant with confidence.
When is the best time to plant rattlesnake beans?
Plant rattlesnake beans after the last frost when soil temperatures reach 60°F (15°C). They thrive in warm climates and struggle with cold—aim for late spring or early summer. In hot zones, opt for fall planting to avoid summer heat stress. Pro tip: Use a soil thermometer to check!
Are rattlesnake beans toxic, and should I wear gloves?
Yes, the pods and seeds contain rotenone, a natural pesticide toxic to humans and pets. Wear gloves when handling plants, and keep them away from children/pets. Cooking destroys toxicity, but never eat raw pods. Use them for ornamental or pest-control purposes instead!
How tall do rattlesnake beans grow, and what support do they need?
These vines can climb 10–15 feet! Provide a trellis, fence, or sturdy stake early in growth. Without support, they sprawl aggressively, competing with other plants. Bonus: Prune side shoots to encourage upward growth and larger pods.
Why aren’t my rattlesnake beans producing pods?
Common culprits: poor pollination (hand-pollinate with a brush if bees are scarce), overcrowding (thin plants to 6–12 inches apart), or nutrient deficiencies (add compost or a balanced fertilizer). Also, ensure full sun (6+ hours/day)—they wilt in shade.
Can I grow rattlesnake beans in containers or small spaces?
Yes! Use a large container (10+ gallons) with drainage and a trellis. They’re great for vertical gardening on balconies or patios. Just ensure the pot stays moist but not soggy—container soil dries faster than in-ground plots.
What’s a good alternative if I want non-toxic climbing beans?
Try yard-long beans, scarlet runner beans, or hyacinth beans—they’re edible, ornamental, and equally vigorous. For pest control, black-eyed Susans (Crotalaria) are a safer (but less dramatic) option. Compare: Rattlesnake beans = bold + toxic; runners = tasty + pretty!
Wrapping up and next steps
Planting rattlesnake beans is a rewarding adventure that brings bold flavors and quick harvests to your garden! 🌱 With just a few key steps—choosing the right variety, preparing your soil, and providing proper care—you’ll soon enjoy fresh, crunchy pods in as little as 60 days.
Whether you’re a seasoned gardener or a curious beginner, these vibrant vines are a fantastic addition to any plot.
Now that you’re armed with all the tips and tricks, roll up your sleeves and start planting! Grab your seeds, mark your calendar for that first harvest, and get ready to savor the delicious (and slightly spicy!) rewards. Happy growing! 🌿✨