Container Gardens
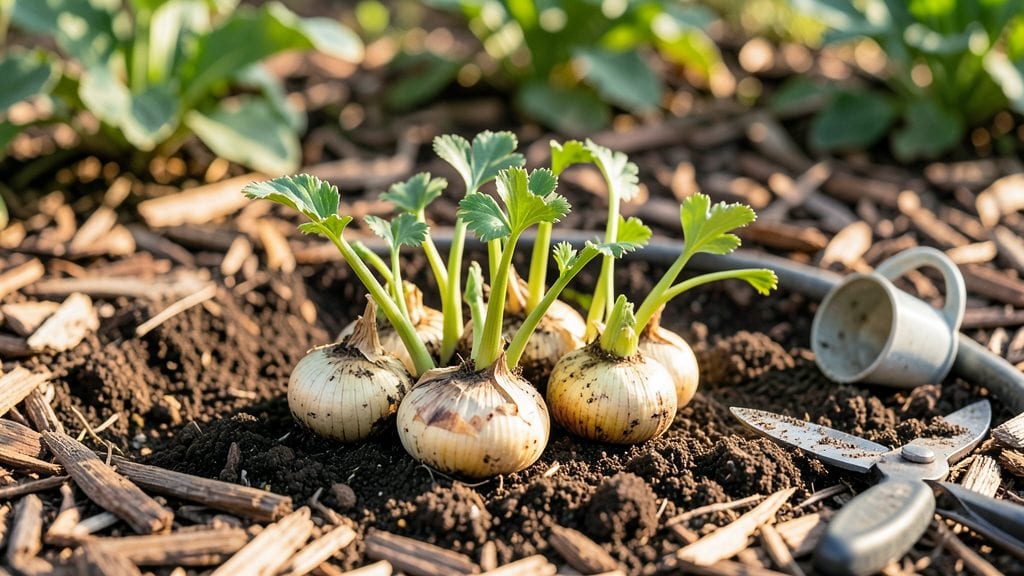
Planting ranunculus corms delivers those dreamy, layered blooms that look like they belong in a bouquet—except they’re growing right in your garden. 🌸 I’ve planted them in everything from containers to garden beds, and the secret to success isn’t complicated: it’s about timing, depth, and a little patience.
Most people rush the process, but taking just 10 extra minutes to prep the soil and layer the corms correctly makes all the difference.
The key is planting them 3-4 inches deep in well-draining soil, with the pointed end facing up—like tiny paperclip arrows. In colder zones, they need a fall planting to establish roots before winter, while warmer climates can plant in early spring.
A 3-inch layer of mulch after planting keeps moisture in and weeds out, and that’s where beginners often trip up by skipping this step.
What you’ll end up with is a burst of velvety petals in early spring, each stem packed with multiple blooms that last weeks in a vase. The plants stay compact, so they’re perfect for containers, borders, or even tucked into perennial beds.
Just avoid overwatering—ranunculus corms rot faster than they sprout if left soggy.
Works in partial shade to full sun, making them versatile for almost any spot in your yard. Once you’ve mastered the basics, you can experiment with colors and varieties—just remember, the deeper the planting, the taller the stems. Let’s get those corms in the ground!
📚 In This Guide
- What you need
- Instructions
- Tips and common mistakes
- Wrapping up and next steps
What you need
- ● Ranunculus corms: Purchase high-quality, dormant corms (typically sold in bulk). Aim for 10-20 corms per square foot for a lush display. Choose colors like pink, red, white, or bi-color based on your preference!
- ● Well-draining potting mix: A blend of 50% high-quality potting soil and 50% perlite or coarse sand (e.g., 2-3 cubic feet per container or garden bed). Avoid heavy clay soils.
- ● Containers or garden bed: Containers: Use pots with drainage holes (minimum 6-inch depth; larger pots for more corms). Terracotta or fabric pots work well.
- ● Garden beds: Ensure the soil is loose, well-draining, and amended with compost. Raised beds are ideal for poor soil conditions.
- ● Garden trowel or small hand shovel: For planting and mixing soil gently.
- ● Watering can or hose with a gentle spray nozzle: Ranunculus corms hate soggy conditions—avoid overwatering!
- ○ Fertilizer (optional but recommended): A balanced, slow-release fertilizer (e.g., 10-10-10 or 5-5-5) mixed into the soil at planting time.
- ● Or, a liquid bloom booster (e.g., fish emulsion or seaweed extract) for post-planting care.
- ● Mulch: Lightly cover planted corms with 1-2 inches of straw or shredded bark to retain moisture (remove once sprouts appear).
- ● Garden gloves: Protect your hands while handling corms or mixing gritty soil.
- ● Plant labels: Mark varieties or planting dates to track progress.
- ● Grow lights (indoor planting): If starting corms 6-8 weeks before the last frost, use a grow light to provide 12-14 hours of light daily.
- ● Epsom salt: A tablespoon per gallon of water can boost magnesium levels for healthier blooms (use sparingly).
Step-by-step instructions for planting ranunculus corms
Here’s the straightforward method I’ve used to coax those delicate, layered ranunculus blooms into my garden every spring.
🌱 Step 1: Prepare the Corms for Planting
Ranunculus corms are unlike bulbs—they’re flat and papery, with tiny buds on top. Before planting, soak them in lukewarm water for 2-3 hours to rehydrate. This step is critical because dry corms resist sprouting until they’ve absorbed moisture. After soaking, gently pat them dry with a paper towel to remove excess water—wet corms rot in cold soil.
Next, separate any corms that are still attached. I like to do this over a sheet of newspaper to catch the small ones. Discard any that feel mushy, shriveled, or have black spots—these won’t bloom. Healthy corms should feel firm and slightly plump. If you’re unsure, a quick sniff test works: they should smell fresh, not sour.
🪴 Step 2: Choose the Right Spot and Plant at the Correct Depth
Ranunculus thrives in full sun to partial shade (at least 4-6 hours of sunlight daily) and well-draining soil. If your garden soil is heavy clay, mix in 2-3 inches of compost or sand to improve drainage—ranunculus hates soggy roots. I plant mine in raised beds or containers if my yard stays damp in spring.
Dig holes 2-3 inches deep—deeper than most bulbs, but shallow enough that the corms aren’t buried under heavy soil. Space them 3-4 inches apart in rows 6 inches apart for a lush, layered display. Place each corm with the flat side down and the pointed end up. If you’re unsure which side is up, trust the tiny buds—they’ll face upward naturally.
☀️ Step 3: Mulch and Water for Strong Growth
After planting, cover the area with 1-2 inches of mulch (I use straw or shredded leaves) to protect the corms from temperature swings and retain moisture. Water lightly but thoroughly—aim for 1 inch of water per week, adjusting for rain. Overwatering now can cause rot, but underwatering stunts early growth. You’ll know you’ve got it right when the soil feels moist 1 inch below the surface.
Here’s the thing—ranunculus needs consistent cool temperatures (40-50°F) to sprout properly. If your spring warms up quickly, plant them in late winter (8-10 weeks before your last frost). In warmer climates, plant in fall (October-November) so they establish roots before summer heat. Once shoots emerge (usually 6-8 weeks after planting), reduce watering slightly to encourage strong root development.
Tips & tricks for perfect ranunculus blooms
These gardening secrets will help you avoid common pitfalls and ensure your ranunculus corms transform into those lush, layered blooms you've been dreaming of.
Soaking Time Matters: That 2-3 hour soak isn't just a suggestion—it's the difference between corms that resist sprouting and ones that wake up ready to grow. I've learned this the hard way after planting dry corms that took weeks to show any signs of life. Use lukewarm water (around 85°F) for optimal absorption, and resist the urge to skip this step even if your corms look plump. The moisture jumpstarts their metabolic processes, giving you a head start on the growing season.
Quality Control: When inspecting your corms in Step 1, trust your senses more than you might think. A quick sniff test reveals more than you'd expect—healthy corms should smell fresh, not sour or musty. I've thrown out entire batches based on that sniff test alone, and it's always paid off. Also, pay attention to the tiny buds on top: they should be firm and upright, not shriveled or mushy. These are your indicators of future blooms.
Planting Depth Precision: The 2-3 inch depth guideline might seem flexible, but ranunculus corms are particular about their placement. Too shallow and they'll dry out; too deep and they'll struggle to reach the surface. I like to use a small ruler to verify depth after planting each corm. For extra security in windy areas, consider adding a thin layer of pebbles on top of the soil after planting to prevent erosion that might expose the corms.
Temperature Timing: Those 40-50°F cool temperatures are non-negotiable for proper sprouting. If you're planting in late winter, monitor your local forecast and adjust your timing accordingly. I've had success using a simple soil thermometer to verify conditions. In warmer climates, fall planting gives the corms time to establish roots before summer heat arrives. The key is consistency—fluctuating temperatures can shock the corms and delay blooming.
Pro Tips for Planting Ranunculus Corms
- These gardening secrets will help you avoid common pitfalls and ensure your ranunculus corms transform into those lush, layered blooms you've been dreaming of.
- Soaking Time Matters: That 2-3 hour soak isn't just a suggestion—it's the difference between corms that resist sprouting and ones that wake up ready to grow.
- Quality Control: When inspecting your corms in Step 1, trust your senses more than you might think.
Frequently asked questions
Got questions about planting ranunculus corms? You’re not alone! Here are the most common concerns—plus quick answers to help you grow stunning, layered blooms with confidence.
When is the best time to plant ranunculus corms?
Plant them 6–8 weeks before your last frost date in fall or early winter (Zone 7–10) for spring blooms, or 6–8 weeks before your first frost in summer/early fall (Zone 3–6) for winter blooms. Cooler soil temps (50–60°F) prevent premature sprouting.
Can I plant ranunculus corms in winter?
Yes! In mild-winter zones (8–10), you can plant them in late fall or even winter, as long as the ground isn’t frozen. In colder climates, plant in early spring (as soon as soil is workable) or summer for winter blooms. Just avoid frost.
What if my ranunculus corms don’t bloom?
Common culprits: too much sun (they prefer partial shade), overcrowding (space them 3–4” apart), or poor drainage. Ensure they get 6+ hours of light and well-draining soil. Deadhead spent blooms to encourage reblooming!
Are there ranunculus alternatives for containers?
Try tulips (early bloomers), anemones (long-lasting), or dahlias (bold foliage). For layered texture, mix in heuchera or hebe. Just match their light/drainage needs—ranunculus are finicky but worth it!
How long do ranunculus corms last in the ground?
With proper care, they’ll rebloom for 2–3 years. After that, dig them up, dry them, and store in a cool, dark place (like a paper bag in the fridge) to replant next season. Divide clumps every 2–3 years to keep them vigorous.
Wrapping up and next steps
Planting ranunculus corms is a rewarding way to add layers of delicate blooms to your container garden with minimal effort! 🌸 With the right timing, soil prep, and a little patience, you’ll soon enjoy vibrant clusters of petals that brighten any space.
Now that you’re equipped with the know-how, why not start planning your next container display?
Ready to take the next step? Grab your corms, pick a sunny spot, and get planting! For even more inspiration, explore our guide on designing stunning container gardens with seasonal blooms.