Transplanting
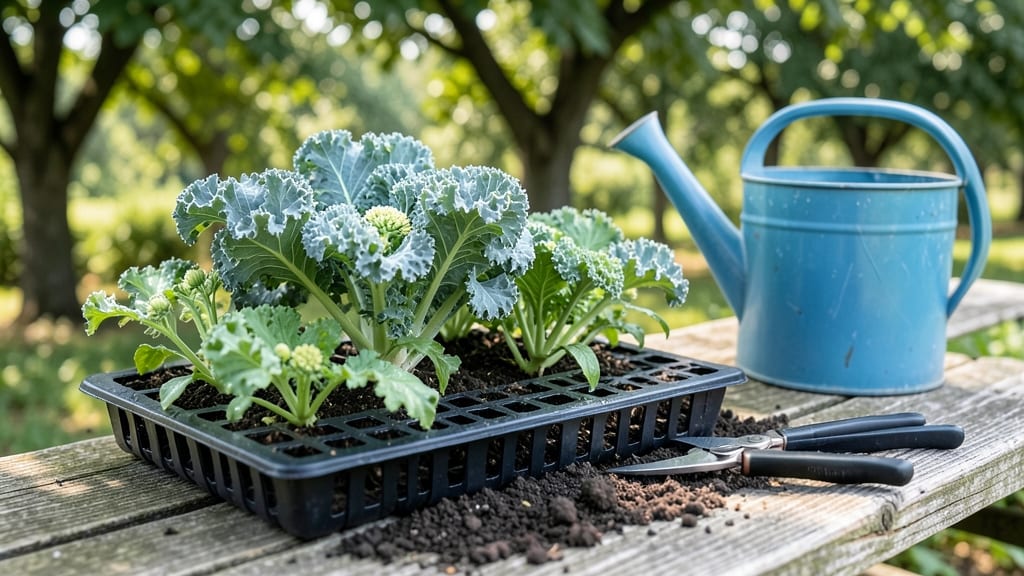
Planting kale seedlings the right way means the difference between tough, thriving plants and wilted disappointment—something I learned after my first batch of seedlings flopped in the ground. 🌱 The secret isn’t just planting; it’s preparing those delicate starts for the real world outside, a process called hardening off that builds resilience over 7-10 days.
You’ll need well-draining soil, a sunny spot with at least 6 hours of sunlight, and a few simple tools: a trowel, compost, and mulch.
Kale thrives in cooler weather, so aim to plant seedlings 2-3 weeks before your last frost date—spring or early fall works best in most climates. The key is patience; rushing this step leads to transplant shock, where plants bolt or develop bitter leaves.
Once hardened off, sink each seedling into the soil so its first true leaves sit just below the surface, then water deeply to settle the roots. Space them 12-18 inches apart to give them room to grow broad and bushy.
Within 2 weeks, you’ll see them adjusting to their new home, sending out fresh growth that’s crisp, sweet, and ready for harvest.
For container gardeners or those in hot climates, partial shade in the afternoon helps prevent bolting. And if your seedlings look stressed after planting? Don’t panic—just keep the soil moist and watch them bounce back.
The payoff is worth it: homegrown kale that tastes nothing like store-bought, harvested straight from your garden.
📚 In This Guide
- What you need
- Instructions
- Tips and common mistakes
- Wrapping up and next steps
What you need
- ● Kale seedlings: 4–6 healthy, disease-free seedlings (choose varieties like Winterbor, Curly Blue, or Lacinato)
- ● Garden plot: Well-draining soil with partial sun (4–6 hours/day). Test pH (ideal: 6.0–7.0).
- ● Transplanting tools: Hand trowel or small shovel
- ○ Garden gloves (optional but recommended)
- ● Watering supplies: Watering can or hose with a gentle spray nozzle
- ● Compost or balanced fertilizer (5-10-5 ratio, 1 tbsp per plant)
- ● Mulch: Straw or shredded leaves (1–2 inches) to retain moisture and suppress weeds.
- ● Row covers: Lightweight fabric to protect seedlings from pests or harsh weather.
- ● Epsom salt: 1 tbsp dissolved in water (spray on leaves weekly for magnesium boost).
- ● Plant markers: Small stakes or labels to track varieties.
Step-by-Step instructions for planting kale seedlings
Here’s my battle-tested method for hardening off kale seedlings so they thrive once transplanted.
🌱 Step 1: Prepare the Garden Bed
Kale thrives in rich, well-draining soil with a pH between 6.0 and 7.0. Work the soil to a depth of 12 inches, removing any rocks or debris that could impede root growth. I like to amend the bed with 2 inches of compost mixed into the top 6 inches of soil—this ensures nutrients are readily available for the seedlings’ rapid growth.
Choose a location that receives at least 4-6 hours of sunlight daily, though kale can tolerate partial shade in hotter climates. Avoid low-lying areas where cold air settles, as kale is frost-tolerant but hates waterlogged roots. If your soil drains poorly, consider building a raised bed or mounding soil to improve drainage.
⏰ Step 2: Time the Transplant for Optimal Conditions
Transplant kale seedlings 2-3 weeks before your last frost date, but only after they’ve developed 4-5 true leaves and a sturdy stem. This timing gives seedlings enough strength to handle outdoor conditions while still allowing them to mature before summer heat sets in. I always check the 10-day forecast—if frost is predicted, delay transplanting until conditions stabilize.
Morning is the best time to transplant, as cooler temperatures reduce stress on the seedlings. If you’re transplanting in hot weather, do it in the late afternoon to give plants time to recover before evening temperatures drop. Avoid transplanting when rain is forecast—wet soil can damage tender roots and make it harder for seedlings to establish.
💧 Step 3: Harden Off Seedlings Gradually
Start hardening off seedlings 7-10 days before transplanting by placing them outside in a sheltered spot for 1-2 hours the first day. Gradually increase their outdoor time by 1 hour daily, moving them to a slightly sunnier location each time. This slow acclimation prevents shock and encourages stronger stems. Watch for wilting or yellowing leaves—if you see these signs, the seedlings aren’t ready yet.
By the final day, seedlings should tolerate 6-8 hours of outdoor exposure without wilting. If nighttime temperatures dip below 40°F, bring them back inside or cover them with a lightweight row cover to protect against cold stress. Kale’s resilience makes it a great candidate for hardening off, but rushing this step often leads to stunted growth or disease.
🪴 Step 4: Transplant Seedlings Carefully
Dig holes twice as wide as the root ball but no deeper than the container’s depth to avoid burying the stem. Gently remove each seedling from its container, loosening the roots if they’re circling. Place the seedling in the hole, ensuring the base of the stem sits just below soil level—this prevents rot while allowing roots to anchor properly.
Fill the hole with soil, pressing lightly around the base to eliminate air pockets. Water deeply immediately after transplanting to help settle the soil and reduce stress. Space seedlings 12-18 inches apart in rows 24 inches apart to allow for airflow and future growth. Mulch with 1-2 inches of straw or shredded leaves to retain moisture and suppress weeds.
☀️ Step 5: Monitor and Support Growth
Keep the soil consistently moist but not soggy for the first 2 weeks after transplanting, watering deeply every 2-3 days if rainfall is insufficient. Kale’s deep roots need steady moisture, but overwatering can lead to clubroot disease or root rot. Use a soaker hose or drip irrigation to deliver water directly to the soil without wetting the leaves.
Fertilize lightly 2 weeks after transplanting with a balanced organic fertilizer (like 5-5-5) to encourage strong leaf production. Avoid high-nitrogen fertilizers, which promote leaf growth at the expense of flavor and bolting. If seedlings struggle, side-dress with compost tea for a gentle nutrient boost. With proper care, your kale will be ready for harvest in 4-6 weeks—just in time for those hearty winter salads.
Tips & tricks for planting kale seedlings
Hardening off kale seedlings might seem straightforward, but these subtle details make all the difference between thriving plants and struggling transplants.
Soil Preparation Secret: When amending your garden bed with 2 inches of compost, mix it into the top 6 inches of soil—not just the surface. This creates a nutrient-rich zone where roots can access food immediately. I've found that adding a handful of perlite or coarse sand to the mix improves drainage, especially in clay-heavy soils. This prevents waterlogging, which kale seedlings despise more than anything.
Harden Off with Purpose: The gradual increase of outdoor time in Step 3 isn't just about duration—it's about location progression. Start in the most sheltered spot (like under a tree or against a fence) and move seedlings to progressively sunnier locations each day. This mimics natural shade patterns and prevents sunburn on tender leaves. If nighttime temps drop below 40°F during hardening, I cover seedlings with a lightweight row cover rather than bringing them inside—this maintains their acclimation progress while protecting against cold stress.
Transplanting Technique: The "twice as wide" hole specification in Step 4 is crucial for root development. Use a trowel to loosen the sides of the hole before placing the seedling—this creates a root-friendly environment. I also recommend scoring the bottom of the root ball with a knife if roots are circling, which encourages outward growth rather than girdling. After transplanting, I press soil firmly around the base to eliminate air pockets, then water immediately to help settle everything in place.
Post-Transplant Care: The 2-week watering window in Step 5 is your critical period for establishing strong roots. I've found that watering deeply every 2-3 days works best, but I check soil moisture by pushing my finger 2 inches into the soil—if it's dry at that depth, it's time to water. For extra insurance against clubroot disease, I add a thin layer of sand or grit to the soil surface after planting, which improves drainage in heavy soils.
Pro Tips for Planting Kale Seedlings
- Hardening off kale seedlings might seem straightforward, but these subtle details make all the difference between thriving plants and struggling transplants.
- Soil Preparation Secret: When amending your garden bed with 2 inches of compost, mix it into the top 6 inches of soil—not just the surface.
- Harden Off with Purpose: The gradual increase of outdoor time in Step 3 isn't just about duration—it's about location progression.
Frequently asked questions
Got questions about planting kale seedlings?
You’re not alone! Here are answers to the most common concerns—from timing to troubleshooting—to help you grow resilient, thriving kale.
How do I know when it’s the right time to plant kale seedlings outdoors?
Plant kale seedlings outdoors after hardening them off (about 7–10 days) and when nighttime temperatures stay above 40°F (4°C). Kale is cold-hardy but thrives best in cooler weather (50–75°F / 10–24°C). Avoid planting in extreme heat or frost—wait for stable conditions!
Can I plant kale seedlings too close together?
Yes! Kale needs space to grow, but overcrowding can lead to disease or poor harvests. Space seedlings 12–18 inches apart in rows 2–3 feet apart. Thin weaker seedlings to give stronger ones room to flourish. Pro tip: Use a small trowel to gently loosen roots before transplanting.
What should I do if my kale seedlings wilt after planting?
Wilting is often due to transplant shock or underwatering. Water deeply at planting and keep soil consistently moist (not soggy). Mulch around seedlings to retain moisture and reduce stress. If wilting persists, check for pests (like aphids) or fungal issues—remove affected leaves and adjust care.
Can I plant kale seedlings in containers instead of the ground?
Kale grows well in containers with at least 5–6 inches of depth and good drainage. Use a high-quality potting mix and place containers in a spot with 4–6 hours of sunlight daily. Containers warm up faster than soil, so monitor moisture closely—kale hates drying out!
How do I protect kale seedlings from pests like cabbage worms?
Prevent pests with row covers or organic sprays (neem oil or insecticidal soap). Handpick worms early in the morning when they’re sluggish. Bonus tip: Plant companion crops like nasturtiums or dill to deter pests naturally. Rotate crops yearly to reduce infestations.
Wrapping up and next steps
Planting kale seedlings is your gateway to a thriving, resilient garden—and you’ve got this! By mastering the hardening-off process, you’re setting your young plants up for success, ensuring they’ll weather real-world conditions like champions. 🌱✨ Whether you’re a seasoned gardener or just starting, every seedling you nurture today will reward you with bold, flavorful harvests tomorrow.
Ready to watch your kale flourish? Your next step: Grab those hardened-off seedlings and give them their forever home in the garden. Check out our transplanting guide for pro tips on spacing, soil prep, and keeping pests at bay!