Picking
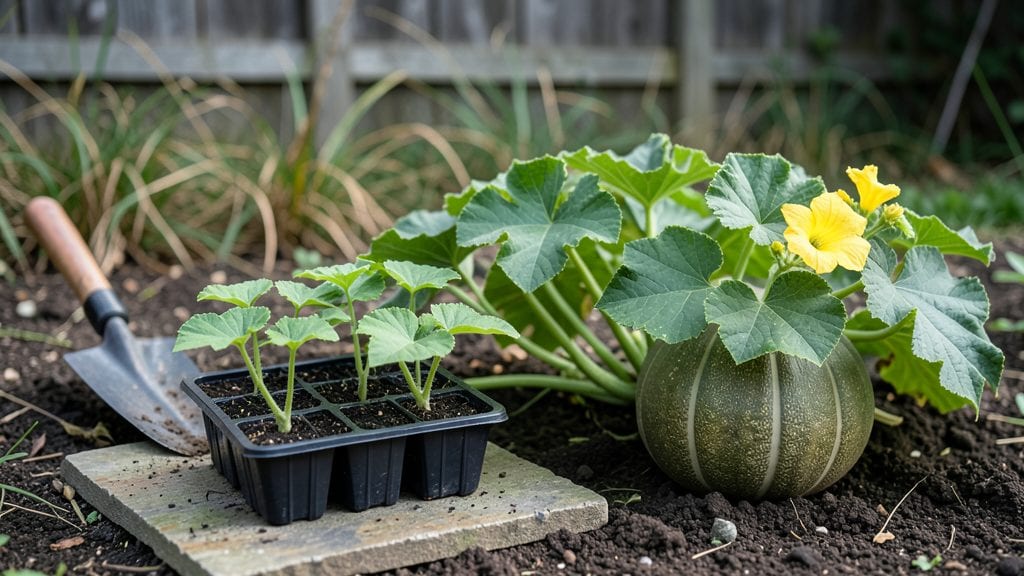
Planting Hubbard squash means giant harvests that outshine smaller winter varieties—these beauties can weigh 20+ pounds each and store for months. ✨ I’ve grown them for years, and the key to success starts with soil that drains well but holds moisture, plus spacing that gives those sprawling vines room to stretch out.
Most gardeners crowd them too close, which leads to blight and stunted growth—that’s a mistake I made my first year (and learned the hard way).
The secret to big yields lies in three simple steps: prepping loose, fertile soil with compost, planting seeds 1 inch deep and 3 feet apart, and giving them full sun all day.
Hubbard squash vines spread 5-6 feet wide, so plan your garden layout like a pizza slice—leave space between hills for airflow and easy harvesting. I swear by black plastic mulch in hot climates to keep roots cool and soil moist without overwatering.
By midsummer, you’ll see those massive leaves unfurl, followed by foot-long fruits by late August. The real magic happens when you let a few mature fully—they’ll keep sweetening on the vine for weeks.
Early care is all about consistent watering (1-2 inches per week) and watching for squash bugs, which love these giants. Once you master the spacing and watering balance, you’ll end up with bushels of storage-worthy squash that make every fall harvest feel like a victory.
Works in zones 3-10, though cooler climates need a 4-5 week head start indoors. The vines are tough but need protection from late frosts—so if you’re in a short season, start seeds early and use row covers.
Here’s where it gets interesting: Hubbard squash thrives in containers too, as long as the pot is at least 15 gallons and you prune the vines to control sprawl. Let’s get those seeds in the ground!
📚 In This Guide
- What you need
- Instructions
- Tips and common mistakes
- Wrapping up and next steps
What you need
- ● Hubbard squash seeds: 3–5 seeds per plant (start with 5–10 plants for a good harvest). Choose heirloom varieties like Blue Hubbard or Golden Hubbard for best results.
- ● Well-draining soil: Rich in compost or aged manure (aim for a pH of 6.0–6.8). Hubbard squash thrives in fertile, loamy soil.
- ○ Compost or organic fertilizer: 2–3 cups per planting hole (optional but highly recommended for nutrient boost).
- ● Mulch (straw or leaves): Spread a 2–3 inch layer around plants to retain moisture and suppress weeds.
- ● Garden trowel or shovel for digging planting holes (6–8 inches deep).
- ○ Garden gloves (optional but helpful for handling prickly vines).
- ● Watering can or hose with a gentle spray nozzle (avoid soaking the leaves).
- ● Row cover or frost cloth (if planting in cooler climates; hubbard squash needs warmth!).
- ● Warm soil: At least 60°F (15°C)—hubbard squash hates cold starts!
- ● Full sun: 6–8 hours of direct sunlight daily (partial shade may reduce yields).
- ● Space: 3–4 feet between plants (they grow large!).
- ● Patience: Hubbard squash takes 80–100 days to mature—plan ahead!
How to plant Hubbard squash for maximum yield
Grow these winter squash giants with confidence—here’s my battle-tested method for healthy vines and monster-sized harvests.
🌱 Step 1: Choose the Perfect Planting Location
Hubbard squash thrives in full sun—at least 6-8 hours daily. I always pick the warmest, most sheltered spot in my garden because these plants sprawl 5-10 feet and need protection from strong winds. Amend the soil with 2-3 inches of compost mixed into the top 12 inches before planting.
Test your soil pH—Hubbards prefer 6.0-7.0. If yours runs acidic, add crushed limestone a few weeks before planting. I like to plant near a fence or trellis to give vines something to climb, which saves space and keeps fruit off the ground.
🌱 Step 2: Plant Seeds at the Right Time and Depth
Wait until the soil reaches 70°F at least 1 inch deep—cold soil delays germination and invites rot. I plant mine 2-3 weeks after your last frost date, using 2-3 seeds per hill spaced 3-4 feet apart. Plant seeds 1 inch deep—deeper than that, and they’ll take forever to sprout.
Mound soil into hills about 1 foot tall and 2 feet wide to improve drainage and warmth. Water the hills thoroughly before planting, then cover seeds with soil and press gently. Thin to the strongest seedling once they’re 3-4 inches tall—don’t pull, cut to avoid disturbing roots.
☀️ Step 3: Water Deeply and Mulch for Consistent Growth
Hubbard squash needs 1-2 inches of water weekly, but deep soaking is better than frequent shallow watering. I water at the base in the morning to prevent fungal diseases. Once plants reach 6 inches tall, spread 3-4 inches of straw mulch around the base, leaving a 2-inch gap around stems to prevent rot.
Mulching keeps soil cool and moist while blocking weeds. You’ll see vines spread rapidly—when they hit 12 inches long, add more mulch or extend the hill to encourage root growth. Avoid overhead watering after vines start flowering to prevent blossom-end rot.
✂️ Step 4: Prune and Support for Bigger Fruit
Pinch off the first few flowers to encourage stronger vine growth. Once vines are established, let them sprawl or train them up a trellis for easier harvesting. I remove any fruit smaller than a softball if vines look stressed—this redirects energy to fewer, larger squash.
Watch for squash bugs and cucumber beetles—they’ll defoliate vines fast. Handpick eggs from the undersides of leaves and drop them in soapy water. If vines look yellow or wilted, check for powdery mildew and treat with neem oil immediately.
🍎 Step 5: Harvest at Peak Ripeness for Best Flavor
Hubbards are ready when their rinds turn hard and dull (not shiny) and the stem separates easily from the vine. I harvest mine in 3-4 months when they reach 10-20 pounds. Use a sharp knife to cut stems, leaving 1 inch of stem attached to prevent rot.
Cure squash in a warm, dry place (80-85°F) for 7-10 days to develop their sweet flavor. Store in a cool (50-55°F), dark place—they’ll keep for 3-6 months. Save seeds from your best squash for next year’s planting!
Tips & tricks for perfect Hubbard squash planting
These battle-tested tricks will help you grow monster-sized Hubbard squash with minimal stress and maximum yield.
The Heat Factor: Hubbard squash seeds need that 70°F soil temperature to germinate properly. I use a soil thermometer to check—if it's cooler, cover the hills with black plastic for a few days to warm them up. Cold soil is the #1 reason seeds fail to sprout. Once they're up, maintain that warmth by watering consistently at the base rather than overhead.
Sunlight Strategy: Those 6-8 hours of full sun are non-negotiable for big squash. If your garden gets afternoon shade, plant near a south-facing wall or fence to extend sunlight exposure. I've seen vines grow 5-10 feet long when given optimal sun—this sprawling habit is why they need so much space! Consider vertical training if space is limited.
Pruning Payoff: When you pinch off those first few flowers in Step 4, you're not being cruel—you're investing in bigger harvests. The plant redirects energy to fewer fruits, resulting in squash that can reach 20 pounds instead of multiple small ones. Also, remove any fruit smaller than a softball if vines look stressed—this forces the plant to focus on growing fewer, larger squash.
Curing is Critical: That 7-10 day curing period at 80-85°F transforms bland squash into sweet, flavorful giants. I use my garage with a space heater during cooler months. Pro tip: Place squash on wire racks with good air circulation to prevent rot. After curing, store in 50-55°F conditions—they'll keep for months and develop even sweeter flavors over time.
Pro Tips for Planting Hubbard Squash
- These battle-tested tricks will help you grow monster-sized Hubbard squash with minimal stress and maximum yield.
- The Heat Factor: Hubbard squash seeds need that 70°F soil temperature to germinate properly.
- Sunlight Strategy: Those 6-8 hours of full sun are non-negotiable for big squash.
Frequently asked questions
Got questions about growing your own hubbard squash? You’re not alone! Here are answers to the most common queries to help you cultivate a thriving patch of these giant gourds.
When is the best time to plant hubbard squash?
For warm climates, plant seeds directly in the soil 2–4 weeks after the last frost when the soil reaches 70°F (21°C). In cooler regions, start seeds indoors 4–6 weeks before the last frost and transplant after danger of frost has passed. Hubbard squash thrives in long, hot summers, so give it plenty of time to mature!
How long does it take for hubbard squash to grow?
From seed to harvest, hubbard squash typically takes 90–120 days. Vines spread rapidly, so expect full maturity in late summer or early fall. Patience is key—these squash need warm soil and consistent heat to develop their signature sweet, dense flesh. Monitor vines for blooms, and harvest when the rind turns hard and dull.
Can I grow hubbard squash in containers?
While hubbard squash prefers spacious garden beds, you can grow them in large containers (at least 15–20 gallons) if your space is limited. Choose a 5-gallon pot or bigger per plant, with excellent drainage. Place containers in full sun and expect smaller yields compared to in-ground planting. Trellising isn’t ideal—they’re heavy!
What are the most common pests or diseases, and how do I prevent them?
Hubbard squash faces threats like squash vine borers, powdery mildew, and cucumber beetles. To prevent issues:
- Rotate crops annually to avoid soil-borne diseases.
- Use row covers early in the season to deter pests.
- Apply neem oil or insecticidal soap for beetles.
- Ensure good airflow to reduce mildew—space plants 3–4 feet apart.
What can I do if my hubbard squash flowers but doesn’t produce fruit?
If your squash plants have flowers but no fruit, check these common culprits:
- Lack of pollinators: Hand-pollinate flowers with a small brush if bees are scarce.
- Temperature stress: Hubbard squash needs consistent warmth (above 70°F)—cool nights can stunt fruit set.
- Over-fertilizing with nitrogen: Too much nitrogen promotes leafy growth over fruit. Use a balanced 10-10-10 fertilizer instead.
- Improper watering: Keep soil evenly moist but not soggy—drought or excess water can cause blossom drop.
Wrapping up and next steps
Growing Hubbard squash is a rewarding journey that delivers hearty, flavorful harvests all year round—whether you’re a seasoned gardener or just starting out! 🌱 With the right soil, spacing, and care, you’ll soon be enjoying the fruits of your labor in soups, pies, or roasted dishes. Now’s the time to roll up your sleeves: grab those seeds, mark your calendar, and get ready to savor the sweet taste of success!
- Next step: Start small—plant a few seeds this season, track your progress, and refine your technique for even bigger yields next time!
- Pro tip: Share your harvest with neighbors or preserve extras by canning or freezing for winter meals. 🎉