
Vegetables
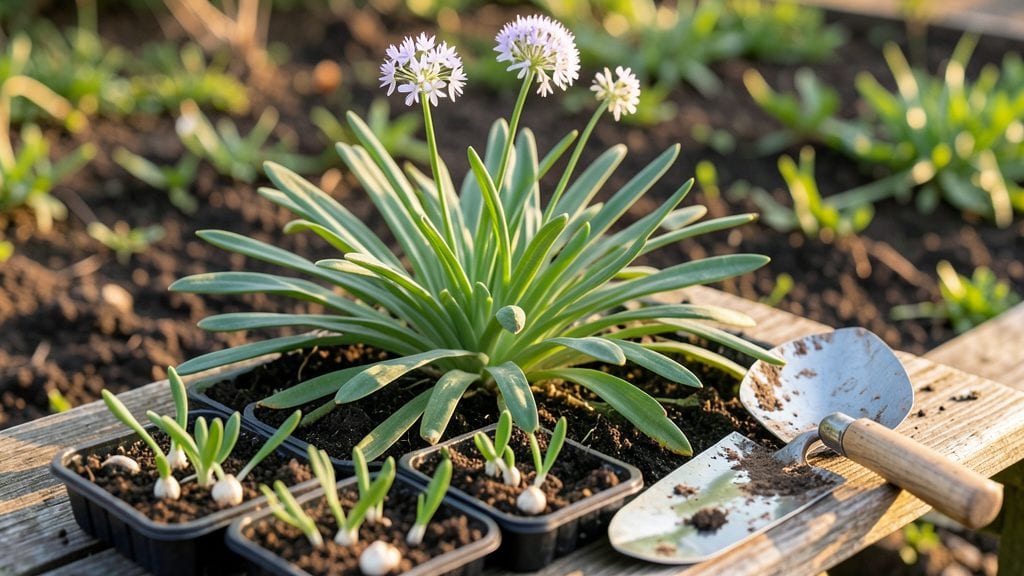
Planting garlic chives in containers or garden beds gives you year-round edible greens that even my brown thumb can't kill. 🌱 The secret lies in their adaptability—thrive in partial shade, tolerate poor soil, and regrow from cuttings like a weed.
I've grown them in everything from cracked terracotta pots to full sun garden plots, and they always bounce back.
Start with a well-draining mix—regular potting soil works, but add perlite if your clay soil stays soggy. Plant cloves 1 inch deep, 4 inches apart, and keep them moist but never soggy.
They grow in zones 3-9, so whether you're in a cold northern climate or a hot southern one, they'll handle it. The first green shoots appear in 2-3 weeks, and you can harvest leaves anytime without harming the plant.
What you end up with is nearly indestructible foliage that keeps producing through frost and heat. Snip the leaves for cooking, let them flower for pollinators, or just enjoy the onion-garlic aroma wafting through your kitchen.
The plants multiply over time, so you'll soon have more than you know what to do with.
Indoor growers can keep them on a sunny windowsill year-round, while outdoor gardeners can tuck them into perennial beds—they self-seed happily. Fair warning: once you plant these, you'll never want to buy chives again. Here's how to get started without overcomplicating it.
📚 In This Guide
- What you need
- Instructions
- Tips and common mistakes
- Wrapping up and next steps
What you need
- ● Garlic chive seeds or nursery starts: 1–2 lbs of seeds (or 10–20 plants if buying starts). Opt for organic, non-GMO varieties for best results.
- ● Well-draining soil: A mix of loamy soil with a pH of 6.0–7.0. Amend with compost (2–3 inches) for nutrient-rich growth.
- ● Sunlight access: A spot with full sun (6+ hours/day) or partial shade (4–6 hours). Avoid deep shade.
- ● Watering can or hose: With a gentle spray nozzle for even moisture.
- ○ Mulch (optional but recommended): Straw, shredded leaves, or grass clippings (1–2 inches) to retain moisture and suppress weeds.
- ● Garden trowel or hand shovel: For planting seeds or dividing clumps.
- ○ Gloves (optional): To protect hands while handling soil or sharp clumps.
- ● Fertilizer (balanced, 10-10-10 or organic): Apply sparingly (per package instructions) in early spring.
- ● Pruners or scissors: For harvesting or trimming spent blooms.
- ● Row covers or netting (cold climates): To protect seedlings from frost if planting early.
Step-by-Step instructions for planting garlic chives
This hardy perennial thrives with almost no effort once planted—here's how to get those purple blooms year after year.
🌱 Step 1: Choose the Right Location and Prepare the Soil
Garlic chives love full sun to partial shade—at least 4-6 hours of sunlight daily. I always pick a spot where they won’t be disturbed, since they spread aggressively. The soil should be well-draining but moist, so if yours is heavy clay, mix in 2-3 inches of compost to improve texture.
Loosen the top 6 inches of soil with a garden fork or tiller. Remove any rocks or debris, then rake the surface smooth. Garlic chives hate competition, so pull any weeds within a 12-inch radius around the planting area. This ensures your chives get all the nutrients and space they need to establish roots quickly.
🌱 Step 2: Divide and Plant the Clumps
If you’re planting from an existing clump, dig it up and separate the individual shoots—each should have a small root system attached. Space them 6-8 inches apart in rows 12 inches apart for easy maintenance. Planting too close will lead to overcrowding and poor air circulation, which invites fungal diseases.
Dig a hole just deep enough to cover the roots—about 1 inch deep. Place the shoot in the hole and firm the soil gently around it with your fingers. Avoid compacting the soil too tightly, as this can stunt root growth. Water lightly immediately after planting to help settle the soil and encourage root contact.
💧 Step 3: Water and Mulch for Establishment
Water the newly planted chives deeply once a week during the first 4-6 weeks to help roots establish. You’ll know they’re getting enough moisture when the soil feels damp 2 inches below the surface. Overwatering is the biggest mistake here—chives hate soggy roots, so always check before watering again.
Spread a 2-inch layer of mulch around the base, keeping it 2 inches away from the stems to prevent rot. I use straw or shredded leaves because they break down slowly and improve soil structure over time. Mulch also suppresses weeds and keeps the soil temperature stable, which garlic chives appreciate.
☀️ Step 4: Maintain Through the Growing Season
Once established, garlic chives are nearly maintenance-free. They’ll send up purple flower spikes in spring, which you can snip for bouquets or let go to seed—birds love the tiny black seeds. Cut back the foliage after flowering to encourage a second flush of growth later in the season.
Fertilize lightly in early spring with a balanced 10-10-10 fertilizer if your soil is poor. I skip this step if I’ve amended the soil well at planting, since chives are low-maintenance and don’t demand extra nutrients. Watch for yellowing leaves—this usually means too much water or poor drainage, not a fertilizer deficiency.
✂️ Step 5: Divide and Propagate Every 2-3 Years
Garlic chives form dense clumps over time, so every 2-3 years, dig up the entire plant in early spring or fall. Separate the clump into smaller sections, each with 3-5 shoots, and replant them in fresh soil. This rejuvenates the plants and gives you free propagation material to share with friends.
Dividing is the secret to keeping garlic chives productive. Old clumps produce fewer flowers and weaker foliage, but fresh divisions bounce back immediately. Just water them in well after replanting, and they’ll be thriving in no time—minimal effort for maximum impact.
Tips & tricks for planting garlic chives
These simple tricks will help you get the most out of your garlic chives with minimal effort—because once they're established, they practically take care of themselves.
The Location Secret: In Step 1, when choosing your spot, remember that garlic chives are aggressive spreaders. If you want to contain them, plant them in containers instead of garden beds. I've seen them take over an entire flower bed if left unchecked—so plan accordingly! For the best purple blooms, prioritize that full sun to partial shade spot with at least 4-6 hours of sunlight daily.
Planting Depth Matters: During Step 2, when planting those individual shoots, resist the urge to bury them too deeply. That 1-inch depth is perfect—they don't need much soil to establish strong roots. If you plant them too deep, you risk rot and poor growth. I've made this mistake and ended up with leggy, weak plants that never really thrived.
Watering Wisdom: The 4-6 week establishment period in Step 3 is critical for root development. That once-a-week deep watering is key—check 2 inches below the surface to ensure the soil stays consistently moist but not soggy. I've learned the hard way that soggy roots lead to fungal issues, so always let the top inch dry out between waterings. A moisture meter is worth the investment if you're unsure.
Mulch Like a Pro: When applying that 2-inch layer of mulch in Step 3, keep it 2 inches away from the stems to prevent rot. I've used both straw and shredded leaves successfully, but avoid thick layers of fresh grass clippings—they can mat down and prevent water from reaching the roots. The mulch will break down over time, so replenish it annually to maintain its benefits.
Pro Tips for Planting Garlic Chives
- These simple tricks will help you get the most out of your garlic chives with minimal effort—because once they're established, they practically take care of themselves.
- The Location Secret: In Step 1, when choosing your spot, remember that garlic chives are aggressive spreaders.
- Planting Depth Matters: During Step 2, when planting those individual shoots, resist the urge to bury them too deeply.
Frequently asked questions
about planting garlic chives—because every gardener deserves a little clarity!When is the best time to plant garlic chives?
Garlic chives thrive in spring or early fall (4–6 weeks before the first frost). They’re hardy perennials, so they’ll often reseed themselves if left undisturbed. For year-round harvests, plant in warm climates year-round—just avoid extreme heat or frost.
How long does it take for garlic chives to grow after planting?
Expect 3–4 weeks for seedlings to sprout, and 6–8 weeks for mature, harvestable leaves. With proper care, they’ll grow 12–18 inches tall and produce delicate purple flowers (edible too!). Patience pays off—harvesting too early stunts growth.
Can I grow garlic chives in containers instead of a garden bed?
Garlic chives love containers—just use a pot at least 6 inches deep with drainage holes. Place them in full sun to partial shade, and fertilize lightly every 4–6 weeks. Containers also make them mobile for pest control or winter protection.
Why are my garlic chives turning yellow or wilting?
Yellowing leaves often signal overwatering, poor drainage, or nutrient deficiency. Let soil dry slightly between waterings, and amend with compost if leaves look pale. Wilting? Check for pests (aphids, slugs) or root rot—adjust care or relocate if needed.
Are garlic chives invasive or hard to control?
Not invasive, but they self-seed aggressively! To manage spread, snip flowers before they form seeds or divide clumps every 2–3 years. They’re non-aggressive in containers, making them a great low-maintenance choice for small spaces.
Wrapping up and next steps
Planting garlic chives is a rewarding way to enjoy year-round greenery and edible blooms with minimal effort! Whether you’re a beginner or a seasoned gardener, these hardy perennials thrive in almost any climate—just give them well-draining soil and a sunny spot. 🌱
Now that you’re armed with the right tips, why not take the next step? Try planting a small patch this weekend, or share your newfound knowledge with a fellow gardening enthusiast. Happy growing—your kitchen (and garden!) will thank you! 🌿✨