Shrubs
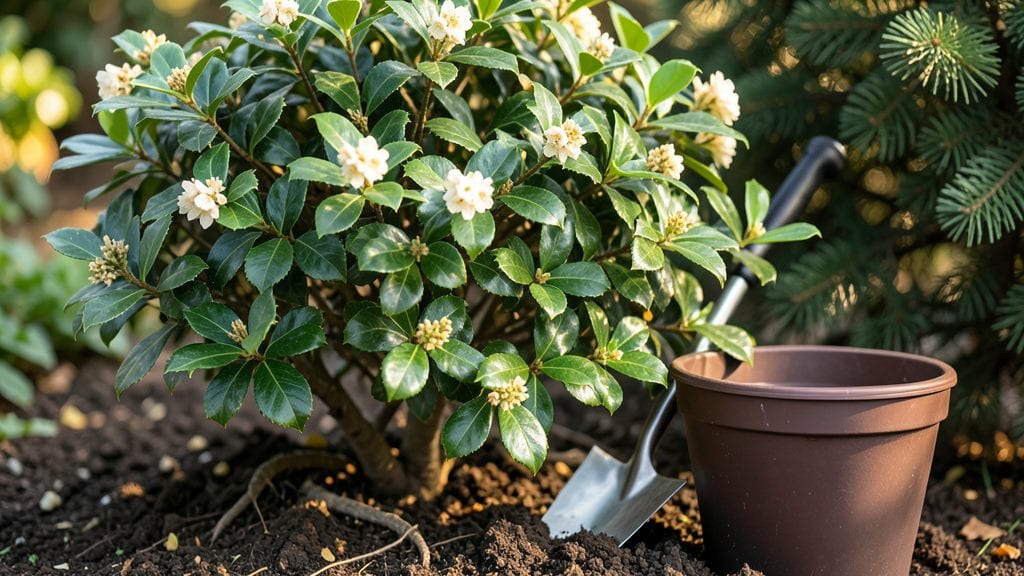
Planting evergreen bushes transforms bare spots into lush, year-round privacy screens that never lose their appeal. ✨ I’ve planted enough of these to know the difference between a hedge that thrives and one that struggles—and it all starts with the right spot and soil prep.
The best time to plant is in early spring or fall, when temperatures are mild and bushes can establish roots without stress. Pick a location with 6 hours of sunlight daily and well-draining soil—waterlogged roots are the enemy of evergreens.
Spacing matters too: give bushes 3–6 feet apart (depending on the variety) so they fill in without crowding.
Dig a hole twice as wide as the root ball but no deeper—evergreens hate sitting too low, which causes rot. Water deeply after planting, then mulch around the base to lock in moisture and keep roots cool. Within a year, you’ll have a dense, fragrant barrier that outlasts seasonal changes.
Pro tip: Prune lightly in late winter to shape the bush before new growth starts. Avoid heavy cuts—evergreens heal slower than deciduous plants. With the right care, your hedge will stay vibrant for decades, offering privacy and curb appeal without the seasonal fuss.
📚 In This Guide
- What you need
- Instructions
- Tips and common mistakes
- Wrapping up and next steps
What you need
- ● Evergreen bushes: Choose 3–5 mature plants (3–5 ft tall) per 10 ft of space, depending on desired density. Opt for varieties like Boxwood, Holly, or Arborvitae.
- ● Shovel or spade: A heavy-duty, rounded-edge shovel (18–24 inches long) for digging holes efficiently.
- ● Garden gloves: A pair of durable, breathable gloves (e.g., leather or nitrile-coated) to protect your hands.
- ● Measuring tape: For precise spacing (aim for 3–6 ft apart, depending on bush size and growth rate).
- ● Compost or organic mulch: 2–3 cubic feet per bush to enrich soil and retain moisture.
- ● Watering can or hose with nozzle: A soaker hose or gentle spray nozzle for deep, even watering.
- ● Pruning shears: Bypass pruners (for clean cuts) to trim roots or shape bushes post-planting.
- ● Soil amendment: Slow-release fertilizer (e.g., 10-10-10 NPK ratio) or mycorrhizal fungi to boost root growth.
- ● Staking kit: Bamboo stakes + soft ties for young or top-heavy bushes in windy areas.
- ● Landscape fabric: To suppress weeds around mulch (cut to fit with scissors).
- ● Wheelbarrow: For hauling soil, mulch, or bushes to planting spots.
- ● Knee pads: Because planting is a labor of love—and your knees will thank you!
Step-by-Step instructions for planting evergreen bushes
Here's my no-fail method for planting evergreens that thrive year-round and deliver that lush privacy you crave.
🌱 Step 1: Choose the Right Location and Dig Your Holes
Evergreens need 6+ hours of sunlight daily for best growth, but they tolerate partial shade too. I scout the area first, marking spots 6-10 feet apart (depending on mature size) to avoid overcrowding. Use a shovel to dig holes twice as wide and just as deep as the root ball—this gives roots room to spread without circling.
Loosen the sides of each hole with your shovel or hands. Compacted soil restricts root growth, and you'll see leggy, weak plants if roots can't expand properly. Break up any large clumps with your fingers until the soil looks fluffy and crumbly. Here's the thing—don't amend the soil in the hole unless it's extremely poor. Mixing in compost or fertilizer can burn tender roots.
🪴 Step 2: Prepare the Root Ball and Position the Bush
Remove the plant from its container and gently loosen the root ball at the edges with your fingers. If roots are circling tightly, use your hands to tease them outward—this prevents girdling as the plant matures. Check the root ball for any signs of disease or damage. If you spot mushy roots or odd discoloration, trim them away with clean pruners before planting.
Place the bush in the hole so the top of the root ball sits 1-2 inches above ground level. This prevents water from pooling around the stem and causing rot. I like to have a helper hold the plant while I adjust the position—evergreens need to face the direction they'll grow best in (usually south or east). Use a level to ensure it's perfectly upright before backfilling.
💧 Step 3: Backfill and Water Thoroughly
Fill the hole with native soil, tapping the sides gently to eliminate air pockets. Don't pack it down too firmly—you want roots to push through easily. Once the hole is about half full, give the plant a deep watering to settle the soil around the roots. This first watering helps eliminate air gaps that could strangle new growth.
Finish backfilling and create a 2-inch-high berm of soil around the perimeter. This helps direct water toward the roots during irrigation. Water again until 6 inches of soil feels moist all the way through. You'll know it's right when water runs out the bottom of the hole—this ensures roots get hydrated without sitting in soggy conditions.
☀️ Step 4: Mulch and Protect for Establishment
Spread 2-3 inches of mulch over the soil surface, keeping it 6 inches away from the stem to prevent rot. I use shredded bark or pine needles—both retain moisture and slowly release nutrients as they break down. Mulch also insulates roots during winter freezes and summer heat waves, which is why evergreens stay green all year.
Water deeply once a week for the first 2 months, checking that the soil stays consistently moist but not waterlogged. If you planted in late fall, hold off on watering until spring growth begins. Evergreens are tough once established, but they need consistent moisture to develop strong root systems in their first growing season.
⏰ Step 5: Prune and Monitor for Long-Term Health
Wait until spring of the following year before pruning. Remove any dead, broken, or crossing branches with clean pruners. I cut just outside the branch collar where it meets the main stem—this ensures proper healing. Never remove more than 25% of the plant's foliage in one season, or you'll stress the bush and risk dieback.
Check plants monthly for signs of pests like spider mites or bagworms. Evergreens rarely have issues, but a quick spray with horticultural oil in early summer keeps them pest-free. If you notice yellowing needles, it's usually overwatering or poor drainage—adjust your watering schedule and improve soil aeration if needed. With proper care, your evergreens will grow into a dense, everlasting privacy screen in just a few years.
Tips & tricks for planting evergreen bushes
Between us, these little details make all the difference between evergreens that thrive and ones that struggle. Trust me on this—proper planting sets the stage for years of lush, green privacy.
Soil Prep Secret: In Step 1, when you're loosening the sides of those holes, take it a step further by breaking up any large clumps until the soil looks like crumbly cake batter. Compacted soil is the silent killer of evergreen roots—it strangles their growth before they even get started. I like to use my fingers to work the soil, which gives me better control than a shovel. And remember, that 6-10 feet spacing isn't just about aesthetics—it gives roots room to breathe and prevents future competition for nutrients.
Root Ball Rescue: Step 2's root ball prep is where most people mess up. If you notice those roots circling like a snake, don't just cut them—gently tease them outward with your fingers. This prevents girdling, which can choke your plant as it grows. Pro tip: If your root ball is bigger than the hole, don't force it! Trim the outer roots with clean pruners before planting. And that 1-2 inch elevation above ground level? It's not optional—it prevents water from pooling and rotting the stem.
Watering Wisdom: The two-step watering in Step 3 is genius, but here's what nobody tells you: After that first deep watering when the hole is half full, let the water soak in completely before adding more soil. You want those roots to make immediate contact with moist soil, not dry pockets. And when you're checking that 6 inches of moist soil, don't just poke the surface—dig down with your finger. The bottom should feel damp, not bone dry.
Mulch Magic: That 2-3 inches of mulch> in Step 4 isn't just decoration—it's insulation. Spread it evenly but keep it 6 inches away from the stem> to prevent rot. I've seen people pile mulch right against the trunk, and within months, the bark starts to rot. Also, if you're in a hot climate, consider adding a layer of straw on top of your mulch—it keeps the soil cooler and retains more moisture during those summer dry spells.
Pro Tips for Planting Evergreen Bushes
- Between us, these little details make all the difference between evergreens that thrive and ones that struggle.
- Soil Prep Secret: In Step 1, when you're loosening the sides of those holes, take it a step further by breaking up any large clumps until the soil looks like crumbly cake batter.
- Root Ball Rescue: Step 2's root ball prep is where most people mess up.
Frequently asked questions
Got questions about planting evergreen bushes? You’re not alone! Here are some of the most common concerns—plus expert answers to help you grow a lush, low-maintenance privacy screen with confidence.
When is the best time to plant evergreen bushes?
The ideal window is early spring or fall (4–6 weeks before the first frost). This gives roots time to establish before extreme heat or cold. Avoid planting in summer’s scorching heat or winter’s frozen ground. Pro tip: If you must plant in summer, water deeply daily for the first 2 weeks to prevent shock!
How far apart should I space evergreen bushes for privacy?
Spacing depends on the mature width of your bushes. For dense privacy, plant 3–5 feet apart for compact varieties (like Dwarf Alberta Spruce) or 6–10 feet apart for larger shrubs (like Emerald Green Arborvitae). Check the plant tag for guidance—overcrowding leads to poor airflow and disease.
How often should I water newly planted evergreen bushes?
Water deeply 2–3 times per week for the first month, then taper to once a week (unless it’s extremely hot/dry). Evergreens hate soggy roots but also can’t tolerate drought. Test soil moisture: Stick your finger 2 inches down—if it’s dry, water! Mulch around the base to retain moisture and protect roots.
What pests or diseases should I watch for in evergreen bushes?
Common culprits include spider mites, bagworms, and root rot. Prevent pests: Spray bushes with water weekly to deter mites; inspect foliage for bagworm nests (brown silk sacs) in spring. For root rot, ensure well-draining soil and avoid overwatering. Fungal issues? Prune affected branches immediately and treat with a copper fungicide.
Can I plant evergreen bushes in full shade? If not, what’s a good alternative?
Most evergreens thrive in full sun to partial shade (4–6 hours of sunlight daily). For shady spots, opt for shadow-tolerant varieties like Leucothoe (Dog Hobble) or Inkberry Holly. If you need privacy, combine evergreens with deciduous shrubs (like Hydrangeas) for seasonal interest—just plant evergreens on the sunniest side for best growth.
Do evergreen bushes need winter care?
Yes! Protect young bushes (under 2 years old) from winter burn (brown needle tips) by applying 2–3 inches of mulch around the base. For heavy snow, gently brush off branches to prevent breakage. Water in late fall if your area has dry winters—evergreens transpire (lose moisture) even in cold months!
Wrapping up and next steps
Planting evergreen bushes is a game-changer for year-round privacy and curb appeal—no green thumb required! 🌲 Whether you’re lining a fence, framing a patio, or softening a yard’s edges, these hardy plants deliver low-maintenance beauty with minimal fuss.
The key? Smart placement, the right tools, and a little patience for roots to settle.
Now that you’re armed with the how-tos and pro tips, it’s time to roll up your sleeves! Start small—pick one section of your yard to transform—and watch your space thrive. Ready to make your outdoor oasis greener (and cozier) than ever? Grab your gloves and get planting! ✨