
Shrubs
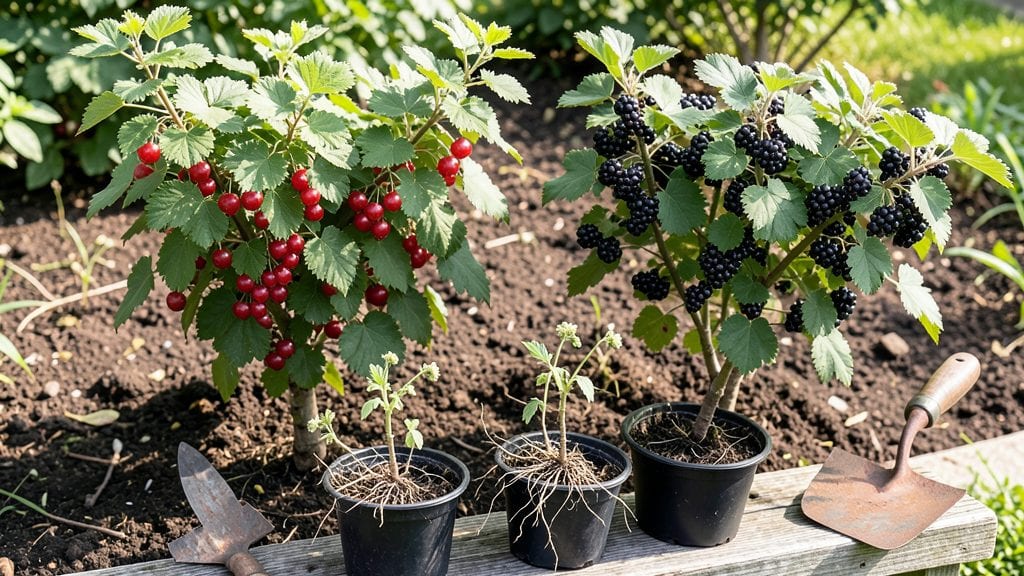
Planting currant bushes starts with a sunny spot and a little patience—these berry producers thrive when given the right conditions. I’ve planted red, black, and white varieties over the years, and the secret to their success lies in full sun exposure, well-drained soil, and proper spacing.
The first year is all about establishing strong roots, not berries, so let’s get the foundation right.
Most beginners overlook soil prep, but currants demand loose, slightly acidic soil with a pH between 5.5 and 6.5. Amend heavy clay by mixing in compost or sand, and avoid planting in low spots where water pools.
A 3-foot diameter hole dug twice as wide as the root ball gives roots room to spread, while spacing bushes 6 feet apart prevents overcrowding and disease. Mulch with wood chips to retain moisture and block weeds—just keep it a few inches away from the stem.
After planting, water deeply to settle the soil, then maintain 1-2 inches of moisture in the root zone without letting it soggy. Within 4-6 weeks, you’ll see new growth, but resist the urge to harvest berries the first year.
Instead, focus on pruning dead branches in late winter to encourage a stronger structure for future harvests. The payoff? Juicy, flavorful berries by year two, with bushes that last for decades.
Works for all currant varieties—red for jam, black for fresh eating, or white for unique flavor. Here’s how to set them up for a lifetime of berries without the guesswork.
📚 In This Guide
- What you need
- Instructions
- Tips and common mistakes
- Wrapping up and next steps
What you need
- ● Currant bushes: 1–3 healthy plants (red, black, or white currants—choose based on your taste and space!)
- ● Well-draining soil: Mix of garden soil, compost (2–3 parts), and perlite or sand (1 part) for loose, nutrient-rich dirt.
- ● Organic mulch: 2–3 inches of shredded bark, straw, or wood chips (keeps roots cool and moist!).
- ● Fertilizer: Slow-release granular fertilizer (10-10-10 ratio) or compost tea for a nutrient boost.
- ● Garden trowel or spade (for digging holes)
- ● Garden gloves (to keep hands clean and protected)
- ● Watering can or hose (with a gentle spray nozzle)
- ● Measuring tape or ruler (to space plants 4–6 feet apart)
- ○ Optional but helpful: Pruning shears (for shaping after planting)
- ● Soil pH tester (currants prefer slightly acidic soil, pH 5.5–6.5)
- ● Bird netting (if birds love your berries as much as you do!)
- ● Full sun location (6+ hours of direct sunlight daily)
- ● Well-draining soil (currants hate soggy roots!)
- ● Space to grow (bushes spread 4–6 feet wide)
- ● Patience! Currants take 1–2 years to bear fruit but reward you for years after.
Instructions for planting currant bushes
Here’s the straightforward method I’ve used to establish healthy, productive currant bushes year after year.
Choose the Right Location and Prepare the Soil
Currants thrive in full sun, so pick a spot that gets at least 6-8 hours of direct sunlight daily. Avoid low-lying areas where cold air pools—currants need good air circulation to prevent fungal diseases. If your soil drains poorly, amend it with 2-3 inches of compost mixed into the top 12 inches of soil to improve drainage and fertility.
Dig a hole twice as wide as the root ball but no deeper. Loosen the sides of the hole to encourage root spread. Currants prefer slightly acidic soil (pH 5.5-6.5), so test your soil and adjust with sulfur if needed. I like to add a handful of bone meal to the bottom of the hole for extra phosphorus—currants are heavy feeders and benefit from a slow-release boost right away.
Plant the Bushes at the Correct Depth
Gently remove the currant bush from its container and loosen any circling roots. Place it in the hole so the top of the root ball sits level with the surrounding soil—burying too deep suffocates the plant, while planting too high stresses the roots. Fill the hole halfway with soil and water deeply to settle it around the roots.
Once the water drains, finish filling the hole, pressing lightly to eliminate air pockets. Don’t compact the soil too firmly—currant roots need room to expand. After planting, water again to ensure the soil settles evenly. Mulch the base with 2-3 inches of wood chips, keeping the mulch 3 inches away from the stem to prevent rot.
Water and Monitor for Early Growth
Water the newly planted currant bushes deeply once a week for the first 4-6 weeks, ensuring the soil stays moist but not soggy. Overwatering at this stage can lead to root rot, while underwatering stresses the plant. Check the soil 1 inch below the surface—if it’s dry, it’s time to water. I use a soaker hose to deliver moisture slowly without disturbing the soil.
Watch for new leaf growth in 2-3 weeks, which signals the bush has taken root. If the leaves yellow or wilt, adjust your watering—currants are drought-tolerant once established but need consistent moisture when young. Fertilize lightly with a balanced 10-10-10 formula in early spring to encourage strong growth without overwhelming the plant.
Tips & tricks for planting currant bushes
A few simple tricks will help you avoid common mistakes and set your currant bushes up for long-term success.
Location and Sunlight: The 6-8 hours of direct sunlight mentioned in Step 1 is non-negotiable for currants. If your yard has partial shade, choose the sunniest spot available—currants won't tolerate less light. I've seen bushes in 5 hours of sun struggle with weak growth and poor fruit production. Also, avoid planting near walls or fences that might block airflow, as currants need that circulation to stay healthy.
Soil Preparation: When amending your soil with 2-3 inches of compost as suggested, don't just mix it in superficially. Work it into the top 12 inches thoroughly—this ensures proper drainage and root development. For the bone meal at the bottom of the hole, use about 1/4 cup per bush. Too much can burn young roots, while too little won't give that needed phosphorus boost. I like to sprinkle it around the hole's bottom before adding the plant.
Planting Depth: Getting the planting depth right in Step 2 is crucial—burying too deep suffocates the plant while planting too high stresses the roots. Here's my trick: After placing the bush in the hole, fill halfway with soil, then water deeply. When the water drains, the soil level will settle. This gives you a more accurate reference point for the final depth. The top of the root ball should end up just slightly above ground level after settling.
Watering Schedule: The 4-6 week watering schedule in Step 3 is perfect, but timing matters just as much as quantity. Water in the morning so the leaves have time to dry before evening—this prevents fungal diseases. I've found that using a soaker hose not only delivers water efficiently but also helps maintain consistent soil moisture without disturbing the soil surface. Check that 1-inch soil depth regularly to avoid both overwatering and underwatering.
Pro Tips for Planting Currant Bushes
- A few simple tricks will help you avoid common mistakes and set your currant bushes up for long-term success.
- Location and Sunlight: The 6-8 hours of direct sunlight mentioned in Step 1 is non-negotiable for currants.
- Soil Preparation: When amending your soil with 2-3 inches of compost as suggested, don't just mix it in superficially.
Frequently asked questions
Got questions about planting currant bushes? You’re not alone! Here are some of the most common queries—and their answers—to help you grow confidently.
When is the best time to plant currant bushes?
Plant currant bushes in early spring (just as buds swell) or early fall (4-6 weeks before frost). Avoid planting in extreme heat or cold—roots need time to establish before stress sets in. For container-grown bushes, you can plant year-round (except winter) as long as soil isn’t frozen.
How long does it take for currant bushes to bear fruit?
Patience is key! Most currant bushes take 2-3 years to produce fruit after planting. Some varieties (like red or black currants) may fruit sooner, but consistent care—like pruning and fertilization—speeds up the process. Pro tip: Plant at least two bushes for cross-pollination if your variety isn’t self-fertile!
What pests or diseases should I watch for when growing currants?
Currants are tough but can fall prey to aphids, spider mites, or whiteflies. For diseases, powdery mildew and anthracnose are common in humid climates. Preventive care: Prune for airflow, water at the base (not leaves), and use organic neem oil if pests appear.
Can I grow currant bushes in containers?
Dwarf varieties (like ‘Consort’ or ‘Ben Connan’) thrive in 5-gallon containers with well-draining soil. Use a mix of potting soil and compost, and place the pot in full sun. Just remember to fertilize regularly and repot every 2-3 years to prevent root bind.
Why aren’t my currant bushes fruiting?
No fruit? Check these fixes:
- Age: They need 2-3 years to mature.
- Pollination: Plant two compatible bushes nearby.
- Nutrients: Test soil pH (currants love 6.0–7.0) and add compost or fertilizer.
- Pruning: Over-pruning can reduce fruit production.
Wrapping up and next steps
Planting currant bushes is a rewarding way to add beauty, flavor, and wildlife-friendly benefits to your garden! 🌱 By choosing the right location, preparing the soil, and following proper spacing and care techniques, you’ll set these hardy shrubs up for years of lush growth and delicious harvests.
Whether you’re growing red, black, or white currants, your effort will pay off with vibrant foliage and bountiful berries.
Ready to get started? Grab your gloves, mark that sunny spot, and dig in! For extra success, consider testing your soil’s pH or researching companion plants to maximize your currant bushes’ potential. Happy planting!