
Companion Plants
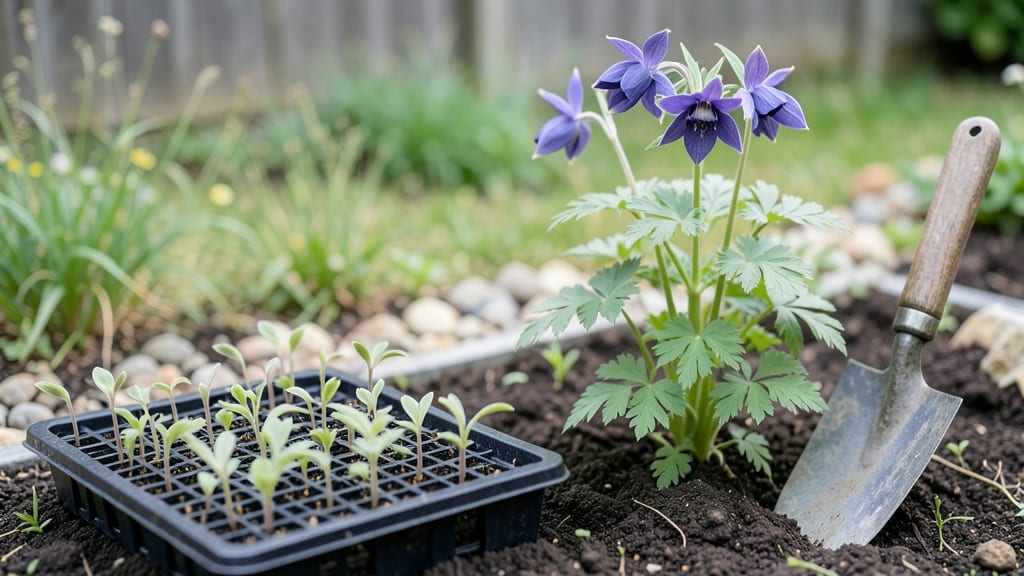
Planting columbine plants transforms a dull corner into a hummingbird magnet. 🌿 I’ve watched these delicate blooms turn my garden into a buzzing, swaying meadow where every bee and butterfly stops by—no fancy setup required.
The key is getting them in the ground right, and I’ll show you exactly how to do it without overcomplicating things.
Columbines thrive in partial shade and well-draining soil, but they’re tougher than they look. You’ll need a spot that gets 3-6 hours of sunlight, a shovel, and some compost—no fancy amendments needed.
For garden beds, space them 12-18 inches apart; in containers, pair them with other pollinator-friendly plants like lavender or catmint. The secret? Don’t bury the crown too deep—just 1 inch below soil level—or they’ll rot before they bloom.
Once planted, water them deeply but infrequently—columbines hate soggy roots. Within 4-6 weeks, you’ll see those signature spurred flowers nodding in the breeze, and by next year, they’ll self-seed into a stunning, low-maintenance display. The best part? They multiply effortlessly, filling gaps naturally while feeding pollinators all summer.
Fair warning: deer and rabbits adore them, so protect young plants if pests are a problem in your area. But if you nail the sunlight and spacing, these wildflowers will reward you with years of color and life—with almost no effort from you.
Let’s get those seeds or starts in the ground!
📚 In This Guide
- What you need
- Instructions
- Tips and common mistakes
- Wrapping up and next steps
What you need
- ● Columbine plants: 3–5 plants per square foot (or 1–2 per 12-inch pot) for a lush display. Choose aquilegia varieties like ‘McKana’s Giant’ or ‘Crimson Star’ for vibrant blooms.
- ● Well-draining potting mix: 1–2 bags (1–2 cubic feet each) for containers or raised beds. Opt for a blend with perlite or sand for aeration.
- ● Garden soil (if planting in-ground): Amend with compost (1 part compost to 3 parts soil) to enrich nutrients.
- ● Fertilizer: A balanced, slow-release 10-10-10 fertilizer (1–2 lbs) or organic options like bone meal or worm castings.
- ● Mulch: 2–3 inches of wood chips or straw to retain moisture and suppress weeds.
- ● Garden trowel or hand shovel (for transplanting seedlings or dividing plants).
- ● Gloves (to protect your hands from thorns or rough soil).
- ● Watering can or hose with a gentle spray nozzle (columbines hate soggy roots!).
- ● Measuring tape or ruler (to space plants 12–18 inches apart).
- ● Pruners or shears (for trimming dead blooms or leggy stems).
- ● Epsom salt (1 tbsp dissolved in water) for magnesium-rich soil—great for vibrant blooms!
- ● Pollinator-friendly companion plants: Pair with bee balm, salvia, or yarrow to attract even more butterflies and bees. 🐝
- ● Stakes or cages (for tall varieties like ‘Black Barlow’ to prevent flopping).
- ● Drip irrigation system (for automated, consistent watering in dry climates).
Step-by-Step guide to planting columbine plants
Here's how to establish a thriving columbine display that hummingbirds and bees will adore.
🌱 Step 1: Prepare the Planting Site for Optimal Growth
Columbines thrive in well-draining soil with partial shade to full sun. Choose a spot that receives at least 4-6 hours of sunlight daily but is protected from intense afternoon heat. They tolerate a range of soil types but perform best in slightly alkaline conditions (pH 7.0-8.0). If your soil is heavy clay, amend it with 1-2 inches of compost mixed into the top 6 inches of soil.
Loosen the soil to a depth of 12 inches using a garden fork or tiller. This helps roots establish quickly, especially in the first critical weeks. Remove any weeds or grass in the planting area, as competition will stunt your columbines' growth. I like to rake the surface smooth afterward—this creates a clean canvas for planting and makes it easier to see where to place each tuber.
🪴 Step 2: Plant Tubers at the Correct Depth and Spacing
Columbines grow from tubers, which should be planted 2-3 inches deep and 12-18 inches apart. The top of the tuber should be just below the soil surface—burying it too deep delays flowering, while planting too shallowly risks exposure to drying winds. Space larger varieties (like Aquilegia caerulea) at the wider end of the range for fuller displays.
Dig a hole slightly larger than the tuber, place it in with the pointed end facing upward, and cover with soil. Press gently around the edges to eliminate air pockets. Water immediately after planting to settle the soil and encourage root contact. You'll see new growth emerge within 2-3 weeks if conditions are right—watch for the first signs of green shoots pushing through the soil.
☀️ Step 3: Provide Water and Light for Establishment
Keep the soil consistently moist but not soggy for the first 4-6 weeks after planting. Water deeply 1-2 times per week, allowing the top 2 inches of soil to dry slightly between waterings. Overwatering can cause tuber rot, while underwatering stresses young plants. Mulch with 1-2 inches of straw or wood chips to retain moisture and suppress weeds—just keep it 2 inches away from the stems to prevent rot.
Columbines adapt well to their light conditions once established, but young plants benefit from gradual exposure. If transplanting in late spring, provide afternoon shade for the first 2 weeks to prevent leaf scorch. You'll know they're thriving when foliage develops a deep green color and stems grow sturdy enough to support the nodding flowers later in the season.
✂️ Step 4: Maintain Through the Growing Season
Deadhead spent blooms to encourage continuous flowering, but leave some seed heads for pollinators and winter interest. Fertilize lightly in early spring with a balanced, slow-release fertilizer (10-10-10) applied at half strength. Columbines are generally low-maintenance but appreciate a top-dressing of compost in early spring to replenish nutrients.
Divide clumps every 3-4 years in early spring or fall to prevent overcrowding. Simply dig up the tubers, separate the sections, and replant. This rejuvenates growth and ensures your meadow remains vibrant. By mid-summer, you'll be rewarded with clusters of unique, nodding flowers that attract hummingbirds and bees—proof your planting paid off.
Tips & tricks for perfect columbine planting
Transforming your garden into a pollinator paradise starts with these essential tips that'll ensure your columbines thrive from the first planting.
Soil Preparation Secret: Before amending your soil with compost, test its pH using a simple kit from your local garden center. Columbines prefer slightly alkaline soil (pH 7.0-8.0), and adjusting this factor can make all the difference in their growth. If your soil tests acidic, sprinkle dolomitic lime according to package instructions before mixing in the 1-2 inches of compost—this creates the perfect foundation for strong root development right from Step 1.
Tuber Orientation Technique: When planting those 2-3 inch deep tubers in Step 2, pay special attention to their shape. The pointed end should always face upward—this is where the new growth emerges. I've seen beginners accidentally plant them upside down, which can delay sprouting by weeks. If you're unsure, look for the slightly flatter side that naturally wants to face downward when resting on a table.
Watering Wisdom: During that critical 4-6 week establishment period in Step 3, I recommend using a soaker hose for watering. This delivers moisture directly to the roots while keeping foliage dry, which prevents fungal diseases. Set your timer for those 1-2 weekly waterings, but always check the top 2 inches of soil first—if it's bone dry, give them an extra drink. The goal is consistent moisture, not soggy soil.
Light Transition Strategy: For those transplanting in late spring, the 2-week afternoon shade period is crucial. I've found that using shade cloth rated for 30-50% coverage works perfectly. This gradual acclimation prevents leaf scorch while still allowing enough light for photosynthesis. You'll notice the difference in just days—the leaves will maintain that vibrant green color you're aiming for.
Pro Tips for Planting Columbine Plants
- Transforming your garden into a pollinator paradise starts with these essential tips that'll ensure your columbines thrive from the first planting.
- Soil Preparation Secret: Before amending your soil with compost, test its pH using a simple kit from your local garden center.
- Tuber Orientation Technique: When planting those 2-3 inch deep tubers in Step 2, pay special attention to their shape.
Frequently asked questions
Got questions about planting columbine? You’re not alone! Here are answers to the most common queries to help you grow thriving wildflower meadows with ease.
When is the best time to plant columbine?
Columbine thrives when planted in early spring or fall
—just as temperatures stabilize (40–60°F). Avoid extreme heat or frost, which can stress young plants. Pro tip: If planting in summer, water deeply and mulch to retain moisture.
How deep should I plant columbine seeds?
Lightly press seeds into soil just ¼ inch deep
—they need sunlight to germinate! Cover them with a thin layer of compost or sand, then water gently. No need to bury them deep!
Can I grow columbine in containers or hanging baskets?
Yes!
Columbine adapts well to containers with at least 6–8 inches of drainage. Use a well-draining potting mix and place in partial shade. Bonus: Hanging baskets add vertical charm to patios!
Why aren’t my columbine seeds germinating?
Common culprits:
Too much water (rot), poor drainage, or seeds needing stratification (cold treatment). Try chilling seeds in a damp paper towel for 4–6 weeks before planting. Patience is key—germination can take 2–4 weeks!
Are there drought-tolerant columbine varieties?
Absolutely!
Try Aquilegia canadensis (wild columbine) or Aquilegia formosa—both handle dry spells better than fancier hybrids. Tip: Mulch around plants to lock in moisture.
Do columbine plants spread or stay clumped?
Most columbine stay clumped
but self-seed lightly, creating natural clusters. To control spread, deadhead spent blooms or remove seed pods. Enjoy their pollinator-friendly charm without overcrowding!
Wrapping up and next steps
Planting columbine plants is a rewarding way to transform your garden into a vibrant haven for pollinators! 🌸 With their striking blooms and resilience, these wildflowers bring both beauty and ecological benefits.
Whether you're a beginner or a seasoned gardener, the key is to choose the right location, prepare the soil, and provide consistent care.
Now that you're ready to plant, take the next step: visit your local nursery or order seeds online to start your columbine adventure. Watch as your garden bursts into color and becomes a buzzing hub for bees, butterflies, and hummingbirds—you’ll be amazed at the difference you make! 🐝✨