Orchid Care
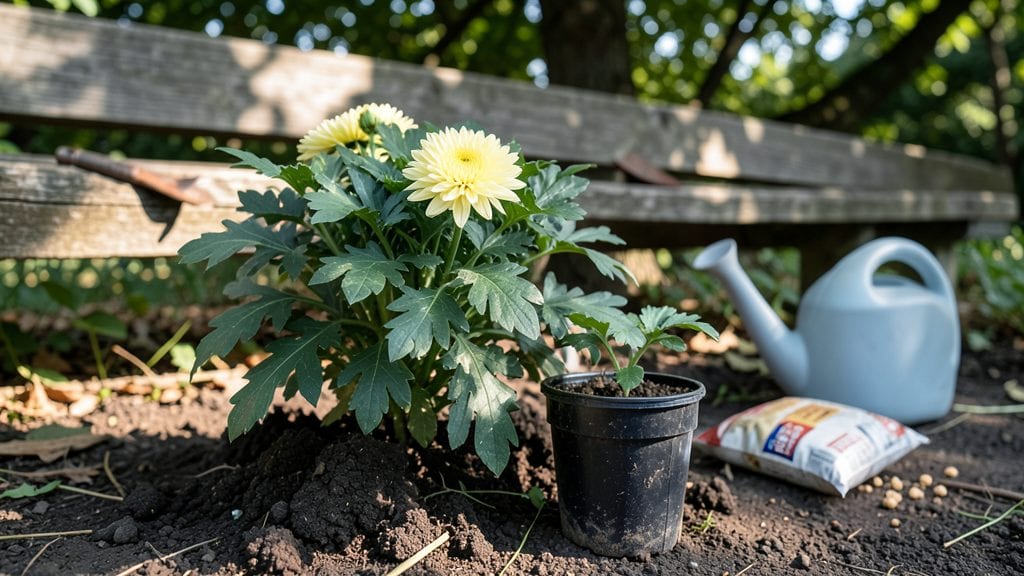
Planting chrysanthemums outdoors transforms your garden into a late-season rainbow of color when most plants have faded. 🌻 I learned the hard way that timing and sunlight make all the difference—my first attempt in hot July meant wilting blooms by September, but fall-planted mums thrived through winter in my Zone 6 garden.
The real secret isn't complicated: cool soil (60-65°F) and full sun (6+ hours daily) are non-negotiable. Most gardeners overlook soil prep—amend with compost to improve drainage, and space plants 18-24 inches apart for airflow. Varieties like 'Bonanza' or 'Mammoth' handle cold better than delicate florist types.
After planting, water deeply but let soil dry between sessions—mums hate soggy roots. Within 4-6 weeks, you'll see sturdy stems forming, and by first frost, those blooms will still be going strong.
The key is patience: fall-planted mums often bloom their first year, while spring ones take until next season.
Works in Zones 3-9, though southern gardeners should plant in early fall to avoid summer heat. Container growers can use 5-gallon pots with well-draining mix. Here's how to get those stems standing tall all season long.
📚 In This Guide
- What you need
- Instructions
- Tips and common mistakes
- Wrapping up and next steps
What you need
- ● Chrysanthemum plants: 3–6 plants (depending on garden size), preferably hardy varieties like ‘Bonanza,’ ‘Dynasity,’ or ‘Mammoth’ for outdoor resilience.
- ● Well-draining potting mix or garden soil: 1–2 cubic yards (for in-ground planting) or 5–10 gallons (for containers). Amend with compost (1 part compost to 3 parts soil) for nutrients.
- ● Organic fertilizer: A balanced 10-10-10 or slow-release granular fertilizer (e.g., 2–3 lbs per 100 sq ft). 💡 Pro tip: Use a phosphorus-heavy fertilizer (e.g., 5-10-10) to encourage root growth before blooming.
- ● Mulch: 2–3 inches of organic mulch (straw, shredded bark, or pine needles) to retain moisture and regulate soil temperature.
- ● Garden trowel or hand shovel (for transplanting small plants).
- ● Garden fork or spade (for breaking up soil in larger areas).
- ● Watering can or hose with a gentle spray nozzle (to avoid damaging delicate stems).
- ● Gloves (to protect hands from thorns or rough soil).
- ● Measuring tape or ruler (to space plants 12–24 inches apart, depending on variety).
- ● Sunlight: A full-sun to partial-shade location (6+ hours of sunlight daily for most varieties). ✨ Bonus: Mums thrive in morning sun + afternoon shade in hot climates.
- ● Climate: Plant in early spring (4–6 weeks before last frost) or early fall (6–8 weeks before first frost) for best results. 🌡️ Note: Avoid planting in extreme heat (above 85°F/30°C), which can stress young plants.
- ● Water source: Access to consistent watering (1–1.5 inches per week, more during drought).
- ● Epsom salt (1 tbsp per gallon of water) for magnesium boosts (especially for yellowing leaves).
- ● Stakes or cages (for tall varieties like ‘Mammoth’ to prevent flopping).
- ● Slow-release plant food spikes (for hassle-free feeding).
- ● Pruning shears (to deadhead spent blooms and encourage reblooming).
Step-by-Step instructions for planting chrysanthemums outdoors
Here’s how to plant these hardy perennials for vibrant blooms that last from summer through fall.
🌱 Step 1: Choose the Perfect Location and Prepare the Soil
Chrysanthemums thrive in full sun—at least 6-8 hours daily—so pick a spot with unfiltered light. I always test the area first by observing how other sun-loving plants (like marigolds) perform there. If they struggle, move to a sunnier patch.
Loosen the soil to a depth of 12 inches using a garden fork, breaking up any compacted layers. Chrysanthemums hate soggy roots, so amend the soil with 2-3 inches of compost to improve drainage. Mix in a handful of balanced 10-10-10 fertilizer per planting hole—this jumpstarts root growth without overwhelming the plant.
🪴 Step 2: Plant at the Right Depth and Spacing
Dig holes twice as wide as the root ball but only as deep as the container’s drainage holes. This prevents burying the crown too deeply, which can rot stems. Gently remove the plant from its pot and tease apart any circling roots—this encourages outward growth instead of girdling.
Space plants 18-24 inches apart for dwarf varieties and 24-36 inches apart for standard types. Crowding leads to weak stems and fewer blooms. Place each plant in its hole, backfill with soil, and firm gently around the base. Water deeply to settle the roots and eliminate air pockets.
☀️ Step 3: Water and Mulch for Moisture Retention
After planting, water thoroughly until the soil 1 inch below the surface feels damp. Chrysanthemums need consistent moisture but despise soggy conditions. I like to water early in the morning so leaves dry quickly, reducing fungal risks like powdery mildew.
Spread 2-3 inches of mulch (like shredded bark or straw) around each plant, keeping it 2 inches away from the stem. Mulch conserves moisture and regulates soil temperature—critical for fall-blooming varieties. Replenish mulch as it breaks down, especially during dry spells.
✂️ Step 4: Prune and Fertilize for Continuous Blooms
Pinch back the tips of new growth 4-6 weeks after planting to encourage bushier plants. Remove the top 2-3 inches of each stem, just above a set of leaves. This redirects energy from vertical growth to lateral shoots, resulting in more stems and flowers.
Feed plants every 4-6 weeks with a low-nitrogen fertilizer (like 5-10-10) to promote blooming over leafy growth. Stop fertilizing 6-8 weeks before your first frost—this helps harden off the plants for winter. Deadhead spent blooms regularly to extend the flowering season and prevent seed formation.
🌿 Step 5: Overwintering for Year-Round Growth
In fall, cut back stems to 2-3 inches above the ground once foliage yellows. This prevents disease and makes cleanup easier. Apply a 4-6 inch layer of mulch (like straw or leaves) to insulate roots from freezing temperatures.
In early spring, remove the old mulch and add fresh compost. Resume watering when the soil dries out, and watch for new shoots emerging from the base. Chrysanthemums are tough—they’ll bounce back year after year with minimal care.
Tips & tricks for planting chrysanthemums outdoors
These sun-loving perennials reward patience with vibrant blooms, but a few strategic moves make all the difference between mediocre and showstopping results.
Sunlight Secret: The 6-8 hours of daily sunlight in Step 1 is non-negotiable—these plants won't tolerate shade. I test potential spots by observing how marigolds perform there first; if they struggle, I know the location won't work. For northern exposures, consider raised beds to maximize light exposure and prevent cold soil issues.
Root Health Strategy: When loosening soil to 12 inches in Step 1, focus on breaking up compacted layers rather than just digging deeper. Chrysanthemums develop extensive root systems, and dense soil restricts their growth. Add coarse sand or perlite to clay-heavy soils to improve aeration without altering the 2-3 inches of compost recommendation.
Pruning Precision: The 4-6 week timing for pinching in Step 4 is ideal, but watch for new growth first. If your plants are still leggy after 6 weeks, give them another 2 weeks before pinching—this prevents stunted growth. Always pinch just above a leaf node to encourage branching. I use clean, sharp pruners to avoid damaging stems, which can invite disease.
Fertilizer Timing: The 4-6 week feeding schedule in Step 4 works beautifully, but I've learned the hard way that late-season fertilizing can delay dormancy. Stop feeding exactly 6-8 weeks before your first frost date—this gives plants time to harden off naturally. Use a soil probe to check moisture levels before fertilizing; soggy soil dilutes nutrients and stresses roots.
Pro Tips for Planting Chrysanthemums Outdoors
- These sun-loving perennials reward patience with vibrant blooms, but a few strategic moves make all the difference between mediocre and showstopping results.
- Sunlight Secret: The 6-8 hours of daily sunlight in Step 1 is non-negotiable—these plants won't tolerate shade.
- Root Health Strategy: When loosening soil to 12 inches in Step 1, focus on breaking up compacted layers rather than just digging deeper.
Frequently asked questions
Got questions about planting and growing chrysanthemums outdoors? You’re not alone! Here are some of the most common queries—plus quick, practical answers to help your garden bloom beautifully.
When is the best time to plant chrysanthemums outdoors?
The ideal time depends on your climate. In USDA Zones 3-7, plant in early spring (after the last frost) or early fall (6-8 weeks before the first frost). For warmer zones (8-11), opt for fall planting to avoid summer heat stress. Chrysanthemums thrive with cool-season roots!
How much sunlight do chrysanthemums need?
Most chrysanthemums love full sun (6-8 hours daily), but they tolerate partial shade (4-6 hours), especially in hot climates. Variegated or pastel varieties may need morning sun + afternoon shade to prevent leaf scorch. Observe your plants—drooping or pale leaves signal too much shade!
Why aren’t my chrysanthemums blooming?
Blooming issues often stem from over-fertilizing with nitrogen (prioritize phosphorus-potassium for flowers) or lack of sunlight. Also check for:
- Deadheading: Remove spent blooms to encourage new growth.
- Daylight: Chrysanthemums need 12+ hours of light for blooming (supplement with grow lights if needed).
- Stress: Overcrowding or sudden temperature swings can delay blooms.
Can I plant chrysanthemums in containers?
Use 10-12 inch pots with drainage holes and well-draining soil. Choose compact varieties like ‘Bonanza’ or ‘Dwarf Spray.’ Containers dry out faster, so water daily in summer and move pots to bright, sheltered spots in winter. Fertilize every 2-3 weeks for best results.
What pests or diseases should I watch for?
Chrysanthemums are tough but can face:
- Pests: Aphids, spider mites, or whiteflies (treat with neem oil or insecticidal soap).
- Diseases: Powdery mildew (spray with baking soda solution) or leaf spot (remove infected leaves + improve airflow).
- Prevention tip: Space plants 12-18 inches apart and avoid overhead watering.
How do I overwinter chrysanthemums outdoors?
In cold climates (Zones 5-7), cut back foliage to 4-6 inches, mulch heavily (3-4 inches), and cover with straw or burlap if temps dip below 20°F. In Zones 8+, trim lightly and protect from frost. Most varieties are perennial with proper care!
Wrapping up and next steps
Planting chrysanthemums outdoors is a rewarding way to add vibrant color and resilience to your garden! 🌸 With the right sunlight, soil, and timing, these hardy blooms will thrive year-round—even in cooler seasons. Whether you’re a beginner or seasoned gardener, the key is patience and attention to their needs.
Now that you’re armed with the know-how, roll up your sleeves and get planting! Start small with a few varieties, experiment with placement, and soon you’ll have a stunning, low-maintenance display. Happy gardening—your future chrysanthemum blooms will thank you! 🌿