Container Gardens
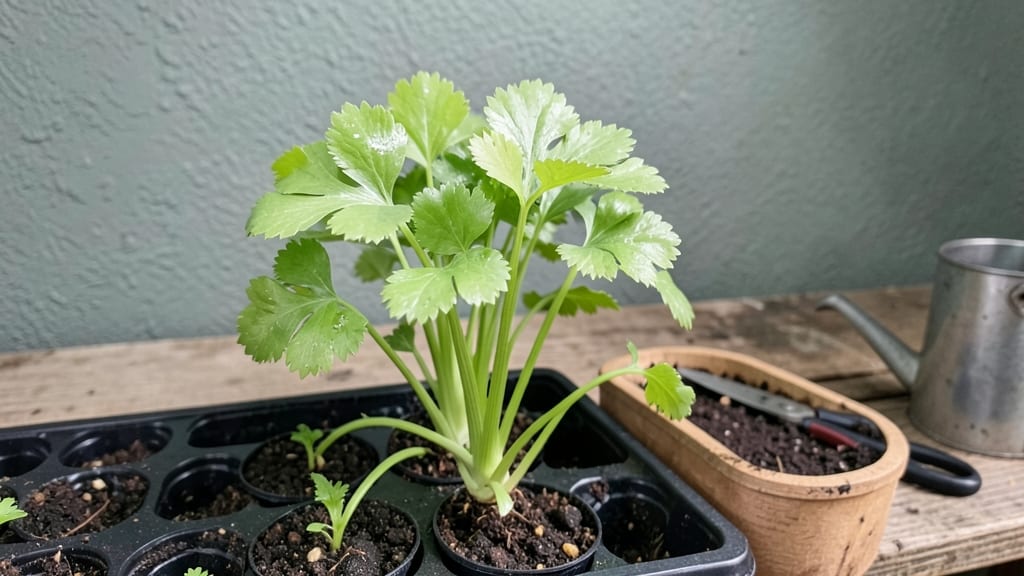
Planting celery indoors transforms your windowsill into a lush, year-round harvest—no garden needed. 🌱 I’ve turned my kitchen into a celery patch that rivals grocery store quality, and the secret lies in mimicking its natural moisture-loving environment.
Celery thrives in shallow water, so we’ll use containers that keep roots consistently damp without drowning them.
The trick is patience and precision: celery grows slowly but steadily, with perfect stalks forming in 8-12 weeks when given the right light and warmth.
You’ll need a sunny window or grow light, a deep container (at least 6 inches tall), and a steady water supply—celery roots need to stay submerged just below the soil surface. Most beginners overlook humidity, but a simple pebble tray or misting routine keeps leaves lush and prevents bolting.
By harvest time, you’ll pull crisp, white-stemmed stalks straight from your kitchen, packed with flavor and zero preservatives. The first batch might be small, but each subsequent planting gets easier—and your neighbors will wonder how you do it.
Once you master the watering rhythm, celery becomes the most rewarding indoor garden project.
This method works in apartments, offices, or sunrooms—anywhere with 6+ hours of light. The only challenge is space, but even a 12-inch pot can produce a harvest. Let’s get those seeds started!
📚 In This Guide
- What you need
- Instructions
- Tips and common mistakes
- Wrapping up and next steps
What you need
- ● Celery Seeds or Seedlings: 2–3 celery seeds (if starting from seed) or
- ● 1–2 young celery seedlings (for faster results)
- ● Containers: 1–2 5–6 inch deep pots (with drainage holes) or
- ● 1 10–12 inch wide container (for multiple plants)
- ● Potting Mix: 2–3 cups of well-draining, peat-free potting soil (avoid garden soil—it compacts)
- ● Growing Supplies: 1 spray bottle (for misting seedlings)
- ● 1 grow light or sunny windowsill (6+ hours of light daily)
- ○ 1 humidity tray or plastic wrap (optional, for seedling stage)
- ● Slow-release balanced fertilizer (5-10-5 ratio)
- ● Organic compost or worm castings (1 tbsp mixed into soil)
- ● Self-watering wick system (to maintain moisture)
- ● Small fan (for airflow and stronger stems)
Step-by-Step instructions for planting celery indoors
Here's how to grow crisp, flavorful celery stalks indoors—no garden needed.
🌱 Step 1: Prepare Containers and Seed Starting Mix
Use the 4-inch diameter pots from your materials list, as celery needs room for its deep root system. Fill each pot with 2 cups of seed-starting mix per container, leaving a ½-inch gap at the top. Press the mix down gently—you want it firm enough to support delicate seedlings but still loose for roots to penetrate.
Celery seeds are tiny, so I like to mix them with a little extra seed-starting mix before sprinkling. This makes sowing easier and prevents clumping. Plant 3-4 seeds per pot at a depth of ¼ inch, then cover lightly with a fine layer of mix. Don’t press down—just pat gently to maintain contact with the soil.
💧 Step 2: Water and Maintain Moisture for Germination
Mist the soil surface with lukewarm water until evenly damp but not soggy. Celery seeds need consistent moisture to germinate, but they’ll rot if waterlogged. Place the pots in a seedling heat mat set to 70-75°F—this warmth speeds up germination, which can take 10-21 days depending on your home’s humidity.
Cover the pots with a clear plastic dome to retain moisture and warmth. Check daily and remove the dome for 5-10 minutes to prevent fungal growth. You’ll know germination is working when tiny green sprouts appear—this is your signal to stop covering entirely and move to bright, indirect light.
☀️ Step 3: Provide Optimal Light for Strong Growth
Once seedlings emerge, place them under a grow light positioned 4-6 inches above the pots. Celery needs 12-14 hours of light daily to prevent leggy growth. If using a south-facing window, rotate the pots quarter-turn daily so they grow straight instead of leaning toward the light.
Watch for pale, stretched stems—this means the light is too weak or distant. Adjust the grow light height or move the pots closer. Strong celery seedlings have deep green leaves and thick stems at the base. Thin to one seedling per pot when they’re 2 inches tall, snipping the weakest at soil level.
🪴 Step 4: Transplant and Encourage Stalk Formation
After 6-8 weeks, when seedlings have 4-6 true leaves, transplant them into 1-gallon containers filled with 4 cups of potting mix per pot. Mix in 1 tablespoon of slow-release fertilizer to support stalk development. Water deeply after transplanting to settle the soil around the roots.
Celery needs cool temperatures (60-65°F) and high humidity to form thick stalks. Place a tray of pebbles and water under the pots to increase humidity, or mist the leaves daily. You’ll see tight leaf clusters forming at the base—this is where the stalks will develop. Keep the soil evenly moist but never waterlogged.
✂️ Step 5: Harvest for Perfect Stalks
Celery is ready to harvest 12-16 weeks after sowing when the leaf clusters are tight and pale green. Use a sharp knife to cut the stalks at the base, leaving 1 inch of growth to encourage regrowth. Store harvested celery in the fridge wrapped in a damp paper towel to keep it crisp.
For a second harvest, trim the regrowth back to 2 inches and continue watering and fertilizing. You’ll get smaller but still usable stalks in another 4-6 weeks. This method ensures you’ll have fresh celery year-round without relying on the grocery store.
Tips & tricks for perfect indoor celery growth
Growing celery indoors isn't just possible—it's faster than you think when you use these insider techniques to maximize stalk development and avoid common pitfalls.
Seed Starting Strategy: For faster germination in Step 1, pre-moisten your seed-starting mix until it's damp like a wrung-out sponge before planting. This eliminates the guesswork of misting later, and the ¼-inch seed depth is crucial—any deeper and they won't have enough oxygen to sprout. I've found that mixing seeds with a tiny bit of sand (about 10% by volume) prevents clumping when planting those 3-4 seeds per pot.
Germination Environment: The 70-75°F heat mat temperature is non-negotiable for speedy results, but here's the trick: place a small thermometer inside one pot to monitor real-time soil temperature. If your home's humidity drops below 50%, increase misting frequency to every 6 hours during the 10-21 day germination window. The moment you see those first sprouts, remove the dome completely—this prevents damping-off disease that can wipe out seedlings overnight.
Light Management: In Step 3, those 12-14 hours of light need to be intense. If using a south-facing window, supplement with a basic LED bulb on a timer—celery won't tolerate weak light. Watch for stems stretching toward the light source (a sign of etiolation), and adjust your grow light to maintain that 4-6 inch distance. Pro tip: Rotate pots quarter-turn daily using a small notched plate to track orientation—this prevents lopsided growth that makes harvesting difficult later.
Transplanting Timing: The 6-8 week transplant window is your golden opportunity to prevent bolting (flowering). When you see those 4-6 true leaves, harden off seedlings by placing them outside in shade for 2 hours daily for 3 days before transplanting. This shock treatment helps them handle the cooler 60-65°F temperatures needed for stalk formation. After transplanting, water deeply until you see moisture emerge from the drainage holes—this ensures the roots establish quickly in the 4 cups of potting mix.
Pro Tips for Planting Celery Indoors
- Growing celery indoors isn't just possible—it's faster than you think when you use these insider techniques to maximize stalk development and avoid common pitfalls.
- Seed Starting Strategy: For faster germination in Step 1, pre-moisten your seed-starting mix until it's damp like a wrung-out sponge before planting.
- Germination Environment: The 70-75°F heat mat temperature is non-negotiable for speedy results, but here's the trick: place a small thermometer inside one pot to monitor real-time soil temperature.
Frequently asked questions
Got questions about growing celery indoors? You’re not alone! Here are some of the most common concerns—and their easy solutions.
Can celery really grow indoors without sunlight?
Celery thrives indoors with bright, artificial light (like a grow light 6–8 inches above the plants). A sunny windowsill works too, but south-facing spots get the best results. Without enough light, stalks will turn leggy or pale. Pro tip: Rotate pots weekly for even growth!
How long does it take for indoor celery to harvest?
With the right conditions, you can harvest baby leaves in 4–6 weeks, but full stalks take 100–130 days. Patience pays off—celery grows slower indoors than outdoors. Check soil moisture weekly (keep it damp but not soggy) to speed up maturation.
Why is my indoor celery turning bitter or tough?
Bitter or fibrous celery often means overcrowding or underwatering. Thin seedlings to 2–3 inches apart and water consistently (1–1.5 inches per week). Too much nitrogen (from fertilizer) can also cause bitterness—balance with phosphorus/potassium. Need more help?
What’s the best indoor container for celery?
Use a 5–7 gallon pot (or deeper) with drainage holes—celery has long roots! Fabric grow bags or self-watering containers work too. Avoid tiny pots; they stunt growth. Bonus: Group plants together to boost humidity (celery loves it!).
Can I grow celery from store-bought stalks?
Yes! Cut the base of a store-bought stalk, trim leaves to 1–2 inches, and place it in water. Roots should sprout in 1–2 weeks. Transfer to soil once roots are 1–2 inches long. Warning: Store-bought celery may be treated with growth inhibitors—rinse the base first for better success!
What if my indoor celery bolts (sends up a flower stalk)?
Bolting usually happens from heat stress or long daylight exposure. Move plants to a cooler spot (60–70°F) and limit light to 12–14 hours/day. If it bolts, harvest leaves early—the stalks will become woody. Plan ahead: Start seeds in early spring for summer harvests!
Wrapping up and next steps
Growing celery indoors is a rewarding way to enjoy fresh, homegrown produce year-round—no green thumb required! 🌱 With the right container, lighting, and care, you’ll harvest crisp, flavorful stalks in just a few months.
Whether you’re a beginner or a seasoned gardener, this method proves that even small spaces can yield big results.
Now that you’re ready to start, pick your favorite variety and dive in! Experiment with flavors, share your progress, or even gift homegrown celery to friends. Happy planting—your kitchen (and taste buds) will thank you!