
Picking
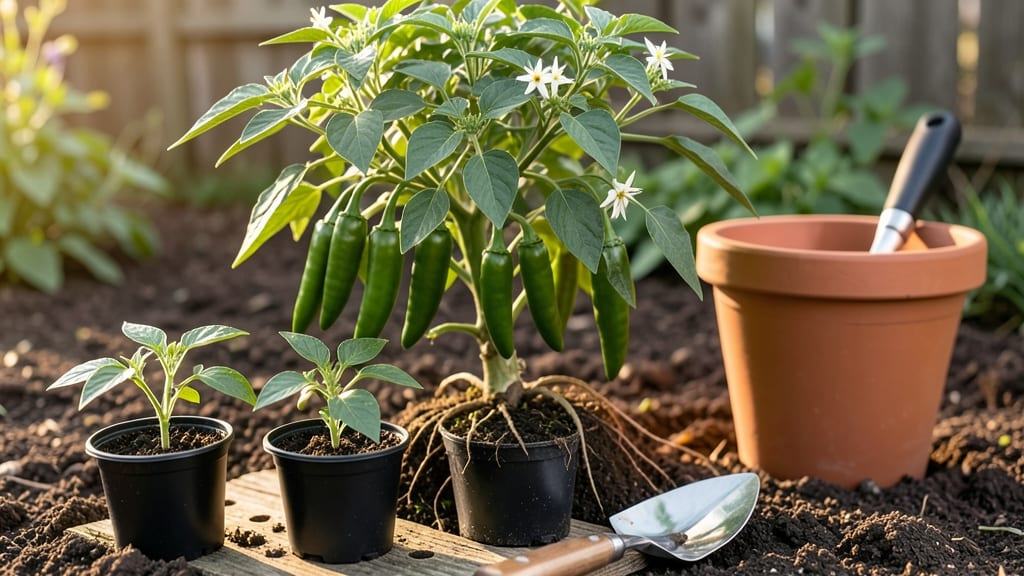
Planting Anaheim peppers starts with the right timing and a sunny spot—these mild but flavorful peppers thrive when sown after your last frost date, giving them at least 80 days of warm weather to mature. 🌱 I learned the hard way that rushing them leads to bitter, stunted plants, so patience here pays off in delicious harvests later.
The key is rich, well-draining soil with a pH between 6.0 and 7.0, and a spot that gets 6-8 hours of sunlight daily—no compromise on that light, or you’ll end up with leggy, weak plants.
Once you’ve picked a spot, prepare the soil by mixing in 2-3 inches of compost and a balanced fertilizer to give those peppers a strong start. Anaheims need 18-24 inches of spacing between plants to avoid crowding, which can spread disease and stunt growth.
Plant seeds ½ inch deep if starting indoors, or ¼ inch deep if sowing directly outside after frost.
Water gently but thoroughly after planting—these peppers hate soggy roots but also can’t handle drought, so aim for 1-1½ inches of water per week, letting the top inch of soil dry out between waterings.
What makes Anaheims special is their heat tolerance—they handle 90°F+ temperatures better than many peppers, but they still need consistent moisture, especially during fruit development. Watch for common early-stage issues like damping off (a fungal rot that kills seedlings) or slow germination (keep seeds warm and moist until sprouts appear).
Once they’re up, thin seedlings to the strongest ones, leaving the rest for compost—this ensures your remaining plants get all the nutrients and space they need to grow into long, glossy, green peppers that’ll keep producing all season.
Here’s the secret weapon: mulch. A 2-3 inch layer of straw or grass clippings keeps soil moist, suppresses weeds, and regulates temperature—exactly what Anaheims crave. By mid-summer, you’ll be harvesting 6-12 inch peppers that pack a mild kick and work perfectly fresh or dried.
The best part? They keep producing as long as you pick them regularly, so your spice game stays strong from summer straight through fall.
📚 In This Guide
- What you need
- Instructions
- Tips and common mistakes
- Wrapping up and next steps
What you need
- ● Anaheim pepper seeds or seedlings: 3–5 plants (for a small garden) or 10+ (for a bountiful harvest). Choose heirloom or hybrid varieties like ‘NuMex Big Jim’ or ‘Luna’. 🌶️
- ● Well-draining potting mix: 5–10 gallons (for seedlings) or garden soil amended with compost (1 part compost to 3 parts soil). Aim for a pH of 6.0–7.0.
- ● Containers (if starting indoors): 4–6" pots (1 per seedling) or biodegradable seedling cups.
- ● Fertilizer: Balanced 10-10-10 or organic options like fish emulsion or worm castings (start with a half-strength dose).
- ● Mulch: Straw or shredded leaves (2–3 inches thick) to retain moisture and suppress weeds.
- ● Gloves: Heavy-duty gardening gloves (to protect from thorns and soil).
- ● Trowel or transplanting spade: For digging and planting.
- ● Watering can or hose with a gentle spray nozzle: Anaheims need consistent moisture (avoid soggy soil!).
- ○ Stakes or cages (optional): Tall varieties (like ‘Luna’) may need support—use 3–4 ft bamboo stakes or tomato cages.
- ● Pruning shears: For trimming leggy growth or removing damaged leaves.
- ● Sunlight: Full sun (6–8+ hours daily). South-facing windows or a greenhouse work for seedlings.
- ● Warmth: Soil temp should be 70°F+ (use a seedling heat mat if starting early).
- ● Space: 18–24" apart in rows (or 24" apart in containers).
- ● Patience: Germination takes 7–14 days, and harvest time is 70–90 days!
- ● 🌡️ Test your soil—Anaheims hate soggy roots! Add perlite or sand if drainage is poor.
- ● ✨ Save seeds from your best peppers for next year (let them dry on a screen).
- ● 🎯 Rotate crops—avoid planting in the same spot yearly to prevent disease.
Step-by-step instructions for planting Anaheim peppers
Here’s how to get your Anaheim peppers thriving from seed to harvest with minimal fuss.
🌱 Step 1: Start Seeds Indoors 8-10 Weeks Before Last Frost
Fill 2-3 inch deep seedling trays with moistened seed-starting mix, pressing it down lightly to remove air pockets. Anaheim pepper seeds germinate best at 75-85°F, so use a seedling heat mat if your home runs cooler. Plant 2-3 seeds per cell at a depth of ¼ inch—they need light to germinate, so don’t bury them too deep.
Cover the tray with plastic wrap to retain humidity, then place it in a warm, bright spot. You’ll see sprouts in 10-15 days, but germination can take up to 3 weeks if your home stays chilly. Once seedlings emerge, remove the plastic immediately to prevent damping-off disease.
☀️ Step 2: Provide Bright Light and Prevent Legginess
Anaheim pepper seedlings need 14-16 hours of light daily to grow strong. A south-facing window rarely provides enough intensity, so supplement with a grow light positioned 2-4 inches above the plants. Raise the light as seedlings grow to maintain that distance.
Leggy seedlings (thin, stretched stems) signal insufficient light. If you notice this, move the light closer immediately. Strong seedlings have thick stems, deep green leaves, and compact spacing between nodes. Rotate the tray a quarter turn daily so they grow upright, not lopsided.
🪴 Step 3: Harden Off and Transplant After Last Frost
Two weeks before your last frost date, start hardening off seedlings by placing them outside in a sheltered spot for 1-2 hours the first day. Gradually increase outdoor time by 1 hour daily until they can tolerate a full day outside. This toughens their cell walls and prevents transplant shock.
Choose a sunny spot with 6+ hours of direct sun and well-draining soil. Anaheims thrive in 60-90°F soil temperatures, so wait until nighttime temps stay above 55°F. Transplant seedlings 12-18 inches apart in rows 18-24 inches apart, burying them slightly deeper than their original containers to encourage root growth.
💧 Step 4: Water Deeply and Maintain Consistent Moisture
Water Anaheim peppers at the base 1-1.5 inches per week, letting the soil dry slightly between waterings. Overhead watering spreads disease, so use a drip irrigation system or watering can with a narrow spout. Mulch with 2-3 inches of organic mulch to retain moisture and keep roots cool.
You’ll know your plants are happy when they produce white flowers after 6-8 weeks. Fertilize lightly with a balanced organic fertilizer every 4-6 weeks to encourage fruit production without burning the plants. Avoid nitrogen-heavy feeds—too much leaf growth means fewer peppers.
✂️ Step 5: Prune and Harvest for Continuous Production
Pinch off the first few flowers to encourage bushier growth and larger peppers. Once plants are established, prune suckers (small shoots in the leaf axils) to direct energy into fruit production. Harvest peppers when they reach 6-8 inches long for the classic Anaheim flavor, or let them ripen to 10+ inches for a sweeter, milder taste.
Harvesting stimulates more production, so pick peppers regularly. Use clean pruners to avoid damaging stems, and wear gloves if you’re sensitive to capsaicin. Store fresh peppers in the fridge for up to 2 weeks, or dry them for long-term storage.
Tips & tricks for perfect Anaheim pepper planting
A few strategic moves will help you avoid common pitfalls and maximize your Anaheim pepper harvest from seed to table.
Germination Precision: The 75-85°F temperature range for germination is non-negotiable—any cooler and you risk delayed sprouting. I use a seedling heat mat set to 80°F and place the tray on top of my fridge to create a stable warm environment. If your home stays below 70°F, consider a small greenhouse or heated propagation mat. The ¼-inch depth is crucial too—deeper planting can lead to weak seedlings that struggle to break through the soil.
Lighting Strategy: Those 14-16 hours of daily light are essential for preventing leggy seedlings, but intensity matters more than duration. I position my grow lights just 2-3 inches above the seedlings and use full-spectrum LED bulbs that mimic sunlight. A simple test: if you can read a book comfortably under the light, it's too dim. Rotate your trays daily to prevent lopsided growth—this simple habit makes a world of difference in seedling strength.
Transplant Timing: The 1-2 hour hardening-off period might seem short, but it's better to start conservatively. I begin with just 1 hour on the first day and increase by 30 minutes daily to avoid shocking tender seedlings. Also, check your soil temperature before transplanting—if it's below 55°F at night, wait another week. Cold soil shocks roots just as much as sudden temperature changes do above ground.
Watering Wisdom: The 1-1.5 inches per week guideline assumes average conditions, but your actual needs depend on rainfall and mulch thickness. I water in the early morning to give foliage time to dry before evening, which dramatically reduces disease risk. For the 2-3 inches of organic mulch, I use straw rather than wood chips—it breaks down faster and adds nutrients as it decomposes.
Pro Tips for Planting Anaheim Peppers
- A few strategic moves will help you avoid common pitfalls and maximize your Anaheim pepper harvest from seed to table.
- Germination Precision: The 75-85°F temperature range for germination is non-negotiable—any cooler and you risk delayed sprouting.
- Lighting Strategy: Those 14-16 hours of daily light are essential for preventing leggy seedlings, but intensity matters more than duration.
Frequently asked questions
Got questions about growing Anaheim peppers? You’re not alone! Here are answers to the most common ones to help you cultivate a thriving crop.
When is the best time to plant Anaheim peppers?
Anaheim peppers thrive in warm soil, so plant them after the last frost when nighttime temperatures stay above 50°F (10°C). For cooler climates, start seeds indoors 8–10 weeks before transplanting. In warmer zones (zones 9–11), direct-sow seeds in early spring for a fall harvest!
How much sunlight do Anaheim peppers need daily?
Anaheim peppers are sun lovers! Aim for 6–8 hours of full sunlight daily. If your garden gets partial shade, supplement with a grow light or choose a sunnier spot. Too little light? Expect slower growth and fewer peppers.
How often should I water Anaheim peppers?
Keep soil consistently moist but not soggy. Water deeply 1–2 times per week, depending on heat and rainfall. Avoid wetting leaves to prevent disease. Mulch around plants to retain moisture and regulate soil temperature.
Can I grow Anaheim peppers in containers?
Use a 5-gallon pot or larger with drainage holes. Choose a lightweight potting mix, and place the container in full sun. Dwarf or bush varieties (like ‘Luna’) work best in containers. Just ensure they get enough water and nutrients!
Why are my Anaheim peppers turning yellow or dropping?
Yellowing leaves or dropped peppers often signal underwatering, overwatering, or nutrient deficiency. Check soil moisture and adjust watering. Yellow edges? Likely magnesium deficiency—feed with Epsom salt (1 tbsp per gallon of water). Pests like aphids or spider mites can also stress plants; treat with neem oil if needed.
How do I know when Anaheim peppers are ready to harvest?
Harvest when peppers are 3–6 inches long and firm but still tender. For milder flavor, pick them green; for smokier taste, wait until they turn red. Use pruning shears to avoid damaging the plant. The more you harvest, the more peppers will produce!
Wrapping up and next steps
Growing Anaheim peppers is a rewarding journey that brings bold flavors and vibrant colors to your garden—or kitchen! 🌱 Whether you're a beginner or seasoned gardener, these versatile peppers thrive with the right care, and soon, you’ll be harvesting enough to spice up everything from salsas to stuffed peppers. Now’s the perfect time to roll up your sleeves and start planting!
Your next step? Pick a sunny spot, prep your soil, and plant those seeds or seedlings with confidence. Before you know it, you’ll be enjoying the fruits of your labor—literally! Happy gardening!