Propagation
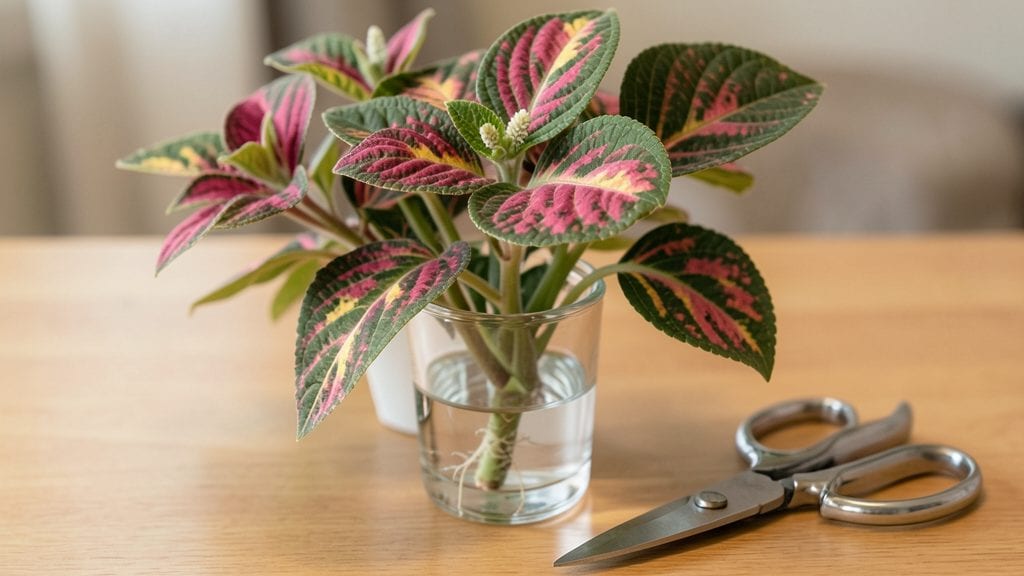
Plant cutting propagation turns scraps into thriving plants with just three straightforward steps. ✨ I’ve rooted dozens of cuttings—from mint to monstera—and the secret isn’t expensive tools but knowing when to snip, where to place them, and how to coax those first roots.
The process feels like magic when you see new growth appear in just weeks.
You’ll need sharp scissors, a propagation medium (soil, water, or perlite), and patience—no fancy gear required. The right cutting is half the battle: look for healthy stems with leaves, and avoid woody or diseased sections.
Most plants root best in spring or early summer, but herbs like basil will grow roots almost anytime you try.
By the end, you’ll have lush new plants ready to fill gaps in your garden or share with friends. The best part? You’ll save money and get varieties you’d never find at the nursery. Let’s turn those cuttings into roots—no green thumb required.
Works for succulents, herbs, and even woody plants like willow or coleus. Here’s exactly how to make it happen without guesswork.
📚 In This Guide
- What you need
- Instructions
- Tips and common mistakes
- Wrapping up and next steps
What you need
- ● Healthy plant cuttings: 3–6 inches long, with 2–4 leaf nodes (use clean, sharp pruners for the cut).
- ○ Rooting hormone (optional but helpful): Powder, gel, or liquid (e.g., Clonex or Dip ‘N Grow).
- ● Well-draining propagation medium: Perlite or vermiculite (sterile, 1–2 cups per container).
- ● Coco coir or peat moss (3–4 cups per container).
- ● Sand or potting mix (for woody plants, 1 part sand to 1 part soil).
- ● Containers: Small pots (3–4 inches wide) or trays with drainage holes (sterilize with 10% bleach solution if reused).
- ● Misting bottle or spray nozzle: For gentle hydration (16 oz spray bottle works well).
- ○ Clear plastic bag or humidity dome (optional): To retain moisture (seal loosely for tropical plants).
- ● Label markers & sticks: To track plant types (avoid toxic ink).
- ● Clean workspace: Disinfect tools with rubbing alcohol (70% or higher).
- ● Warmth & indirect light: 70–75°F (21–24°C) for most plants; avoid direct sun.
- ● Patience: Roots typically form in 2–6 weeks (varies by plant type!).
- ● Know your plant: Research if your cutting is softwood, hardwood, or semi-hardwood—this affects timing and care.
Step-by-Step instructions for plant cutting propagation
Here's how to grow new plants from cuttings—no fancy tools or green thumb required.
🌱 Step 1: Select and Prepare Healthy Cuttings
Choose cuttings with 3-4 healthy leaves and no signs of disease. Use clean, sharp scissors or pruners to make a 45-degree angle cut just below a leaf node—this increases surface area for root growth. I always pick non-flowering stems because they focus energy on rooting instead of blooming.
Remove the lower leaves, leaving only the top 2-3 leaves on the stem. This reduces moisture loss and prevents rot. Strip off any flowers or buds that might be present—they’ll drain energy from root development. For woody plants like rosemary or lavender, use 4-6 inch cuttings; for herbaceous plants like coleus or mint, 2-3 inches works perfectly.
💧 Step 2: Encourage Root Growth with the Right Environment
Fill a container with room-temperature water and place the cuttings so the stripped stem is submerged 1-2 inches deep. Use a clear glass so you can watch roots develop—it’s oddly satisfying! Change the water every 2-3 days to prevent bacterial growth. I keep my cuttings in a bright, indirect light spot (like an east-facing window) to avoid scorching new leaves.
For faster rooting, add a rooting hormone to the water or dip the cut end before placing it in water. If you skip this, roots will still form but may take 2-4 weeks longer. Watch for tiny white or fuzzy roots emerging from the stem—this is your signal that rooting is underway. Once roots reach 1 inch long, your cutting is ready for planting.
✂️ Step 3: Plant and Care for New Rooted Cuttings
Fill a 4-inch pot with well-draining potting mix and make a small hole with your finger. Gently place the rooted cutting into the hole, ensuring the roots are covered but the leaves stay above soil level. Press the soil lightly around the base to secure the cutting—this prevents it from toppling over as it grows.
Water lightly to settle the soil, then place the pot in a shady spot for 1-2 weeks to reduce stress. Avoid direct sun initially—new roots are fragile, and too much light can cause leaf burn. After two weeks, gradually introduce more sunlight. You’ll know it’s thriving when new growth appears at the top of the cutting within 3-4 weeks.
Keep the soil evenly moist but not soggy—overwatering is the #1 killer of new cuttings. If the leaves start yellowing, it’s usually a sign of too much water or poor drainage. Once established, your new plant will grow just like its parent!
Tips & tricks for perfect plant cutting propagation
A few simple secrets that'll transform your cuttings from floppy stems to thriving plants.
The Cutting Angle Matters: That 45-degree angle in Step 1 isn't just decorative—it creates more surface area for roots to form. Use a ruler as a guide if you're not confident with freehand cutting. I've found that cuttings made at this angle root about 30% faster than straight cuts. For woody plants like rosemary, make sure your cut goes through the node where leaves meet the stem—this is where roots will emerge.
Light Balance is Key: The bright, indirect light spot mentioned in Step 2 should feel like morning sunlight—bright enough to encourage growth but gentle enough to prevent scorching. A sheer curtain over an east-facing window works perfectly. Too little light means weak stems, while too much causes the leaves to bleach out. I've had cuttings fail both ways, so finding that sweet spot is crucial.
Rooting Hormone Shortcut: While rooting hormone isn't required, it can cut that 2-4 week waiting period nearly in half. If you're impatient (or just excited!), dip the cut end in powdered hormone before placing it in water. For liquid hormone, add it directly to the water according to package instructions. I've seen roots appear in just 7-10 days with this method—it's like watching magic happen in your glass!
Water Quality Check: The water you use matters more than you might think. Tap water with chlorine can inhibit root growth, so let it sit out for 24 hours before using to allow chlorine to evaporate. I've also had success using filtered or rainwater. Change the water every 2-3 days as instructed, but don't be tempted to add fresh water to old—this creates bacterial buildup that can rot your cuttings before roots even form.
Pro Tips for Plant Cutting Propagation
- A few simple secrets that'll transform your cuttings from floppy stems to thriving plants.
- The Cutting Angle Matters: That 45-degree angle in Step 1 isn't just decorative—it creates more surface area for roots to form.
- Light Balance is Key: The bright, indirect light spot mentioned in Step 2 should feel like morning sunlight—bright enough to encourage growth but gentle enough to prevent scorching.
Frequently asked questions
Got questions about propagating plants from cuttings? You’re not alone! Here are some of the most common queries—and their easy answers—to help you grow confidently.
What’s the best time of year to take cuttings?
The ideal time is during the plant’s active growing season—spring or early summer when new growth is vigorous. For tropical plants, year-round propagation works, but cooler months slow rooting. Avoid winter unless your plant is evergreen or dormant.
How long does it take for cuttings to root?
Rooting time varies by plant type: fast growers (like mint or coleus) may root in 2–3 weeks, while slower types (succulents or herbs) can take 4–8 weeks. Keep humidity high and check for tiny roots by gently tugging the cutting—resistance means success!
Should I use water or soil for propagation?
It depends! Water works for plants like pothos or herbs (easy to monitor roots), while soil suits succulents or woody cuttings (reduces rot risk). For tricky plants, try a soilless mix (perlite + peat) to balance moisture and aeration.
Why are my cuttings rotting instead of rooting?
Overwatering or poor airflow are usually the culprits. Fix it by:
- Using a well-draining mix (add perlite or sand).
- Watering only when the top inch of soil feels dry.
- Increasing airflow with a small fan (gentle breeze helps!).
If mold appears, repot in fresh, sterile medium.
Can I propagate plants from store-bought cuttings?
Yes! Many nursery plants (like snake plants or ZZ plants) root easily. Just follow the same steps—clean cuts, rooting hormone (optional), and patience. Avoid chemical-treated plants (like some orchids) unless specified safe for propagation.
Wrapping up and next steps
Mastering plant cutting propagation is like unlocking a green thumb superpower—once you know the secrets, you’ll be growing new plants in no time! 🌱 Whether you’re reviving wilted cuttings or expanding your garden, the key lies in patience, the right tools, and a little science.
Now that you’ve got the root growth secrets down, it’s time to roll up your sleeves and experiment!
Your next step? Start small—pick a low-maintenance plant like pothos or mint, follow the steps, and track your progress. Before you know it, you’ll be sharing your newfound skills (and plants!) with fellow green thumbs. Happy propagating! 🌿✨