
Companion Plants
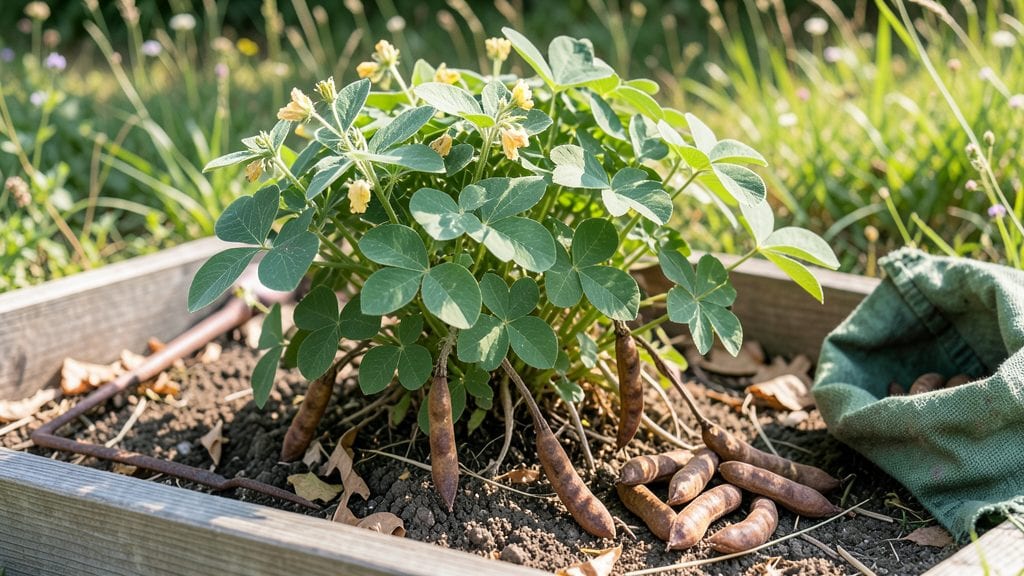
Harvesting your peanut plant at the right time means the difference between sweet, plump pods and bitter, shriveled ones 🥜 — and the key is knowing exactly when to dig.
Harvesting peanuts at the wrong time means bitter, shriveled pods—while perfect timing unlocks sweet, plump harvests worth the wait. But how do you know when those underground treasures are ready?
Most gardeners in USDA Zone 6a plant peanuts in April or May, so by September or October, you’ll need to watch for three critical signs: yellowing leaves, papery shells, and pods that rattle when shaken.
Below, I’ll walk you through the exact visual cues, soil tests, and digging tricks to pull peanuts at peak flavor—plus how to avoid the two biggest mistakes that ruin a harvest.


How to identify peanut pods ready for harvest by color and growth stage
Peanut plants take patience, but knowing the exact signs of maturity transforms guesswork into a foolproof harvest. The pod color shifts dramatically from green to tan, while the leaves yellow and dry—these visual cues tell you when to dig.
Ignoring these signals often leads to bitter, shriveled peanuts or wasted labor digging too early.
First, understand that peanut pods mature underground, so what you see above ground (the peanut plant's leaves) is just part of the story. The pod color progression is your primary guide—starting green, then turning tan or brownish when ready.
Combine this with the leaf yellowing and vine drying to pinpoint the perfect harvest window.
Here’s the color and growth stage breakdown you need to avoid common mistakes like harvesting too soon (underripe, bitter peanuts) or too late (shriveled, moldy pods).
At the pod formation stage (around 60-90 days), peanuts are still greenish-yellow and not ready. This is when many gardeners mistakenly dig, only to find small, bitter peanuts. Wait until the pod color turns tan and the leaves yellow—this signals maturity.
A quick soil check confirms readiness: dig up a test peanut to see if the shell is papery and thick.
When peanuts reach 120-150 days after planting, the vines yellow and dry out—a clear sign to harvest. The pods rattle when shaken, another foolproof indicator. If you wait too long, the pods darken and become shriveled, losing flavor and texture.
Harvest before the first frost to avoid moldy, spoiled peanuts.
For regional adjustments, warm climates (like USDA Zone 8+) may extend the harvest window, while cooler zones (Zone 6 or below) require earlier digging. Always prioritize pod color and leaf condition over calendar dates. A test dig every 5-7 days ensures you don’t miss peak maturity.
Pro tip: Shake the vines before digging—if peanuts rattle, they’re ready. If they sound hollow, they’re overripe. This simple trick saves hours of digging underripe peanuts. Combine it with the pod color chart above for 100% accuracy.
One common mistake is harvesting based on pod size alone. Small pods can still be fully mature if the shell is thick and papery, while large pods with thin shells are underripe. Always check the shell texture and color first.
If your peanut plants are in containers, monitor the root growth closely—they mature faster
Soil testing and digging methods for stress-free peanut harvesting
Perfect timing and gentle digging are what separate crisp, flavorful peanuts from shriveled disappointments. Before you even touch your plants, the soil moisture level and plant maturity must align. Too dry? Pods shrivel. Too wet? Risk rot. And digging too deep or too aggressively can bruise those precious underground pods.
I’ve learned the hard way—skipping a simple soil moisture check or rushing the harvest can turn a bounty into a bust. The key is patience: wait for the right soil conditions and use the proper digging technique to preserve your crop.
Here’s exactly how to do it right, step by step.
Dig a 1-inch deep hole near the plant base. If the soil feels damp but not soggy, it’s ready. Too dry? Water deeply 2-3 days before digging.
Gently dig up 1-2 test peanuts from the soil. Look for tan-colored pods with a papery shell. If they’re still green or thin, wait 3-5 days.
Use a hand trowel or garden fork to dig 6-8 inches deep, following the vine’s growth pattern. Avoid sharp tools that puncture pods.
Gently brush off loose dirt to inspect for damaged pods. Discard any bruised or moldy peanuts immediately to prevent spoilage.
Spread peanuts in a single layer on a screen or tray in a well-ventilated, dry area (70-80°F). Cure for 7-10 days until shells are completely dry.
After curing, store your peanuts in a cool, dry place (50-60°F) to preserve freshness. Pro tip: Label varieties if you’re growing multiple types—some cure faster than others! The right soil prep and digging method make all the difference between a bitter harvest and a sweet, plump bounty.
Don’t rush—wait for the perfect soil moisture and pod color. Patience here pays off with flavorful, storable peanuts you’ll enjoy all season long. 🥜