
Trees
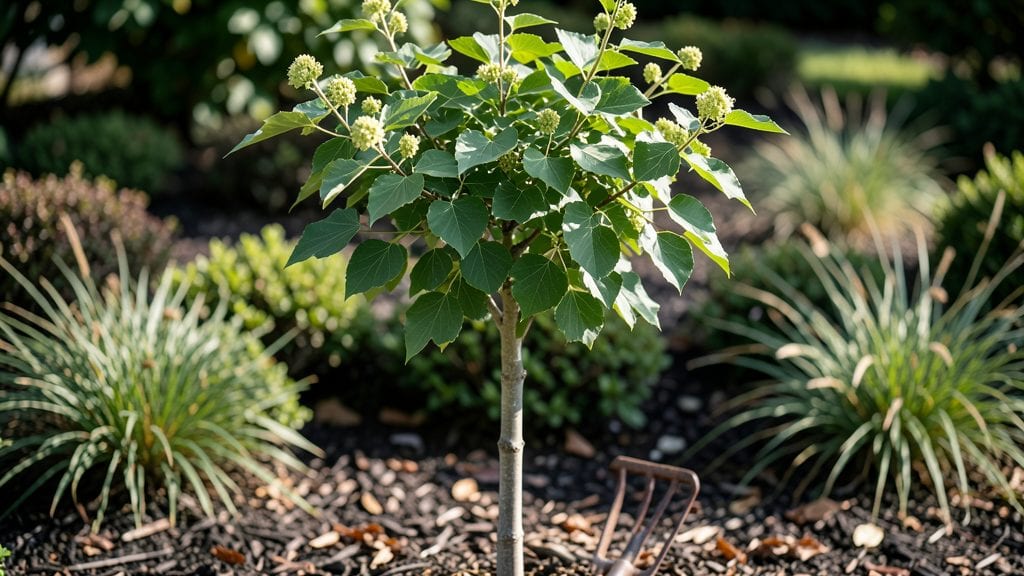
Planting outdoor trees that thrive year-round starts with the right spot and soil—honestly, I’ve buried too many saplings in the wrong place to count. The secret isn’t just digging a hole; it’s matching the tree to sunlight, soil, and space so its roots can spread without competition.
A single misstep here means struggling with stunted growth or pests for years.
You’ll need basic tools—a shovel, mulch, and a watering can—but the real game-changer is knowing your tree’s needs. Deciduous varieties like maples love full sun, while evergreens such as pines tolerate shade better.
My first oak nearly died because I planted it too close to a fence; now I measure twice before I dig once. The payoff? Trees that stay healthy through droughts, storms, and even winter freezes.
Once planted, consistent watering for the first two years makes all the difference—deep soaks once a week beat light sprinkles daily. I’ve seen trees double in size when cared for properly, their leaves a vibrant green instead of yellowing by midsummer.
The best part? A well-planted tree adds shade, wildlife habitat, and curb appeal without requiring constant attention.
This works for front yards, backyards, or even urban spaces with container-friendly species. Let’s get those roots growing strong from day one.
📚 In This Guide
- What you need
- Instructions
- Tips and common mistakes
- Wrapping up and next steps
What you need
- ● Tree seedlings or saplings: 1–5+ (depending on desired coverage; choose disease-resistant, climate-adapted varieties like Oak, Maple, or Magnolia)
- ● Size: 1–3 gallons (small) to 15+ gallons (mature) per tree
- ● Planting hole tools: 1 shovel (round-point or digging spade, 16–24" wide)
- ● 1 garden trowel (6–8" wide for precision)
- ● Soil amendments: 5–10 lbs compost or organic matter (e.g., aged manure, leaf mold)
- ● 1–2 lbs slow-release fertilizer (10-10-10 NPK ratio for general use)
- ● Mulch: 2–4 cubic feet wood chips, pine straw, or shredded bark (3–4" layer)
- ● Watering supplies: 1 garden hose (½" diameter) with adjustable nozzle
- ○ 1 watering can (optional for small saplings)
- ● Support (if needed):strong> 1–2 tree stakes or bamboo supports (for young or top-heavy trees)
- ● 1 roll tree tie or soft garden twine
- ● Soil test kit: To check pH and nutrient levels (ideal range: 6.0–7.0 for most trees).
- ● Root stimulator: 1 bottle (e.g., Mycorrhizal fungi or seaweed extract) to boost early growth.
- ● Drip irrigation system: For automated watering (great for large plantings).
- ● Pest deterrents: Neem oil spray (for aphids or mites)
- ● Physical barriers (e.g., tree guards for young saplings)
- ● Seasonal care: Winter mulch (extra 2–3" layer for cold climates)
- ● Frost cloth (for tender young trees)
Instructions for planting and maintaining outdoor trees
Here's the straightforward approach I use to ensure strong, healthy trees that thrive for years.
Choose the Right Location and Prepare the Soil
Select a spot with at least 6 feet of clearance around the tree's mature size to allow for root spread and airflow. Trees need full sun for most of the day, though some varieties tolerate partial shade. Before planting, remove any weeds or grass within the planting area—competition for nutrients will stress your new tree.
Dig a hole that's twice as wide as the root ball but only as deep as the container the tree came in. Loosen the sides of the hole with a shovel to help roots penetrate the surrounding soil more easily. Avoid amending the native soil with compost or fertilizer at planting time—this can burn tender roots. Instead, mix a small amount of the topsoil you removed with the backfill soil to ensure a gradual transition.
Remove the Tree from Its Container and Inspect Roots
Gently squeeze the sides of the container to loosen the root ball before carefully sliding the tree out. If the roots are circling tightly around the root ball, use your fingers to tease them apart—this prevents girdling, which can strangle the tree as it grows. Check for any damaged or broken roots; trim away any that look mushy or discolored with clean pruning shears.
Place the tree in the hole so the top of the root ball sits 1-2 inches above the surrounding soil level. This slight elevation prevents water from pooling around the trunk, which can cause rot. Once positioned, use one hand to hold the tree steady while you backfill the hole with the native soil you removed earlier.
Plant and Water the Tree Properly
Fill the hole halfway with soil and gently tamp it down with your hands to remove air pockets. Add more soil, tamping lightly as you go, until the hole is nearly full. Avoid compacting the soil too firmly—roots need space to expand. Once the tree is securely in place, water it deeply to settle the soil and eliminate air gaps around the roots.
After watering, the soil should be evenly moist but not soggy. Add the remaining soil to the hole and create a 2-3 inch deep watering basin around the base of the tree. This basin helps direct water straight to the roots. Mulch the area with 2-3 inches of organic mulch, keeping it 6 inches away from the trunk to prevent rot and pests.
Provide Ongoing Care for Long-Term Health
Water the tree once a week during the first growing season, providing 10-15 gallons of water per week, depending on rainfall. Young trees need consistent moisture to establish their root systems. You’ll know the tree is getting enough water when the soil feels moist 2-3 inches below the surface. Overwatering can be just as harmful as underwatering, so always check before adding more water.
Fertilize the tree once in early spring with a slow-release, balanced fertilizer. Avoid fertilizing in the first year unless the tree looks nutrient-deficient, which is rare if you planted it in good soil. Prune the tree in late winter or early spring to remove any dead, diseased, or crossing branches. Always use clean, sharp pruning shears and make cuts just outside the branch collar to promote quick healing.
Monitor and Adjust Care as the Tree Matures
As your tree grows, keep an eye out for signs of stress, such as yellowing leaves, stunted growth, or pest infestations. Most issues can be prevented with proper watering, mulching, and occasional pruning. If you notice pests like aphids or spider mites, treat them early with a hose spray or insecticidal soap to avoid long-term damage.
Every 2-3 years, add a 1-2 inch layer of mulch to the base of the tree, again keeping it away from the trunk. This helps retain moisture, regulate soil temperature, and suppress weeds. In winter, protect young trees from harsh winds and frost by wrapping the trunk with tree guard or burlap if you're in a particularly cold climate. This extra layer of insulation can make all the difference in the first few years of growth.
Tips & tricks for perfectly planted outdoor trees
Planting a tree is just the beginning—these insights will help you avoid common mistakes and give your tree the best chance to thrive for decades.
Root Ball Preparation: When you remove the tree from its container in Step 2, don't be tempted to rush. Take the extra 5 minutes to gently separate any circling roots with your fingers. I've seen too many trees fail because those roots acted like a noose, cutting into the trunk as the tree grew. This simple step prevents girdling, which can strangle your tree before it even gets established.
Soil Level Matters: In Step 2, that 1-2 inch elevation above ground level isn't just a suggestion—it's critical. I learned this the hard way when a young oak I planted sank too low, leading to rot. The slight mound helps prevent water from pooling against the trunk. After planting, I always check this by running my finger around the base to confirm the soil level is consistent all around.
Watering Wisdom: The 2-3 inch deep watering basin you create in Step 3 isn't just for looks. Fill it with water and let it soak in completely—this ensures water reaches the roots rather than running off. I've found that using a hose with a gentle spray setting works better than a heavy stream, which can erode the soil. After watering, the soil should feel moist 2-3 inches down, not just at the surface.
Mulching Strategy: That 2-3 inches of organic mulch in Step 3 should be applied carefully. While it's tempting to pile it high, keeping it 6 inches from the trunk prevents rot and pest issues. I recommend using shredded bark or wood chips, which break down slowly and improve soil structure over time. Refresh this layer every 2-3 years as instructed, but never let it build up—thick mulch layers can suffocate roots.
Pro Tips for Outdoor Planted Trees
- Planting a tree is just the beginning—these insights will help you avoid common mistakes and give your tree the best chance to thrive for decades.
- Root Ball Preparation: When you remove the tree from its container in Step 2, don't be tempted to rush.
- Soil Level Matters: In Step 2, that 1-2 inch elevation above ground level isn't just a suggestion—it's critical.
Frequently asked questions
What’s the best time of year to plant trees outdoors?
The ideal window is early spring or fall —when temperatures are mild, and soil isn’t frozen. Spring lets roots establish before summer heat, while fall offers cooler weather and steady moisture. Avoid planting in extreme heat or cold; roots struggle to adapt.
How often should I water newly planted trees?
Newly planted trees need deep, infrequent watering—about once a week (or more in extreme heat ). Water slowly to soak the root zone (1–2 feet deep). Overwatering can suffocate roots, so check soil moisture with your finger: if it’s dry 2–3 inches down, it’s time to water again!
Can I plant trees in containers outdoors year-round?
Yes! Container-grown trees thrive outdoors if you choose the right species (e.g., Japanese maple, dwarf fruit trees ) and use well-draining soil. Move pots to shaded areas in summer and protect from frost in winter. Just remember: containers dry out faster, so monitor soil moisture closely.
Why are my tree leaves turning yellow or brown?
Yellow/brown leaves often signal overwatering, underwatering, or nutrient deficiencies . Check the soil: soggy spots = too much water; dry, cracked soil = thirsty roots. Yellow leaves on older growth? Likely iron deficiency. Brown edges? Could be underwatering or salt buildup. Adjust care and fertilize if needed!
Do I need to fertilize outdoor trees, and how?
Most trees benefit from annual fertilization in early spring . Use a slow-release granular fertilizer or organic options like compost. Follow package instructions—overdoing it can burn roots. For young trees, a light application around the drip line (the edge of the tree’s branches) works best.
How do I protect trees from pests or diseases?
Prevention is key! Inspect leaves regularly for holes, sap, or unusual spots . Prune dead branches, remove fallen leaves, and keep the area clean. Use neem oil or insecticidal soap for mild infestations. For fungal issues (like powdery mildew), improve airflow and avoid overhead watering.
Wrapping up and next steps
Planting trees outdoors isn’t just about aesthetics—it’s a rewarding way to enhance your space, support the environment, and enjoy nature’s beauty year-round. 🌿 Whether you’re a beginner or a seasoned gardener, the key is patience, proper care, and a little creativity.
With the right techniques, your trees will thrive, providing shade, wildlife habitats, and even fresh air for decades.
Ready to take the next step? Start small—pick one tree that fits your climate and space, then expand your green thumb with each new planting. Your future self (and the planet) will thank you! 🌱