
Pruning
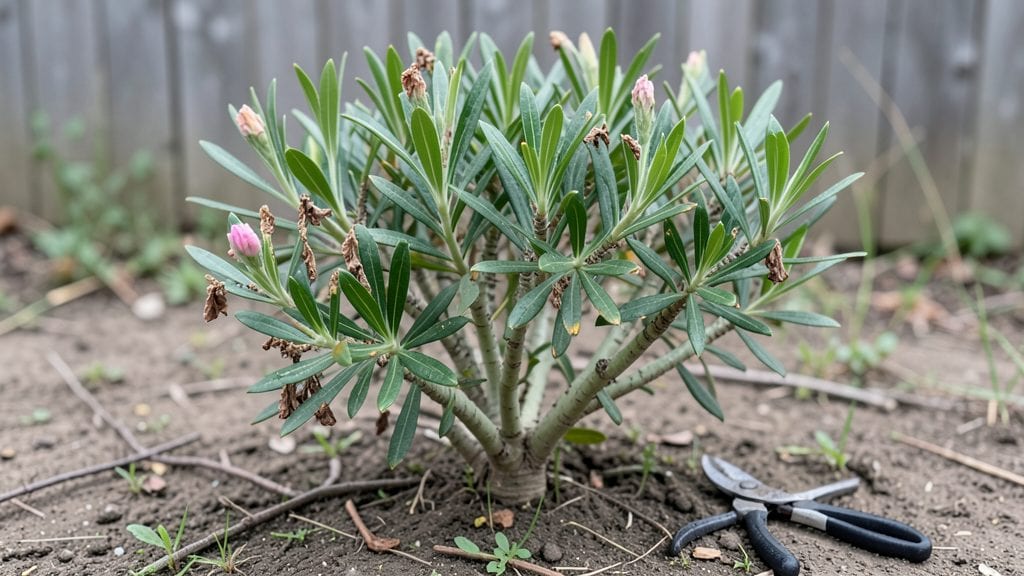
Pruning oleander plants the right way turns scraggly bushes into showstopping blooming shrubs year after year. I’ve pruned mine every season for five years, and the difference between a neglected plant and one that thrives is just timing, sharp tools, and knowing where to cut.
The toxic sap makes this job serious business, but the results—dense foliage, nonstop flowers, and a compact shape—are worth every minute.
You’ll need three seasonal trims to keep oleanders healthy: a light cleanup after winter’s last frost, a mid-summer shape-up, and a late-season bloom boost. Grab clean, sharp pruners (never dull tools—they crush stems), gloves (the sap causes skin irritation), and disinfectant (70% rubbing alcohol wipes out fungal hitchhikers).
The key is cutting just above a leaf node at a 45-degree angle, which encourages new growth without leaving ugly stubs.
After pruning, your oleander will respond with new shoots within weeks, and those shoots become next year’s blooms. The first flush of flowers arrives stronger, and the plant fills out instead of growing leggy.
Just avoid cutting into old wood—oleanders bloom on new growth, so prune back to last year’s growth only if you’re rejuvenating a neglected plant. The payoff? A bush that looks like it belongs in a nursery, not your backyard.
Works for both container-grown and in-ground oleanders, and the same principles apply whether you’re shaping a hedge or a single specimen. The only rule? Never prune in fall—you’ll cut off next year’s buds. Now, let’s get those shears ready.
📚 In This Guide
- What you need
- Instructions
- Tips and common mistakes
- Wrapping up and next steps
What you need
- ● Bypass pruning shears (for clean cuts on smaller stems) – 1 pair (4-6" blades, sharp & rust-resistant)
- ● Loppers (for thicker branches, ½"–1" diameter) – 1 pair (with bypass or anvil blades)
- ● Hand pruners (for precision trimming) – 1 pair (ergonomic grip, stainless steel)
- ● Gloves (nitrile or leather) – 1 pair (thick enough to protect from sap and thorns)
- ● Disinfectant (70% isopropyl alcohol or bleach solution) – small bottle (to sterilize tools between cuts)
- ● Rubbing alcohol or hand sanitizer – (for cleaning sap off skin if exposed)
- ● Heavy-duty trash bags – 1-2 bags (for disposing of pruned branches)
- ● Ladder or step stool – (if oleander is taller than 6 feet)
- ● Hose or water spray bottle – (to rinse sap off tools and skin)
- ● Pole pruner – (for high branches without a ladder)
- ● Garden twine or zip ties – (to secure heavy branches temporarily)
- ○ Pruning sealant – (for large cuts to prevent disease, optional for oleander)
- ● Safety glasses – (if working near eyes or in dusty conditions)
Instructions for pruning oleander plants seasonally
Here's the precise seasonal approach I've used to keep oleanders lush, blooming, and pest-resistant year after year.
Early Spring Pruning for New Growth
Begin your first trim in late February or early March—just as new shoots begin to swell but before they break dormancy. This timing ensures you're cutting back last year's growth while stimulating fresh, vigorous stems. I always prune on a dry, overcast morning to reduce stress on the plant and minimize sap bleeding, which can attract pests.
Remove all dead, diseased, or crossing branches first. Use clean, sharp pruning shears to make cuts at a 45-degree angle, about ¼ inch above a leaf node or outward-facing bud. Avoid cutting into old wood—oleanders bloom on new growth, so you want to encourage fresh stems. Target branches that are thinner than a pencil; these won't produce strong blooms.
For shaping, I follow the plant's natural form, removing no more than ⅓ of the total foliage in one session. If your oleander is overgrown, spread the pruning over two sessions, two weeks apart. After trimming, apply a balanced fertilizer (10-10-10) to support the flush of new growth. You'll see fresh green shoots within 2-3 weeks—that's your signal the pruning worked.
Mid-Summer Maintenance Pruning
Schedule your second trim in late July or early August, after the first flush of spring blooms has faded. This is purely about cleanup and airflow—oleanders hate crowded branches, which trap humidity and invite fungal diseases like powdery mildew. On a warm, sunny afternoon, I inspect each branch for signs of stress: yellowing leaves, weak stems, or clusters of small, sparse blooms.
Remove any leggy growth that stretches toward the light but produces few flowers. Cut back these stems by half their length, making your cuts just above a leaf node where new growth can emerge. Thin out the center of the plant to improve airflow—oleanders need good circulation to stay healthy. If you notice any branches with brown, crispy edges, prune those immediately, as they signal sunburn or drought stress.
After pruning, give the plant a deep watering to help it recover. I avoid fertilizing at this stage—oleanders are sensitive to excess nitrogen in summer, which can lead to lush foliage but fewer blooms. Instead, focus on mulching the base with 2-3 inches of organic mulch to retain moisture and regulate soil temperature.
Late Fall Pruning for Winter Preparation
The final trim of the year happens in October or November, just before the first hard frost. This is your chance to shape the plant for winter and remove any growth that might be damaged by cold. Start by pruning back any weak, spindly branches that grew during the summer—these are the ones most likely to suffer in freezing temperatures. Cut them back to a strong, healthy branch or bud.
Next, thin out the outer edges of the plant to improve sunlight penetration. Oleanders need full sun to bloom well, and dense foliage can block light from reaching the center. I also remove any seed pods that have formed after blooming—while they're not harmful, they sap energy the plant could use to harden off for winter. After pruning, apply a slow-release, winter-specific fertilizer (like 5-10-10) to strengthen the roots.
For container-grown oleanders, move pots to a sheltered location if your winters drop below 25°F. If you're in a cold climate, wrap the base of the plant with burlap or a thick layer of mulch to protect the roots. You'll notice new, sturdy growth emerging in early spring—this is the plant's way of telling you it's ready for another year of blooms.
Tips & tricks for pruning oleander plants seasonally
A few key strategies will help you transform your oleander pruning routine from routine maintenance into a year-round blooming success. These insights come from years of trial, error, and watching oleanders thrive under precise seasonal care.
Timing Precision: The exact timing in each season is non-negotiable for optimal results. In Step 1, prune when you see those first tiny green buds forming—this is your plant's signal it's ready for renewal. I've learned the hard way that pruning too early can damage dormant buds, while waiting too long risks losing the first flush of blooms. For Step 3, mark your calendar for October 1st as your deadline—any later and you risk winter damage to tender new growth. The 2-3 week window after spring pruning to see new shoots is your quality control check; if you don't see vigorous growth, you may have pruned too aggressively.
Cutting Technique Mastery: The 45-degree angle cut isn't just arbitrary—it's about directing water runoff away from the branch collar to prevent rot. When making cuts in Step 1, visualize creating a tiny roof over the bud you're targeting. For thicker branches, I use my pruning shears to make two cuts: first to remove most of the branch, then a clean cut just above the bud. The "thinner than a pencil" rule is crucial—these pencil-thin branches are energy vampires that drain your plant without contributing much to blooms. Remember, oleanders bloom on new growth, so every cut should encourage fresh stems.
Seasonal Care Nuances: The summer maintenance in Step 2 deserves special attention to airflow. I've seen oleanders develop powdery mildew from overcrowded branches—it starts as white dust on leaves and quickly spreads. To prevent this, thin the center first, then work outward. The 2-3 inches of mulch recommendation isn't just about moisture—it's about creating a thermal blanket that keeps roots cool in summer and insulated in winter. For container plants facing 25°F winters, I've found that moving them to sheltered locations (like against a south-facing wall) can make the difference between survival and thriving.
Fertilizer Strategy: The balanced 10-10-10 fertilizer in spring and winter-specific 5-10-10 in fall serve different purposes. Spring feeding supports the flush of new growth you'll see in 2-3 weeks, while the winter formula focuses on root strengthening. I've made the mistake of fertilizing in summer—it leads to lush foliage but sparse blooms. Instead, focus on that mulch layer and deep watering after summer pruning to help the plant recover without excess nitrogen confusing its growth priorities.
Pro Tips for Oleander Plant Pruning
- A few key strategies will help you transform your oleander pruning routine from routine maintenance into a year-round blooming success.
- Timing Precision: The exact timing in each season is non-negotiable for optimal results.
- Cutting Technique Mastery: The 45-degree angle cut isn't just arbitrary—it's about directing water runoff away from the branch collar to prevent rot.
Frequently asked questions
Got questions about oleander pruning?
Here are the most common ones—plus expert answers to keep your plant thriving year-round.
When is the best time to prune oleander?
The ideal times are early spring (just before new growth), summer after flowering (to shape and encourage blooms), and late fall (light cleanup before winter). Avoid pruning in extreme heat or cold, as it stresses the plant. Seasonal timing makes all the difference!
How much can I trim oleander without harming it?
You can safely remove up to 1/3 of the plant’s foliage in one session, but avoid over-pruning. Focus on dead, diseased, or crossing branches first. Oleanders are resilient, but never cut more than 25% of the canopy in a single trim—this can weaken growth.
What should I do if my oleander bleeds sap after pruning?
Sap bleeding (latex-like ooze) is normal and harmless—it’s the plant’s way of sealing wounds. To minimize it, use sharp, sterilized tools and prune on a dry, cool day. Seal cuts with pruning sealant (optional) if you’re concerned, but most oleanders heal fine without it.
Will pruning oleander reduce its flowers?
Not if done right! Pruning after flowering (summer trim) actually encourages more blooms by redirecting energy. Avoid heavy cuts in late winter, as this can delay spring flowers. For maximum blooms, pair pruning with balanced fertilizer.
Can I prune oleander in containers differently than in the ground?
Yes! Container oleanders need more frequent pruning (every 4–6 weeks) to control size and roots. Trim 10–15% of growth per session and repot every 2–3 years to refresh soil. Dwarf varieties (like ‘Petite Pink’) thrive with light, regular shaping.
What if my oleander looks leggy after pruning?
Leggy growth often means too little light or over-pruning. Move your plant to full sun (6+ hours/day) and reduce future cuts by 20%. Fertilize with low-nitrogen feed (like 5-10-10) to promote bushier, not taller, growth.
Wrapping up and next steps
Pruning your oleander isn’t just about aesthetics—it’s the secret to keeping this stunning shrub thriving year-round! By mastering the three seasonal trims (spring, summer, and late fall), you’ll encourage vibrant blooms, stronger growth, and even pest resistance.
Remember, sharp tools, proper timing, and a little patience are your best allies.
Ready to transform your oleander into a lush, low-maintenance showstopper? Grab your pruners and start planning your next trim—your plant (and neighbors!) will thank you. 🌿✨