
Propagation
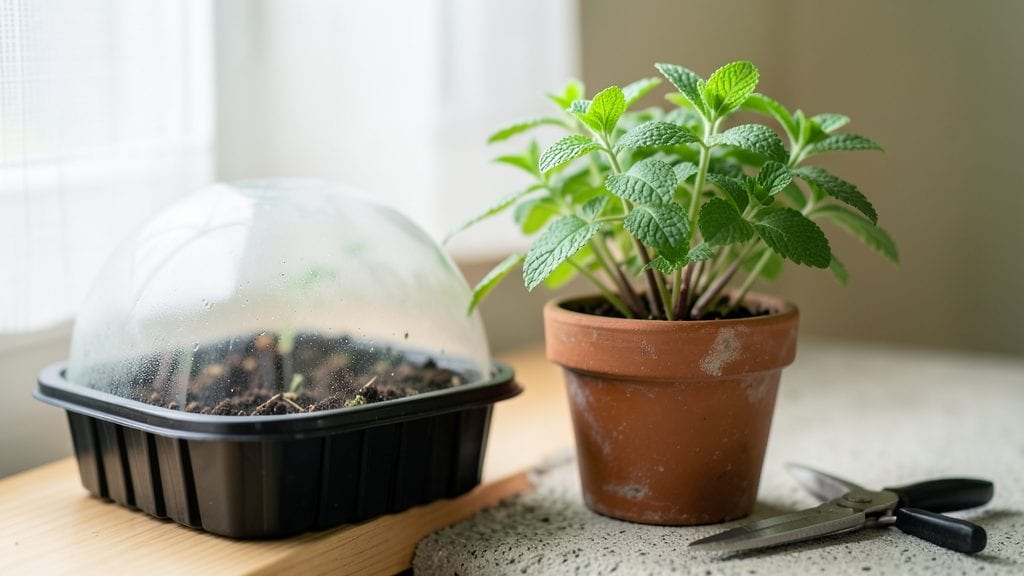
Growing mint from seed feels like cheating the system—it’s one of the fastest ways to get fresh, fragrant plants on your windowsill or garden. 🌱 I’ve tried both water and soil germination, and the right method can cut your waiting time in half while keeping those delicate seedlings from flopping over.
The secret lies in patience and precision: keep seeds warm, moist, and in bright indirect light, and you’ll see tiny sprouts emerge in as little as 7–10 days. Most people overwater or crowd the seeds, which leads to mold or weak stems—don’t make that mistake.
A simple setup with a shallow tray, damp paper towels, and a clear plastic bag does the trick.
Once those first leaves unfurl, you’ll be snipping fresh mint for teas or cocktails in just 4–6 weeks. The plants stay vigorous year-round if you keep them pruned, and the peppery scent alone makes it worth the effort.
Here’s how to avoid the pitfalls and get it right the first time.
Works perfectly for indoor windowsills or outdoor garden beds, and the same method applies to other fast-growing herbs like basil or cilantro. Let’s get those seeds sprouting!
📚 In This Guide
- What you need
- Instructions
- Tips and common mistakes
- Wrapping up and next steps
What you need
- ● Mint seeds or cuttings: For seeds: 1 packet (approx. 50-100 seeds) of organic peppermint (Mentha × piperita) or spearmint (Mentha spicata) seeds.
- ● For cuttings: 1-2 healthy stems (4-6 inches long) with at least 2-3 leaf nodes (avoid flowering stems).
- ● Germination medium (choose one): For water: 1 clear glass or jar (8-12 oz) filled with 2-3 inches of room-temperature water.
- ● For soil: 1 small pot (4-6 inches in diameter) with well-draining potting mix (or a seed-starting mix with perlite/vermiculite).
- ● Tools: Scissors or pruning shears (for cuttings).
- ● Spray bottle (for misting soil).
- ○ Plastic wrap or humidity dome (optional but helpful for soil germination).
- ● Rooting hormone: Speeds up root growth for cuttings (gel or powder form).
- ● Grow lights or sunny windowsill: Ensures 6-8 hours of indirect light daily.
- ● Fertilizer: A diluted liquid fertilizer (e.g., fish emulsion) for soil-grown seedlings after 4-6 weeks.
- ● Label or marker: To track seed varieties or planting dates.
Step-by-step instructions for mint plant germination
Here's how to grow mint from cuttings—fast, easy, and without the mess of seeds.
🌱 Step 1: Select and Prepare Healthy Mint Stems
Choose a healthy mint plant with firm, green stems free of yellowing or spots. Cut a 4-6 inch section just below a leaf node (the bump where leaves grow out). This is where roots will sprout. Remove the lower leaves, leaving just a few at the top. You'll need 4 cuttings total for your project.
Place the cuttings in a glass of room-temperature water (about 2 inches deep). Make sure the nodes are submerged—they need moisture to activate root growth. Change the water every 2-3 days to prevent bacteria buildup. Roots should appear in 7-14 days, depending on your home’s warmth.
💧 Step 2: Encourage Root Growth in Water
Set the glass in a spot with bright, indirect light—no direct sun yet. Too much heat will stress the cuttings before roots form. You’ll see tiny white bumps at the nodes within 3-5 days, then fine roots within 7-10 days. Once roots reach 1-2 inches, they’re ready for soil.
If roots grow too long (over 2 inches), trim them slightly before planting. This prevents shock when you transfer the cuttings to soil. I like to do this with clean scissors, making a slight angle cut just below the root mass.
🪴 Step 3: Plant in Soil for Strong Growth
Fill a 6-inch pot with well-draining potting mix (never garden soil—it compacts too much). Make a small hole with your finger, then gently place the rooted cutting into the hole. Cover the roots lightly with soil, pressing down just enough to hold the cutting steady. Water until moisture seeps from the bottom of the pot.
Keep the soil consistently moist but not soggy. Mint hates waterlogged roots, so wait until the top inch feels dry before watering again. Place the pot in partial shade for the first week to help it adjust. After that, move it to bright, indirect sunlight for strong growth.
☀️ Step 4: Maintain and Harvest Your Mint
Once your mint is established (about 4-6 weeks), it’s ready for full sun. You’ll know it’s thriving when you see new leaves forming at the top and along the stems. Pinch back the tips to encourage bushier growth—this prevents legginess and keeps the plant compact.
Harvest leaves as needed, but leave at least half the plant intact so it keeps growing. Mint grows aggressively, so you’ll have plenty to share (or make tea with!). If the pot gets crowded, divide the plant into 2-3 smaller pots to keep it healthy.
Tips & tricks for perfect mint plant germination
Here's what I learned after growing mint from cuttings the easy way—no fancy tools or complicated steps required.
Cutting Selection is Everything: The health of your starting stems makes all the difference. Look for stems that are 4-6 inches long with vibrant green leaves and no signs of yellowing or damage. I always check the leaf nodes—they're where those roots will sprout! If you see any brown spots or wilting, skip that stem entirely. Confession: I skipped this step once and ended up with only 2 out of 4 cuttings rooting successfully.
Water Quality Matters: Use room-temperature water (not cold from the tap) to avoid shocking your cuttings. I've found that changing the water every 2-3 days prevents bacteria buildup and keeps the water fresh for root growth. Pro tip: If you notice any cloudiness or slimy film developing, dump that water immediately and give your glass a good rinse before adding fresh water.
Lighting Secrets: That bright, indirect light recommendation is crucial—direct sun can actually cook your cuttings before roots form. I place mine near an east-facing window where they get morning light but no harsh afternoon sun. You'll see those tiny white root bumps appear at the nodes within 3-5 days if conditions are right. If your cuttings look sad or wilted after a few days, they might need more light.
Root Trimming Technique: When roots grow longer than 2 inches, trim them before planting to prevent transplant shock. I use clean scissors and make a slight angle cut just below the root mass. This helps the roots establish more quickly in soil. Don't worry—your mint will grow new roots just fine after this gentle trim.
Pro Tips for Mint Plant Germination
- Here's what I learned after growing mint from cuttings the easy way—no fancy tools or complicated steps required.
- Cutting Selection is Everything: The health of your starting stems makes all the difference.
- Water Quality Matters: Use room-temperature water (not cold from the tap) to avoid shocking your cuttings.
Frequently asked questions
about mint plant germination—here’s what you need to know before diving in!How long does it take for mint seeds to germinate?
Mint seeds typically sprout within 14–30 days when kept in warm (70–75°F), moist conditions. Pro tip: Use a seedling heat mat to speed up germination if your space is cool. Patience is key—some varieties (like peppermint) can take longer than spearmint!
Can I germinate mint in water like basil?
Yes, but with caution! Mint roots are delicate, so limit water germination to 3–5 days before transplanting to soil. Use a jar with a mesh lid for airflow. Over-soaking can rot the seeds—keep the water just covering the seeds, changed daily.
Why aren’t my mint seeds sprouting?
Common culprits: old seeds (mint loses viability after 1–2 years), cold temps, or dry soil. Try these fixes:
- Soak seeds overnight before planting.
- Use a seedling heat mat (60–70°F is ideal).
- Check moisture—soil should stay damp, not soggy.
Is it better to grow mint from seeds or cuttings?
For speed and reliability, cuttings win! Mint grown from stem cuttings (6+ inches, with nodes) roots in 1–2 weeks and mirrors the parent plant’s traits. Seeds are hit-or-miss for variety consistency—plus, they’re slower. Bonus: Cuttings let you clone your favorite mint type!
Will mint take over my garden if I plant it?
Absolutely—mint is invasive!
To contain it:
- Plant in containers (even large pots).
- Use root barriers (bury a plastic pot or hardware cloth around the base).
- Harvest regularly to discourage spreading.
Wrapping up and next steps
Growing mint from seeds or cuttings is a rewarding journey—whether you choose the speed-grow method in water or the classic soil approach, patience and care will yield lush, fragrant plants. 🌱 With the right conditions (light, warmth, and consistency), you’ll soon enjoy fresh mint for teas, cocktails, or cooking. Now that you’re armed with tips and troubleshooting advice, why not start your own mint patch today?
🌿 Next Steps:
- Pick your preferred method (water or soil) and gather supplies.
- Monitor progress and adjust care as needed.
- Share your mint-growing wins with fellow gardeners!