
Tools
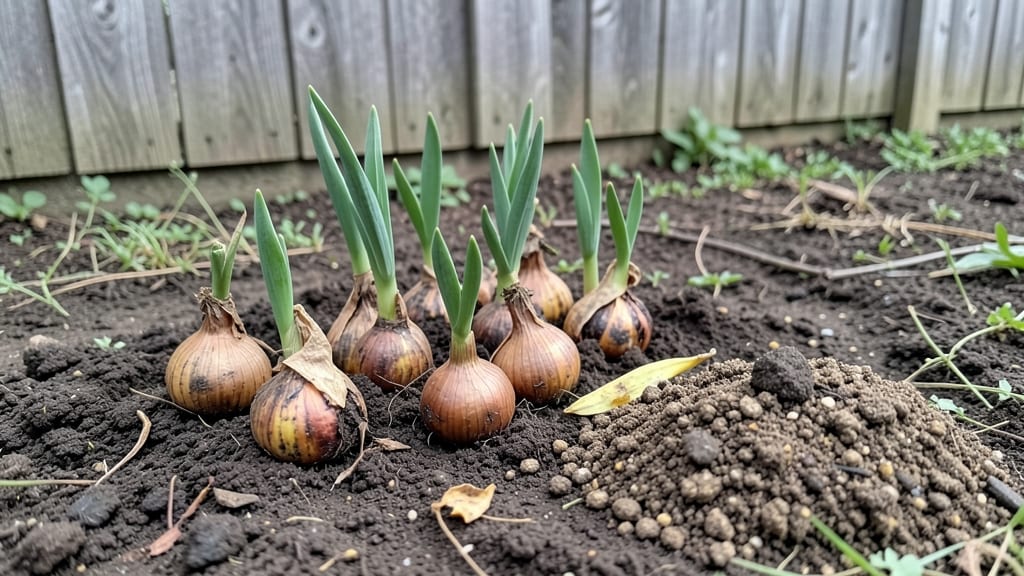
Layered bulb planting turns one small spot into a year-round color show—no empty gaps, no wasted space, just blooms from early spring through late winter.
I first tried this after killing a dozen tulips by planting them too shallow, and now my front yard has three layers of color where there used to be bare dirt.
The secret isn’t complicated: stack bulbs by size and bloom time, with the largest at the bottom and the smallest on top.
You’ll need bulbs that thrive in the same conditions—think daffodils, alliums, and grape hyacinths—and a spot with well-draining soil that gets at least 6 hours of sun.
The depth rule is simple: 6 inches deep for the biggest bulbs, then work your way up to 2-3 inches for the smallest. A 5-gallon container or a 2-foot-wide garden bed gives enough room for three layers without crowding.
By late spring, you’ll see daffodils first, followed by alliums in summer, and finally late-blooming crocuses in winter. The foliage stays green longer, too, because the layers support each other.
Even in drought years, this setup stays lush and reliable—no extra watering, no fuss. The only trick is planting in fall, when the soil is cool but not frozen.
Works in containers, borders, or even under trees where grass won’t grow. Once you try it, you’ll wonder why you ever planted bulbs any other way. Here’s how to get started without overcomplicating it.
📚 In This Guide
- What you need
- Instructions
- Tips and common mistakes
- Wrapping up and next steps
What you need
- ● Bulbs: Choose a mix of early, mid, and late-season bloomers (e.g., crocus, tulips, daffodils, alliums, hyacinths). Aim for 10–20 bulbs per square foot, adjusting by depth layer (see planting guide).
- ● Well-draining soil: Loamy or sandy soil amended with compost (2–3 inches) or organic matter (e.g., coconut coir, peat moss). Avoid clay-heavy soil unless amended.
- ● Garden tools: Trowel or bulb planter (for precision)
- ● Garden fork or spade (for aerating soil)
- ● Measuring tape or ruler (for depth tracking)
- ● Mulch: 2–3 inches of organic mulch (e.g., shredded bark, straw, or leaves) to insulate bulbs and retain moisture.
- ● Bulb planter with depth guide (saves time and ensures consistency).
- ● Soil pH tester (ideal pH: 6.0–7.0 for most bulbs; adjust with lime or sulfur if needed).
- ● Drip irrigation system (for automated watering, especially in dry climates).
- ● Garden grid or staking system (helps organize layers and track spacing).
- ● Slow-release fertilizer (e.g., 10-10-10 or bulb-specific formula) to mix into soil before planting.
- ● Garden journal or app (to log bulb types, planting dates, and bloom cycles).
- ● Choose a sunny to partially shady location (most bulbs thrive in 6+ hours of sunlight daily).
- ● Plan your layering sequence (tallest bulbs at the back, shortest in front) and bloom timing (early spring → late summer).
- ● Test soil drainage: Dig a hole, fill it with water, and check if it drains within 1 hour. Poor drainage? Amend with perlite or sand.
Step-by-Step guide to layered bulb planting for year-round color
This method transforms one planting into a seasonal display—here’s how to stack bulbs for continuous blooms.
Select and Layer Bulbs by Bloom Time
Start by grouping bulbs into three layers based on their bloom cycles. Place the earliest bloomers, like crocuses or snowdrops, at the bottom (6 inches deep). These will flower first in early spring. Add mid-season bloomers, such as tulips or daffodils, in the middle (4 inches deep). Finally, top with late bloomers like alliums or lilies (2-3 inches deep). This ensures each layer gets enough light to thrive while maintaining the right spacing for healthy growth.
I always arrange them in descending order of bloom time—this prevents overcrowding and gives each bulb room to develop strong roots. If you’re unsure about bloom times, check the seed packet or bulb catalog for specific varieties. The key is patience: deeper bulbs need more time to push through the layers above, so plan your planting to allow for that natural progression.
Prepare the Planting Site and Soil
Choose a well-draining location with at least 6 hours of sunlight daily. Loosen the soil to a depth of 12 inches using a garden fork or tiller. Amend the soil with 2-3 inches of compost to improve fertility and drainage—bulbs rot quickly in soggy soil. I like to mix in a handful of bone meal or bulb fertilizer at this stage to provide slow-release nutrients for early root growth.
Test the soil moisture by squeezing a handful—it should crumble easily but not feel dry or dusty. If your soil is heavy clay, add sand or perlite to create air pockets. Avoid planting in low spots where water pools, as even well-draining bulbs can suffer in saturated conditions. A slight mound in the planting area helps with drainage and prevents future waterlogging.
Plant Bulbs in Strategic Layers
Begin by digging a hole 12 inches deep and 12 inches wide—this accommodates all three layers without crowding. Place the earliest bloomers at the bottom, spacing them 4-6 inches apart. Cover them with 2 inches of soil, then add the mid-season bulbs, spacing them 3-4 inches apart. Finish with the late bloomers at the top, spacing them 2-3 inches apart. Press the soil gently around each bulb to eliminate air pockets, which can cause rot.
Here’s the thing—don’t pack the soil too firmly. Bulbs need room to breathe, and compacted soil restricts root growth. Water the planting deeply after each layer to settle the soil and encourage root contact. If you’re planting in fall, aim to finish at least 6 weeks before the first hard frost—this gives bulbs time to establish roots before winter dormancy.
Mulch and Maintain for Season-Long Beauty
Spread 3 inches of mulch over the planting area to insulate the soil and retain moisture. Use shredded bark, straw, or leaves—just avoid thick layers that can suffocate bulbs. In early spring, remove the mulch once shoots appear to prevent rot. Water lightly every 7-10 days during the growing season, aiming for 1 inch of water per week. Bulbs are drought-tolerant once established, but consistent moisture helps them push through layers of soil.
Watch for signs of stress, like yellowing leaves or mold on the mulch. If you see mold, fluff the mulch or replace it with fresh material. Deadhead spent blooms to redirect energy to next year’s flowers, but leave foliage until it yellows naturally—this ensures the bulb stores nutrients for future growth. With this approach, you’ll enjoy blooms from early spring through summer, all from one carefully layered planting.
Tips & tricks for perfect layered bulb planting
A few simple strategies will help you create a stunning, long-lasting display that blooms season after season.
Layering Strategy: When arranging your bulbs in Step 1, consider the mature height of each variety. Place taller bulbs like alliums or lilies in the top layer—they'll push through the shorter layers below without crowding. This vertical arrangement creates a natural progression of blooms while preventing overcrowding as plants mature. I've found that spacing early bloomers 4-6 inches apart at the bottom gives them enough room to develop strong roots before pushing through the layers above.
Soil Preparation Tip: In Step 2, don't skip the soil moisture test. If your soil feels too dry, add water gradually until it reaches that perfect crumbly texture. For heavy clay soils, I recommend mixing in equal parts sand and perlite to create ideal drainage. This prevents waterlogging which can cause bulb rot—especially important when planting multiple layers. A slight mound in the planting area helps direct water away from the center, further protecting your investment.
Planting Depth Insight: The depth measurements in Step 3 are crucial for success. Remember that deeper planting doesn't mean deeper roots—it's about positioning bulbs to receive adequate light at their specific growth stages. Early bloomers need that 6-inch depth to store energy for spring growth, while shallower planting of late bloomers ensures they get sufficient light to develop properly. Press soil gently around each bulb to eliminate air pockets, but avoid compacting it too firmly.
Seasonal Timing: The 6-week window mentioned in Step 3 is flexible based on your climate. In warmer regions, you might extend this to 8 weeks, while colder areas should aim for 4-5 weeks before frost. I've learned this the hard way—planting too close to frost can leave bulbs vulnerable to freeze damage before roots establish. Check your local frost dates and adjust accordingly for optimal results.
Pro Tips for Layered Bulb Planting
- A few simple strategies will help you create a stunning, long-lasting display that blooms season after season.
- Layering Strategy: When arranging your bulbs in Step 1, consider the mature height of each variety.
- Soil Preparation Tip: In Step 2, don't skip the soil moisture test.
Frequently asked questions
When is the best time to plant bulbs in layers?
The ideal time depends on your climate. In cool regions (Zones 3-7), plant in fall (October-November) for spring blooms. In warmer zones (8-10), plant in late fall to early winter (November-January) to avoid summer heat. For year-round color, stagger plantings every 4-6 weeks—just ensure bulbs get consistent moisture until roots establish.
Can I layer bulbs in containers or just in-ground?
Layering works in both containers and garden beds. For pots, use a well-draining mix (like 60% potting soil, 30% perlite, 10% compost) and plant bulbs in inverted layers (largest at the bottom). In-ground, dig a hole 12-18 inches deep (or deeper for taller bulbs like tulips). Containers are great for small spaces or renters—just ensure drainage holes!
What if my bulbs don’t bloom after layered planting?
No blooms? Check these fixes:
- Light needs: Most bulbs need 6-8 weeks of cold (chilling). If planted too late, they may not bloom until next year.
- Depth issues: Plant bulbs 3x their height deep (e.g., crocus 3", daffodils 6"). Too shallow = weak growth.
- Soil/nutrients: Amend soil with bone meal or compost before planting. Bulbs need phosphorus for blooms!
- Pests: Squirrels or rodents may dig them up. Use chicken wire cages or plant daffodils (toxic to critters).
Give it 1-2 years—some bulbs (like alliums) take time to naturalize!
Can I mix spring and fall-blooming bulbs in the same layer?
Yes! Layering spring (tulips, daffodils) and fall (crocus, colchicum) bulbs creates nonstop color. Place fall bloomers deeper (they need more cold) and spring bulbs shallower. Pro tip: Pair early bloomers (snowdrops) with late bloomers (alliums) for a seamless transition. Just avoid mixing aggressive spreaders (like squills) with delicate bulbs.
How do I know which bulbs to layer together?
Group bulbs by:
- Height: Tall (alliums, tulips) at the bottom, medium (daffodils, hyacinths) in the middle, short (crocus, grape hyacinths) on top.
- Bloom time: Stagger early, mid, and late bloomers for continuous color.
- Light needs: Most bulbs thrive in full sun (6+ hours), but shade-tolerant options (like lycoris) work in dappled light.
Top pairings: Daffodils + tulips, crocus + alliums, or hyacinths + grape hyacinths. Check individual bulb care tags for specifics!
Wrapping up and next steps
Mastering layered bulb planting transforms your garden into a vibrant, ever-changing masterpiece—no green thumb required! 🌸 By strategically layering bulbs, you unlock year-round blooms with minimal effort, proving that beauty thrives in depth and planning. Ready to dive in?
Start small: pick one bed or container and experiment with just 3-5 bulb varieties. Test your layers, snap photos, and refine your design over time. Before you know it, you’ll be the neighborhood’s go-to gardener for effortless, show-stopping color!