
Tools
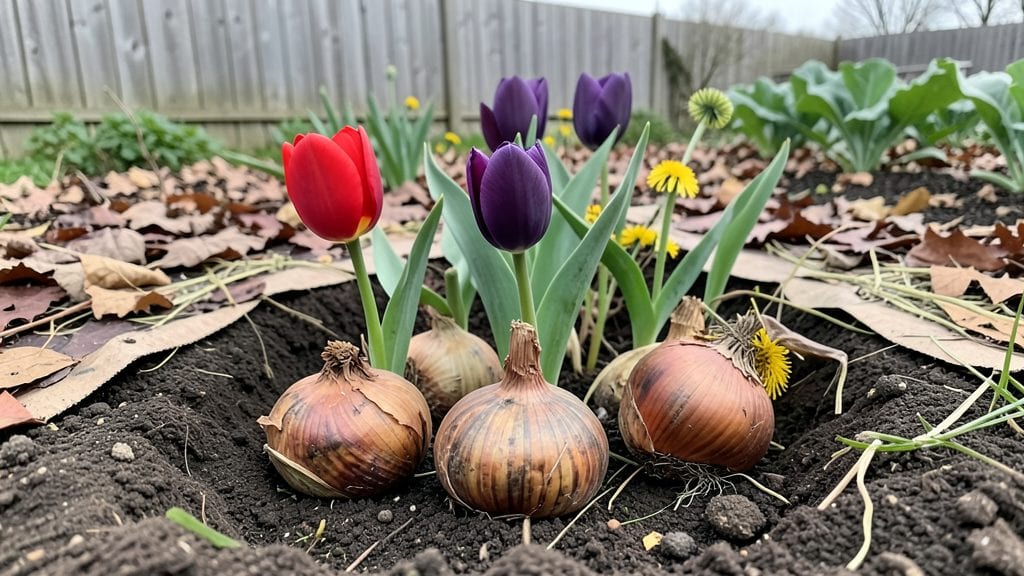
Planting bulbs in layers like a lasagna gives you three seasons of blooms from one spot—something my spring garden never did before I tried this. The key is stacking bulbs, soil, and organic matter in alternating layers, creating a nutrient-rich bed that flowers from early spring through late fall.
It’s not just about more blooms; it’s about transforming a single patch into a year-long showstopper with minimal effort after the initial setup.
This method works best with spring-, summer-, and fall-blooming bulbs like tulips, daffodils, alliums, and crocosmia, but you can mix in perennials or even small shrubs for extra texture. The layers improve drainage, retain moisture, and feed roots over time, so you skip the annual soil amendments.
I’ve used this in raised beds, containers, and even along fences—anywhere you want low-maintenance color without the upkeep. The only rule? Start with a good-quality bulb, and don’t skimp on the compost layers.
By late spring, you’ll see the first blooms pushing through, followed by a midseason wave of color, and then a final burst in fall. The plants support each other—taller bloomers rise above shorter ones, and the organic matter keeps the soil warm and active.
It’s like giving your garden a built-in fertilizer factory that just happens to look stunning. Once you’ve layered your first bed, you’ll wonder why you ever planted bulbs the old way.
Adapt it to your climate: in hot zones, add extra mulch to retain moisture; in cold areas, use a thicker layer of organic matter to insulate roots. And yes, you can reuse the same spot year after year—just add a fresh top layer of compost each fall.
The payoff? A garden that keeps giving with almost no extra work from you. Ready to try it?
📚 In This Guide
- What you need
- Instructions
- Tips and common mistakes
- Wrapping up and next steps
What you need
- ● Bulbs: 20–30 spring-, summer-, and fall-blooming bulbs (e.g., tulips, daffodils, crocuses, alliums, or dahlias). Mix varieties for staggered blooms!
- ● Lasagna layers: 1–2 inches of coarse mulch or wood chips (e.g., cedar or hardwood)
- ● 1–2 inches of compost or well-aged manure
- ● 1–2 inches of topsoil or bulb-specific planting mix
- ● Garden tools: 1 garden fork or spade (for digging)
- ● 1 hand trowel (for precision planting)
- ● Soil amendments: Bone meal (for phosphorus) or bulb fertilizer (follow package rates).
- ● Mulch: Straw or shredded leaves (to retain moisture and suppress weeds).
- ● Edging tools: A metal or plastic edging strip to define your lasagna bed neatly.
- ● Watering can or hose: With a gentle spray nozzle for post-planting hydration.
- ● Garden gloves: To keep hands clean while handling soil and bulbs.
How to plant a lasagna bulb garden for continuous color
Here’s the straightforward method I’ve used to create vibrant, low-maintenance gardens that bloom from spring through fall.
Select and Prepare Your Bulbs
Choose bulbs that thrive in your climate—tulips, daffodils, and alliums work beautifully in layers. I always pick bulbs that are firm and free of soft spots, because damaged bulbs rot underground and ruin the whole display. For a 4-bulb lasagna, you’ll need about 12-15 bulbs total—three layers of four bulbs each.
Sort bulbs by size, placing the largest at the bottom and smallest at the top. This creates a natural gradient as they bloom over time. Soak the bulbs in lukewarm water for 1 hour before planting to encourage root growth. Drain well afterward—waterlogged bulbs won’t root properly.
Layer the Bulbs in the Container
Start with a 12-inch deep container or garden spot with well-draining soil. Add a 2-inch layer of gravel or coarse sand at the bottom to prevent rot from sitting water. Place the largest bulbs—like tulips or daffodils—6 inches deep, spacing them 3-4 inches apart. This bottom layer will bloom first in early spring.
Add a 2-inch layer of potting mix over the first bulbs, then place the next layer of medium-sized bulbs—such as hyacinths or crocuses—4 inches deep. Repeat with a 1-inch layer of soil, then top with the smallest bulbs—like grape hyacinths or snowdrops—2 inches deep. This top layer will bloom last in late spring or early summer.
Add Mulch and Water for Establishment
Cover the bulbs with 3 inches of mulch, using a mix of 2 inches of compost and 1 inch of bark or straw. This protects the bulbs from temperature fluctuations and retains moisture. Water thoroughly until the soil is evenly damp but not soggy—you should see water trickle from the drainage holes if using a container.
Place the container in a spot with full sun to partial shade, depending on your bulb varieties. Most lasagna bulb gardens thrive in 6+ hours of sunlight daily, but shade-tolerant bulbs like daffodils can handle 4-6 hours. Wait 2-3 weeks before watering again, allowing the soil to dry slightly between waterings to prevent rot.
Maintain Through the Seasons
Once the first blooms appear in spring, reduce watering to once every 2 weeks unless the soil feels dry to the touch. Deadhead spent flowers by snipping the stems just above the foliage to redirect energy into next year’s blooms. Leave the leaves intact until they yellow naturally—this ensures the bulbs store energy for future growth.
In fall, add a 1-inch layer of fresh mulch to insulate the bulbs over winter. Most lasagna bulb gardens need minimal care beyond seasonal mulching and occasional watering. You’ll see three distinct blooming periods—early spring, late spring, and early summer—if you’ve layered the bulbs correctly.
Divide and Refresh Every 3-4 Years
After 3-4 years, the bulbs may crowd or bloom less vigorously. In early fall, carefully lift the container and separate the bulbs, discarding any that are soft or shriveled. Replant the healthiest bulbs in a new container with fresh potting mix, following the same layering technique. This refreshes the display and keeps the blooms abundant.
Real talk: The first year might not be perfect, but once established, this garden becomes a self-sustaining showstopper. I’ve had mine bloom reliably for over five years with just seasonal mulching and occasional deadheading.
Tips & tricks for perfect lasagna bulb planting
A few simple tricks will help you create a thriving lasagna bulb garden that blooms beautifully for years. The secret lies in the details—like how you prepare your bulbs and arrange them in layers.
Bulb Selection Tip: When choosing bulbs, prioritize firmness and size consistency within each layer. I’ve learned that bulbs with slight nicks or soft spots will rot underground, ruining your entire display. For the bottom layer, opt for larger bulbs like tulips or daffodils—they’ll establish strong roots first and bloom earliest. The middle layer can feature medium-sized bulbs such as hyacinths, while the top layer should contain smaller bulbs like grape hyacinths or snowdrops. This size progression ensures each layer gets enough space and nutrients to thrive.
Layering Technique: The key to continuous blooms lies in precise layering. After placing your largest bulbs 6 inches deep in Step 2, add exactly 2 inches of potting mix before the next layer. This spacing prevents bulbs from touching and allows room for root growth. I’ve found that using a ruler to measure each layer’s depth makes the process much easier—especially when working with multiple bulbs. Remember, the top layer of smaller bulbs only needs to be 2 inches deep, but they’ll still produce stunning late-season blooms.
Watering Wisdom: The 1-hour soak in lukewarm water before planting is crucial—it kickstarts root growth without over-saturating the bulbs. After planting, water thoroughly until you see moisture trickle from drainage holes, but avoid soggy soil. During the first 2-3 weeks, let the soil dry slightly between waterings to prevent rot. Once established, reduce watering to every 2 weeks in spring, but always check soil moisture first—overwatering is the fastest way to kill your lasagna bulb garden.
Sunlight Strategy: Most bulbs need 6+ hours of sunlight daily, but shade-tolerant varieties like daffodils can handle 4-6 hours. If your garden gets partial shade, place taller bulbs like alliums in the back and shorter varieties like crocuses in front. I’ve noticed that bulbs in containers need slightly more frequent watering than in-ground plantings because they dry out faster. Rotate your container occasionally to ensure even sunlight exposure all around.
Pro Tips for Lasagna Bulb Planting
- A few simple tricks will help you create a thriving lasagna bulb garden that blooms beautifully for years.
- Bulb Selection Tip: When choosing bulbs, prioritize firmness and size consistency within each layer.
- Layering Technique: The key to continuous blooms lies in precise layering.
Frequently asked questions
Got questions about lasagna bulb planting?
You’re not alone! Here are answers to the most common queries to help you grow stunning year-round blooms with ease.
When is the best time to plant lasagna bulbs?
Plant lasagna bulbs in early spring (March–April) for summer blooms or late summer/fall (August–September) for spring flowers. In warmer climates, you can plant year-round! Choose a time when soil temps are above 60°F (15°C) for best root growth.
How long does it take for lasagna bulbs to bloom?
With proper care, lasagna bulbs typically bloom 8–12 weeks after planting. Early-season varieties may flower sooner, while cooler climates might delay blooms until late spring or summer. Patience pays off—healthy bulbs reward you with vibrant, long-lasting flowers!
Can I plant lasagna bulbs in containers?
Lasagna bulbs thrive in containers with well-draining soil and at least 8–10 inches of depth. Use a pot with drainage holes, and group 3–5 bulbs together for a fuller look. Just ensure the container gets 6+ hours of sunlight daily and water regularly.
What if my lasagna bulbs aren’t blooming?
No blooms? Check these fixes:
- Light: Are they getting full sun (6+ hours/day)?
- Water: Keep soil consistently moist but not soggy.
- Food: Fertilize with a balanced bulb food every 4–6 weeks.
- Age: Bulbs may need 1–2 years to mature before blooming.
Are lasagna bulbs perennial, or do I replant yearly?
Lasagna bulbs are perennial in USDA Zones 8–10 but often treated as annuals in colder climates. In frost-prone areas, dig and store bulbs indoors after blooming, then replant the following spring. With care, they can rebloom for years!
Wrapping up and next steps
Planting lasagna bulbs is a game-changer for year-round color and effortless garden care! With just a few seasonal trims, you’ll enjoy bold blooms from spring to frost—plus, the layered mulch technique saves time and water.
Whether you’re a green thumb or a beginner, this method makes gardening simple, sustainable, and stunning.
Ready to transform your garden? Grab your supplies, follow the steps, and watch your outdoor space thrive with minimal effort. Start planting today! 🌱✨