
Landscaping
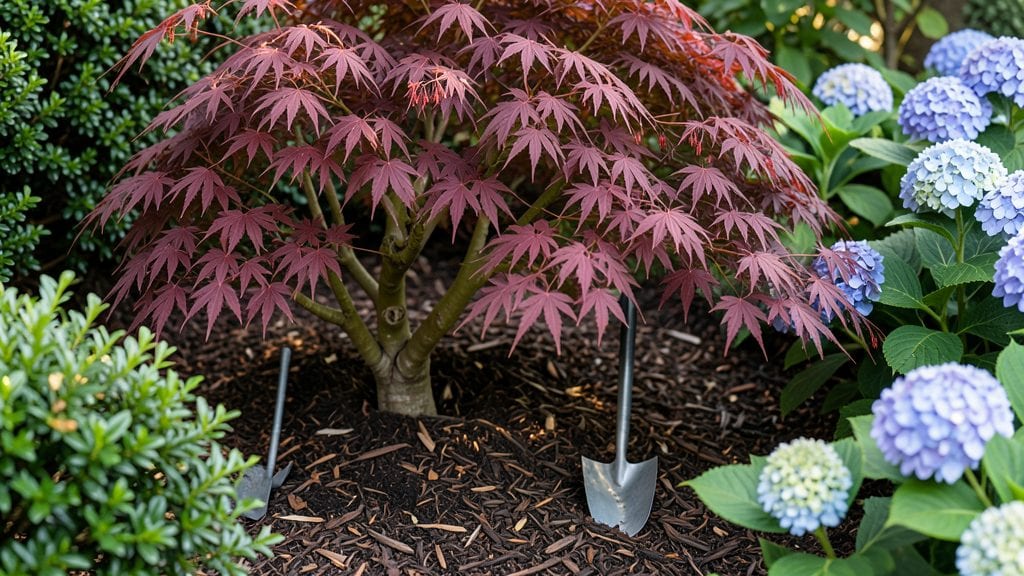
My landscape tree and shrub planting isn’t just about filling empty spaces—it’s about creating a living tapestry that changes with every season. 🌿 I've designed my backyard so that spring brings bursts of azalea blooms, summer offers deep green foliage, and fall... delivers fiery maple leaves, all while winter structure keeps the space feeling alive.
The key lies in layering species by height, texture, and bloom time to ensure there's always something interesting to see.
Start with a rough sketch of your space, marking sun exposure and existing features. Most people overlook soil prep, but amending with compost and organic matter makes all the difference for root establishment.
I use a mix of evergreens for winter structure, deciduous trees for seasonal color, and flowering shrubs for mid-season interest—this combo keeps the garden dynamic year-round without needing constant maintenance.
By the time you're done, you'll have a landscape that feels intentional, not just random. The right spacing prevents future crowding, while thoughtful placement creates focal points that draw the eye.
You'll notice how much more cohesive your outdoor space looks after just a few strategic plants—no more empty corners or visual clutter.
This approach works for both small urban yards and spacious rural properties. Whether you're working with a formal English garden style or a relaxed cottage look, the principles stay the same. Let's get your design sketched out and those plants in the ground!
📚 In This Guide
- What you need
- Instructions
- Tips and common mistakes
- Wrapping up and next steps
What you need
- ● Plants: 1–3 mature trees (e.g., oak, maple, or evergreen) – choose based on height (15–30 ft) and sunlight needs.
- ● 3–5 shrubs (e.g., hydrangeas, boxwood, or azaleas) – select for texture, color, and seasonal interest.
- ● 5–10 perennial ground covers (e.g., creeping thyme or sedum) for fill and erosion control.
- ● Soil Amendments: 50 lbs compost or aged manure for nutrient-rich soil.
- ● 10 lbs slow-release fertilizer (10-10-10 or organic option).
- ● 2–3 bags mulch (3–4 inches of pine bark or shredded wood).
- ● Tools: 1 shovel (round-point for digging, flat for edging).
- ● 1 garden trowel (for transplanting small plants).
- ● 1 pruners (bypass for clean cuts).
- ● 1 wheelbarrow (for hauling soil/amendments).
- ● 1 measuring tape (for spacing plants accurately).
- ● 1 watering can or hose with nozzle (gentle spray setting).
- ● Safety Gear: 1 pair gloves (heavy-duty for digging).
- ● 1 sunscreen and hat (for outdoor work).
- ● 1 soil test kit – ensures pH and nutrient balance before planting.
- ● 1 tree stake kit (for young, top-heavy trees).
- ● 1 landscape fabric – suppresses weeds under mulch.
- ● 1 post-hole digger – if staking or adding support structures.
- ● 1 plant tag organizer – tracks varieties and care notes.
Step-by-step instructions for planting trees and shrubs in a layered design
Here's how to create a balanced, year-round landscape that thrives with minimal maintenance.
🪴 Step 1: Plan Your Layered Layout
Start by sketching your design on paper, focusing on three key layers: tall trees (12-15 feet), mid-height shrubs (6-10 feet), and low ground covers (1-3 feet). Place your tallest trees first—these anchor the design and provide structure. I like to position them 15-20 feet apart to allow mature growth without crowding.
Next, add shrubs in the middle layer, spacing them 6-8 feet apart to create visual interest while maintaining airflow. For ground covers, plan for 3-4 feet of spacing to prevent competition. This layered approach ensures every season has color or texture—think evergreens for winter structure, spring bloomers like azaleas, and summer foliage from hydrangeas.
🌱 Step 2: Dig Holes the Right Size
Dig holes twice as wide as the root ball but only as deep as the container—never deeper. This prevents root damage and encourages outward growth. I use a shovel to loosen the sides of the hole so roots can spread easily. For each hole, remove 2-3 inches of native soil from the bottom and mix it with the topsoil you’ve set aside.
This blend improves drainage and nutrient availability. If your soil is heavy clay, add a handful of compost to the backfill mix. Avoid amending with fertilizer at planting—new roots need time to establish before competing for nutrients.
☀️ Step 3: Position and Plant Each Layer
Place the tree or shrub in the hole so the top of the root ball sits level with the surrounding soil—never buried deeper. For trees, I use a level to ensure the trunk stays straight. Gently remove the plant from its container and loosen any circling roots with your fingers. This prevents girdling as the plant matures.
Backfill with the soil mix, pressing lightly to eliminate air pockets. Water deeply to settle the soil, then top-dress with 1-2 inches of mulch, keeping it 3 inches away from the trunk to prevent rot. Mulch conserves moisture and regulates soil temperature—critical for young plants.
💧 Step 4: Water and Monitor Growth
Water each newly planted tree or shrub with 5 gallons of water immediately after planting. This helps settle the soil and removes air gaps around roots. Over the next 2-3 weeks, water 2-3 times per week (or daily in extreme heat) until the plant shows signs of establishing—new leaves or shoots indicate success.
Check soil moisture by sticking your finger 2 inches deep; if dry, water again. Avoid overwatering—soggy soil suffocates roots. For the first year, focus on deep, infrequent watering to encourage strong root development.
✂️ Step 5: Prune and Maintain Layers
Prune only to remove dead or damaged branches immediately after planting. Wait until spring to shape trees and shrubs—this gives them time to recover from transplant shock. For layered designs, trim shrubs in early summer to encourage bushier growth before the next season.
Fertilize lightly in early spring with a balanced, slow-release formula (10-10-10). Avoid heavy feeding the first year—your goal is root growth, not foliage. Monitor each layer for pests or disease; catch issues early by inspecting new growth weekly.
Tips & tricks for perfect landscape tree and shrub planting
Creating a thriving layered landscape takes more than just digging holes—it's about smart planning and attention to detail that keeps your plants healthy for years.
Layering Strategy: When planning your 15-20 foot spacing for tall trees, consider their mature height and canopy spread. I always sketch a rough scale drawing first—this helps visualize how each layer will interact. For mid-height shrubs (6-8 feet apart), think about how they'll fill out over time; some varieties like hydrangeas grow wider than they do tall. The ground cover layer (3-4 feet apart) should be the most flexible—use it to fill gaps and tie everything together visually.
Soil Preparation: The 2-3 inches of native soil you remove from the bottom of each hole is your secret weapon. Mixing it with topsoil creates a perfect blend that mimics the plant's original growing conditions. For clay-heavy soils, that handful of compost makes all the difference—it improves drainage while adding essential nutrients. Pro tip: If you're planting multiple trees, set aside a wheelbarrow of this soil mix to save time.
Planting Precision: That level you use for trees isn't just about looks—it ensures the trunk grows straight and prevents water pooling at the base. For container-grown plants, gently squeeze the sides of the pot to loosen roots before removing them. I've learned the hard way that circling roots (those that grow in circles around the container) can strangle the plant as it matures. Take the extra 30 seconds to untangle them with your fingers—your future self will thank you.
Watering Wisdom: The 5 gallons of water you pour immediately after planting isn't just about settling the soil—it's about removing air pockets around the roots. For the first 2-3 weeks, think of watering as a conversation with your soil: stick your finger 2 inches deep and water only when it feels dry. Overwatering is just as damaging as underwatering, especially in those first critical weeks when roots are establishing.
Pro Tips for Landscape Tree And Shrub Planting
- Creating a thriving layered landscape takes more than just digging holes—it's about smart planning and attention to detail that keeps your plants healthy for years.
- Layering Strategy: When planning your 15-20 foot spacing for tall trees, consider their mature height and canopy spread.
- Soil Preparation: The 2-3 inches of native soil you remove from the bottom of each hole is your secret weapon.
Frequently asked questions
Got questions about planting trees and shrubs for a stunning, year-round landscape?
Here are some of the most common concerns—plus expert answers to help you design with confidence!
What’s the best time of year to plant trees and shrubs?
For most regions, early spring or fall are ideal—when soil is workable but not frozen, and temperatures are mild. Avoid extreme heat or cold, which can stress young plants. Evergreens and broadleaf shrubs often thrive best in fall planting, while spring is great for deciduous trees. Check local frost dates for precision!
How often should I water newly planted trees and shrubs?
Water deeply 2–3 times per week for the first year, ensuring moisture reaches the root zone (about 12–18 inches down). After that, reduce frequency but increase depth—mature trees need 10–15 gallons per watering. Mulch heavily (3–4 inches) to retain moisture and protect roots. Overwatering is just as harmful as underwatering!
Can I plant shrubs and trees too close together?
Yes, but strategic spacing is key! Shrubs should be planted 3–6 feet apart (depending on mature size), while trees need 15–25 feet of clearance for their canopy. Use layered planting—tall trees at the back, mid-height shrubs in the middle, and low ground covers up front—to create depth without overcrowding.
What do I do if my new plant looks wilted or diseased?
First, check the soil moisture—wilting often signals underwatering (or overwatering!). If leaves yellow or spots appear, it could be fungal disease or pests. Remove affected foliage, apply neem oil or fungicide if needed, and improve airflow by pruning nearby branches. Isolate the plant until you identify the issue to prevent spread.
Are there low-maintenance alternatives to traditional shrubs?
Consider dwarf varieties (like Dwarf Fothergilla or Boxwood ‘Green Mountain’), native plants (e.g., Oakleaf Hydrangea), or ornamental grasses (such as Little Bluestem) for texture and resilience. These require less pruning, water, and pest control while still delivering year-round interest.
Still unsure? Local nurseries or extension offices can recommend species tailored to your climate and soil!
Wrapping up and next steps
Transforming your outdoor space with landscape tree and shrub planting is a rewarding way to create a vibrant, layered garden that thrives year-round! 🌿 By carefully selecting plants, planning for seasonal interest, and following best practices, you’ll craft a stunning, low-maintenance landscape that evolves with each season.
Whether you’re a beginner or a seasoned gardener, every step you take brings you closer to a beautiful, functional outdoor retreat.
Ready to get started? Sketch your design, gather your materials, and begin planting today! Your future garden will thank you—one leaf, bloom, and berry at a time. 🌸