Pruning
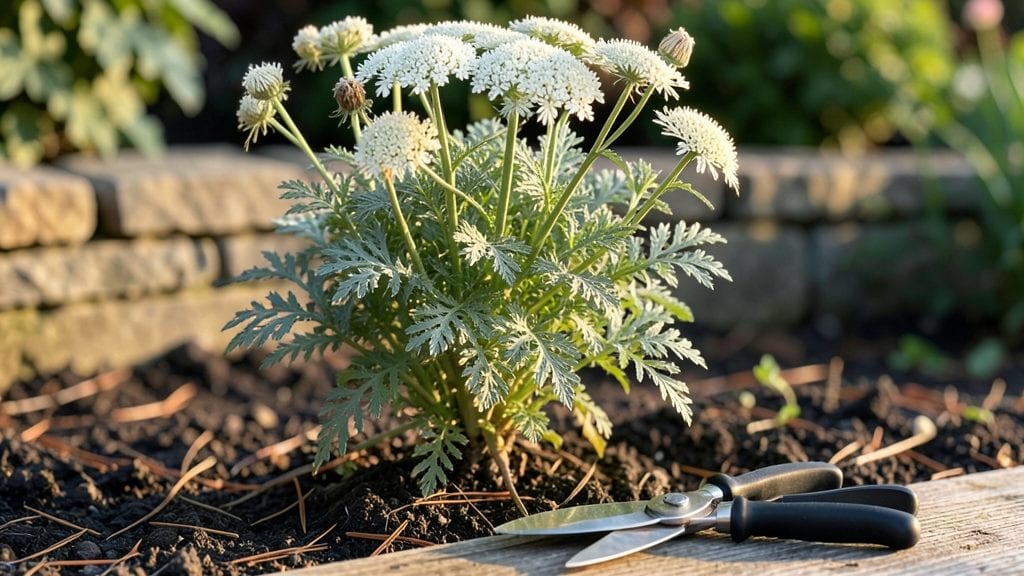
Trimming yarrow plants transforms them from scraggly survivors into showstopping perennials that bloom like crazy year after year. ✨ I’ve watched my own yarrow go from a wild, floppy mess to a neat, bushy powerhouse just by mastering a few simple cuts—no fancy tools or green thumb required.
The key isn’t just when to trim but how: a little precision goes a long way toward keeping those fern-like foliage and flat-topped flowers looking their best.
You’ll need just three things: sharp pruners (or clean scissors), a sunny morning, and about 15 minutes of your time. The best time to trim is right after the first flush of blooms fades in early summer, then again in late fall to tidy up.
Avoid cutting into woody stems—focus on the green growth—and you’ll encourage fresh, vibrant shoots that keep flowering well into autumn. Most gardeners overlook the late-season trim, but that’s when you set up next year’s success.
After a proper trim, your yarrow will reward you with denser foliage, longer stems, and blooms that last weeks longer than untrimmed plants. The secret weapon? Cutting back by about one-third each time—just enough to open up air circulation and prevent flopping.
You’ll also extend the plant’s lifespan, as yarrow naturally self-seeds but stays vigorous with good pruning habits. Think of it as a spa day for your perennials.
Works for both garden borders and wildflower meadows, and the same techniques apply whether you’re dealing with the classic Achillea millefolium or its showier cultivars. Once you see the difference, you’ll never let yarrow go untrimmed again—it’s that transformative. Ready to give it a try?
📚 In This Guide
- What you need
- Instructions
- Tips and common mistakes
- Wrapping up and next steps
What you need
- ● Pruning shears – Bypass pruners (sharp, clean, and 5-inch blades for precision cuts). Sterilize with rubbing alcohol before and after use!
- ● Hand pruners – For smaller stems and finer details (4-inch blades work well).
- ● Gloves – Garden or work gloves (thick enough to protect from thorns and sharp edges).
- ○ Garden kneeler or stool – For comfort when trimming low-growing yarrow (optional but highly recommended for back-friendly gardening!).
- ● Watering can or hose – To hydrate plants before and after trimming (yarrow prefers moderate moisture).
- ● Compost or mulch – 1-2 inches of organic mulch (like straw or shredded leaves) to retain moisture and suppress weeds.
- ○ Disinfectant spray – Optional but smart (70% isopropyl alcohol or hydrogen peroxide) to clean tools between cuts and prevent disease.
- ● Trimming container or bucket – A 5-gallon bucket or similar to collect clippings for composting.
- ● Choose the right time – Trim yarrow in early spring or after the first flush of blooms (late spring/early summer) for best results.
- ● Check the weather – Avoid trimming on windy days (yarrow stems can be brittle).
- ● Identify healthy vs. diseased stems – Remove only dead, brown, or wilted growth (save pruning for vigorous, green stems).
Precision techniques for trimming yarrow plants
Here’s how to keep your yarrow thriving year after year with sharp cuts and strategic timing.
🌿 Step 1: Identify the Right Time for Trimming
Yarrow thrives when pruned at the right moments. The first cut comes in early spring, just as new growth begins—look for fresh shoots emerging from the base. This removes old foliage and encourages dense, bushier regrowth. I wait until the soil warms to at least 50°F to avoid stressing the plant.
For summer blooms, trim again after flowering, cutting back one-third of the plant to promote a second flush of flowers. This is when you’ll see spent flower heads turning brown—snip them off cleanly to redirect energy into new growth. Avoid trimming in fall unless you’re in a warm climate; yarrow stores energy in its roots for winter.
✂️ Step 2: Use Sharp Tools for Clean Cuts
Never use dull shears—yarrow’s tough stems tear when cut with blunt blades, leaving ragged edges that invite disease. Grab your bypass pruners or sharp garden shears and make cuts at a 45-degree angle, about ½ inch above a leaf node or bud. This angle helps water run off the cut, preventing rot.
For larger clumps, I use clean, sterilized loppers to avoid crushing stems. Always disinfect tools with rubbing alcohol between cuts if you’re working with multiple plants. You’ll notice the difference in how quickly new growth appears—clean cuts heal faster and look more professional.
🌱 Step 3: Prune for Shape and Health
Yarrow’s natural form is clumping, but it can sprawl if left unchecked. Thin out congested centers by removing old, woody stems at the base—these are the thick, brown stalks that no longer produce vibrant foliage. Aim to leave 3-4 strong, green stems per clump to maintain airflow and reduce fungal risks.
If your yarrow is leggy, cut back the tallest stems by half to encourage a fuller shape. I like to step back and visualize the plant’s silhouette—this helps me decide where to make the next cut. Avoid over-trimming; yarrow is resilient but won’t bounce back from severe pruning.
💧 Step 4: Post-Trimming Care for Recovery
After pruning, give your yarrow a deep watering to help it recover, especially in dry climates. The roots need moisture to support new growth, but avoid soggy soil—yarrow hates sitting in water. I mulch around the base with 2-3 inches of organic mulch to retain moisture and suppress weeds.
Watch for new shoots emerging within 2-3 weeks. If you see yellowing leaves, it’s a sign of overwatering or stress—adjust your care and reduce watering slightly. Yarrow is drought-tolerant once established, so let the soil dry out between waterings. This is the moment that matters: proper post-trimming care sets the stage for next year’s blooms.
⏰ Step 5: Plan for Seasonal Maintenance
Mark your calendar for late fall to cut back any remaining foliage to 2-3 inches above the ground. This tidies up the plant and protects it from harsh winter winds. In colder zones, a light layer of mulch over the crown insulates the roots—just remove it in early spring to avoid smothering new growth.
Real talk: Yarrow is low-maintenance, but precision trimming makes all the difference. A well-pruned plant rewards you with bold, long-lasting blooms and a tidy, garden-worthy presence. Stick to this routine, and you’ll enjoy yarrow’s beauty for decades.
Tips & tricks for perfect yarrow trimming
A few strategic adjustments can transform your yarrow from a wild clump into a showstopping garden feature. These are the details that make all the difference between average and extraordinary results.
Soil Temperature Matters: That 50°F soil temperature threshold in Step 1 isn't arbitrary—it's when yarrow's roots become active enough to handle pruning without shock. I test soil temperature with a simple thermometer inserted 2 inches deep. If you're in doubt, wait a few extra days. The plant will forgive you for being cautious, but it won't forgive rushed trimming when roots are still dormant.
The One-Third Rule: When cutting back one-third of the plant in summer (Step 1), focus on removing the oldest stems first—they're the ones that have already flowered and are now just taking up space. Use your fingers to gently separate stems at the base before cutting; this helps you visualize which ones to remove. Think of it like giving your yarrow a haircut—you're not shaving it bald, just shaping it for new growth.
Tool Sterilization Secret: The rubbing alcohol recommendation in Step 2 isn't just about clean cuts—it's about preventing cross-contamination between plants. I keep a small spray bottle of 70% isopropyl alcohol handy and give my tools a quick spritz between each plant. This is especially important if you're working with multiple yarrow clumps or other perennials in your garden. A few seconds of sterilization now saves hours of fungal treatment later.
Visual Pruning Cue: For Step 3's shape adjustments, here's my pro tip: Step back and look at your yarrow from 5 feet away. The ideal silhouette should resemble a rounded dome. If you see tall stems shooting up like fingers reaching for the sky, those are your targets for cutting back by half. This visual check prevents over-pruning—your goal is balance, not a miniature hedge.
Pro Tips for Trim Yarrow Plants
- A few strategic adjustments can transform your yarrow from a wild clump into a showstopping garden feature.
- Soil Temperature Matters: That 50°F soil temperature threshold in Step 1 isn't arbitrary—it's when yarrow's roots become active enough to handle pruning without shock.
- The One-Third Rule: When cutting back one-third of the plant in summer (Step 1), focus on removing the oldest stems first—they're the ones that have already flowered and are now just taking up space.
Frequently asked questions
Got questions about trimming yarrow? You’re not alone! Here are answers to the most common concerns to help you keep your plants thriving.
When is the best time to trim yarrow?
Trim yarrow in early spring (just as new growth appears) and again after the first flush of blooms (late spring to early summer). Avoid heavy cuts in fall—let the foliage die back naturally to protect the plant over winter. For perennials, a light trim in late summer can encourage fresh growth before dormancy.
How much can I cut back yarrow without harming it?
Yarrow is tough! You can safely trim up to one-third of the plant’s height in a single session. For established plants, cutting back to 4–6 inches above the ground in spring promotes bushier growth. Avoid over-trimming—leave some foliage to photosynthesize and support the roots.
What should I do if my yarrow looks leggy after trimming?
Leggy yarrow often means it needs more light or a harder prune. Next time, cut back aggressively (to 3–4 inches tall) in early spring. Fertilize lightly with balanced, low-nitrogen fertilizer to encourage compact growth. If the issue persists, relocate to a sunnier spot—yarrow thrives in full sun (6+ hours/day).
Can I use yarrow cuttings for propagation?
Take 4–6 inch cuttings from healthy stems in early summer, remove the lower leaves, and dip in rooting hormone. Plant in moist potting mix and keep humid (use a plastic bag or propagator). Roots should form in 4–6 weeks. Yarrow spreads easily—you can also divide mature clumps in spring or fall.
Why did my yarrow turn brown after trimming?
Brown tips or stems after pruning usually mean stress from over-trimming, drought, or fungal issues. If the plant is otherwise healthy, it’s likely just adjusting—water lightly and avoid trimming again until new growth appears. For brown spots, ensure good airflow and avoid wetting foliage when watering. If mold appears, treat with neem oil.
Wrapping up and next steps
Trimming yarrow isn’t just about tidying up—it’s your secret weapon for vibrant blooms, healthier growth, and a garden that thrives year after year. 🌿 With the right tools, timing, and technique, you’ll keep your plants lush, encourage new flowers, and even extend their lifespan.
Whether you’re a seasoned gardener or just starting out, a little precision goes a long way!
Now that you’re armed with the know-how, grab those shears and get pruning! 🌸 For extra flair, experiment with yarrow in bouquets or dried arrangements—your trimmed plants will thank you with stunning results. Happy gardening!